Windows 10 22H2 is around the corner and might release this month i.e. Oct 2022. Upgrading an existing version of Windows often troubles users with some error codes or issues. If you are also facing problems installing the new version on your computer, read this article till in the end. In this post, we will discuss how to get Windows 10 22h2 ISO file, clean install it, and set up this new OS on your PC.
When you clean install an operating system, it doesn’t face compatibility issues with the existing applications. As your device will be reset to its original settings, this will also address any underlying issues within your system.
What other benefits do I get after Clean installing Windows?
Clean installing Windows 10 22H2 will improve overall system performance, fast reboot time, and less RAM usage. Moreover, as you already know about data loss, you must have taken the system backup beforehand. Thus, there won’t be any fear of data loss as well.
Note: Follow the steps below only when Windows 10 version 22h2 becomes available for the general public.
How to Clean Install Windows 10 22H2 on your PC
Assuming you have already downloaded its ISO image and made it bootable, follow the below instructions to fresh install Windows 10, version 22h2 on your PC –
- Insert the bootable media at its respective port and restart your computer.
- While the system is rebooting, press the boot key 2-3 times. This key varies from one manufacturer to another. By default, this could be Esc, f2, f10, or f12.
- Pressing this boot key will make your device boot into its BIOS or UEFI settings.
- When the Windows Setup page comes into the display, click Next.
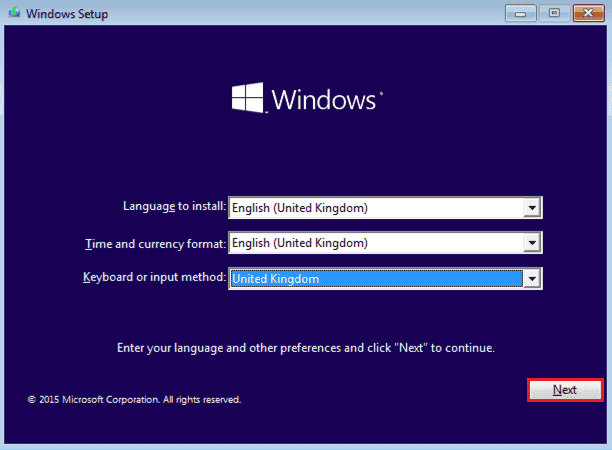
- Choose your preferred language, Time and currency format, and Keyboard or input method.
- Click Next and then Install now.

- The system will now request you activate your Windows copy. If you do have the product key, type the same, and hit Next. Else, you may also click on “I don’t have a product key” if you want to activate your Windows copy using the Digital License attached to your Microsoft account.

- After you click on this button, wait for a few seconds, and then hit the Next button.
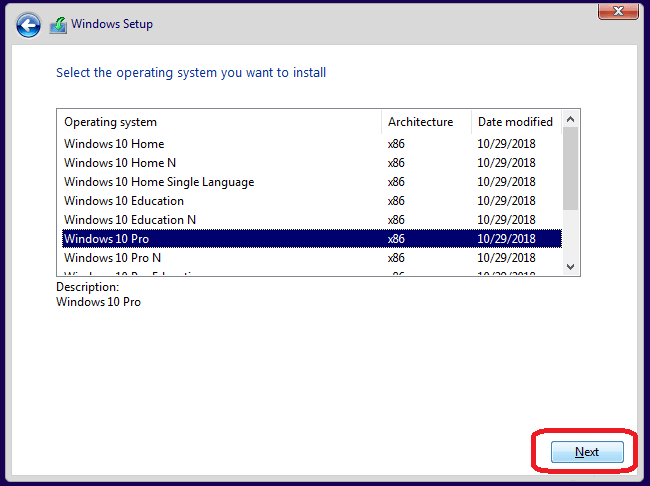
- A list of Operating systems will appear on the subsequent screen. Choose an edition and hit the Next button.
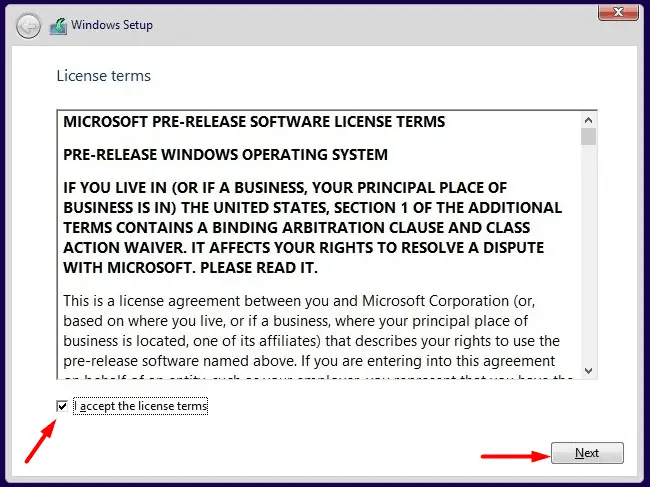
- Tick the checkbox that reads – “I accept the license terms“, and hit Next again.
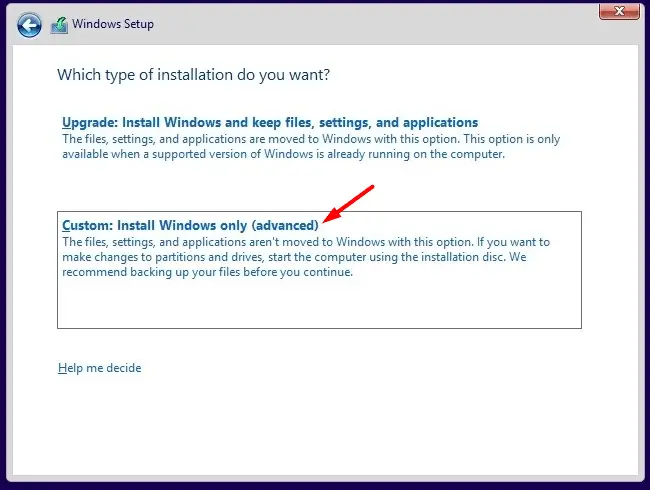
- You will receive two different options to choose from. As you are trying to clean install Windows 10 22H2, go for the second option i.e. “Custom: Install Windows only (advanced)“.
- On the next screen, select the drive on which you would like to install Windows 10 22H2. This drive must have at least 40 GB of free storage space on it. After you select a drive, click Format first. The system will then start formatting the chosen drive. After this formatting completes, click the Next button.
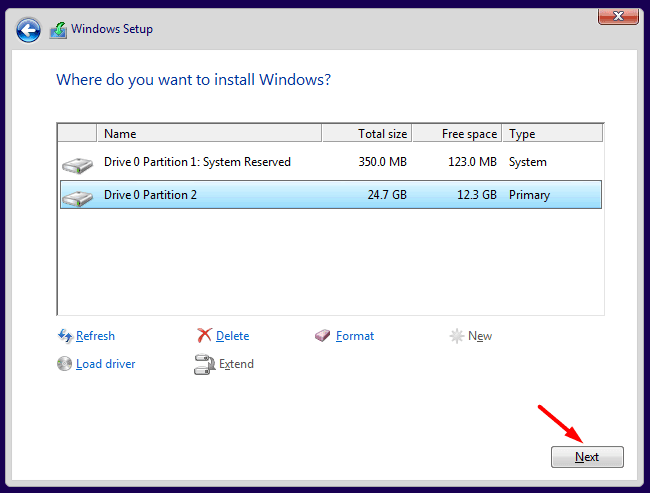
Note: When you click either Format or Delete, the data stored inside your root drive will be lost permanently. You can’t cancel an ongoing installation as then you won’t be able to use your device.
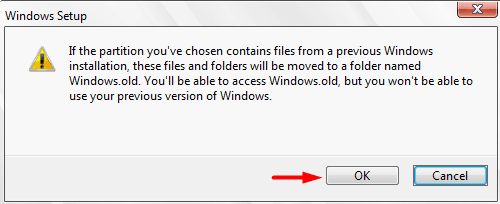
- In case you didn’t opt for Custom install and rather go for the Upgrade option, all your previous files and folders will be moved to a folder named
Windows.old.
- The system will then start extracting files from the bootable media and getting these files ready for installation. After you see both the first and second options ticked, remove your bootable device.
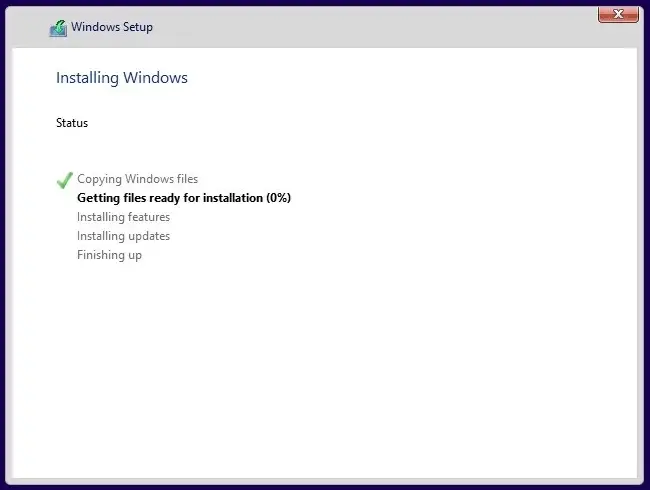
- The system may restart several times during Windows 10 installation. After this is over, you will be redirected to the Out-of-box-experience (OOBE) page.
How to Set up Windows 10, version 2022
Windows 10, version 22H2 is successfully installed on your computer. Follow these steps to set it up on your PC –
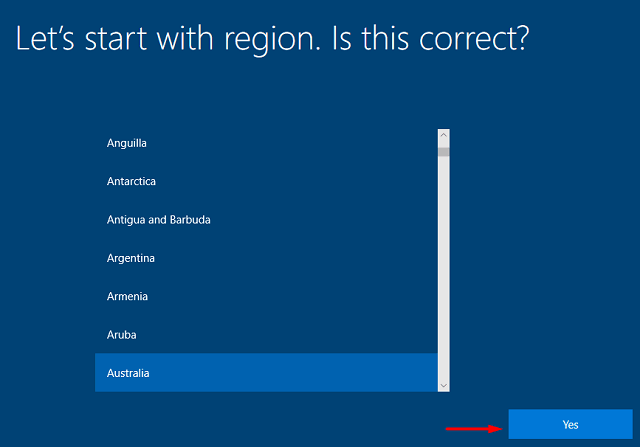
- On the OOBE screen, select your country first and hit the Yes button.
- Choose the default Keyboard layout for your device, and hit Yes again.

- In case you would like to add a second keyboard layout, go ahead and add one. Else, hit the Skip button.
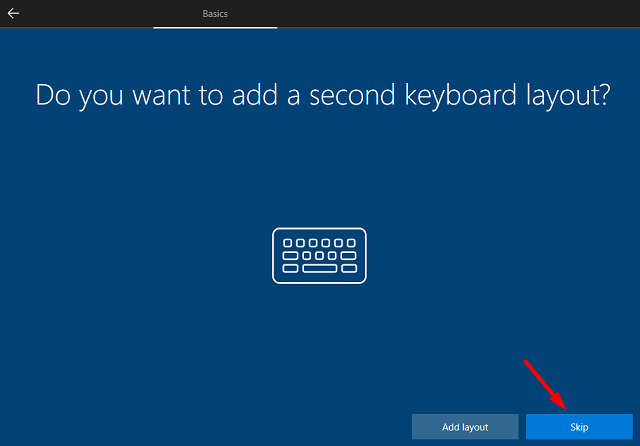
- The system will next prompt connecting to a network. You may skip connecting to a network as well, however, in that case, you have to sign in as a local account user.
- When the system prompts “how would you like to set up”, select “Set up for personal use“. This option is available only to Pro users. If you had already installed the Home edition, you will not see this window.
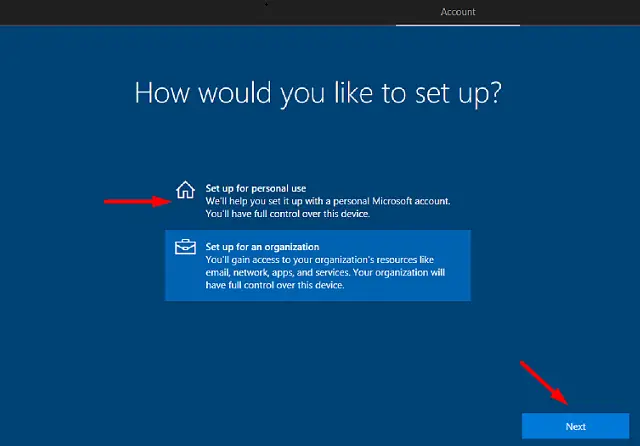
- Click Next and sign in to your official Microsoft account.
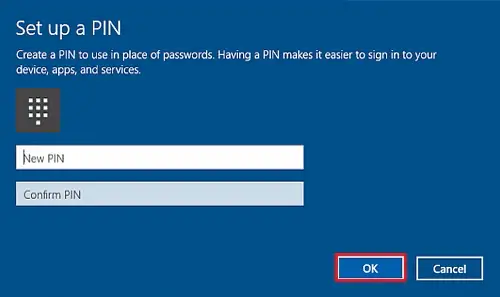
- When prompted to set up a PIN, provide a four-digit passkey, confirm it in the subsequent text box, and hit OK.
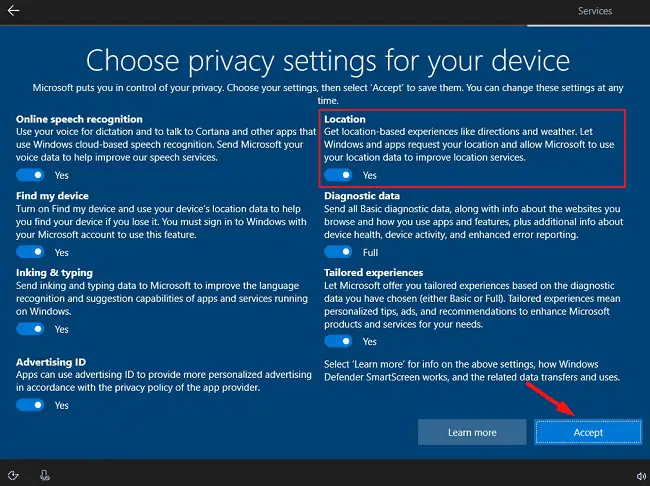
- On the next screen, adjust the privacy settings as per your needs and hit Accept. Say, for example, you don’t want your PC to have the location information, turn off its toggle switch.
- You will see the “Customize your device” screen next. Choose all the ways you plan to use your device. The options available are Gaming, Schoolwork, Creativity, Entertainment, Family, and Business. A little description of all these modes is provided just below these customization services.
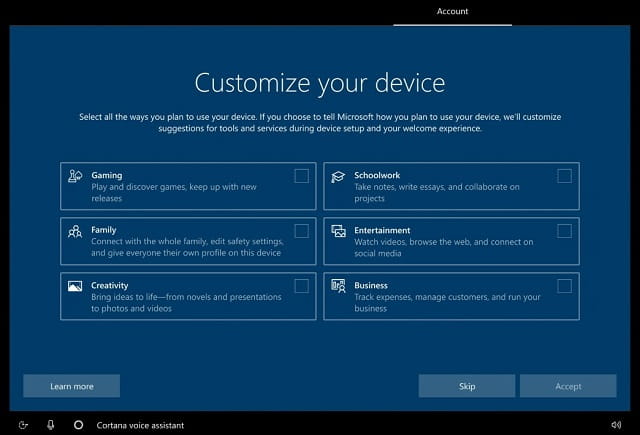
- After you have configured the services, click the Accept button.
- You will see the “Use your Phone from your PC” option next, click Skip for now. You may set it up separately once your device becomes functional.
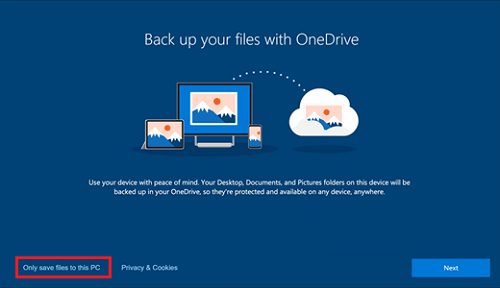
- If you do use OneDrive to bring back all the files stored in the cloud, click Next. When you opt for this option, all your pictures, documents, and other data will be stored on OneDrive. In case you don’t want to use OneDrive, click “Only save files to this PC“.
- You will see the “Claim your free trial of Microsoft 365” window next. Click No thanks if you don’t want to use this feature. Or, you may try Microsoft 365 for free. Choose whichever option suits you the most.
- Cortana was once very useful on Windows devices. However, it has very little to no usage these days. So, click on “Not now” when Cortana setting up page appears. If you think otherwise, click Accept.
That’s it, you have successfully set up Windows 10 22H2 on your computer. Do create a system restore immediately afterward entering into your device. You may use this system backup in case something went wrong on your device in the future.


