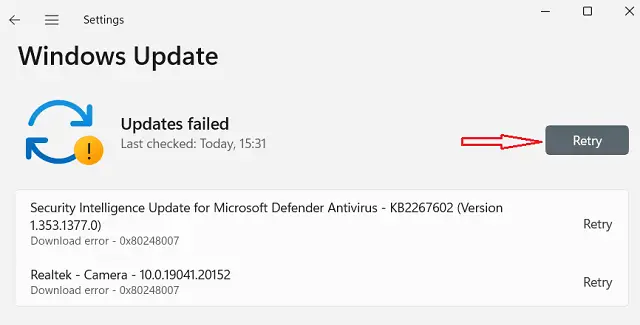
The error code 0x800706be is an update-related issue and when it occurs, you won’t be able to download or install any pending updates. Windows updates might even restrict downloading any optional updates. If that’s the case, you should purge Windows cache folders i.e. SoftwareDistribution and catroot2 folders.

What causes Windows updates to fail on PCs?
Windows updates may fail due to a variety of reasons like corrupted or missing system files, installing buggy patch updates, or unnecessarily stored cache inside the Windows cache folders. Now that you know what possibly could have gone wrong, let’s see how one can resolve this issue on a Windows 11 or 10 PC.
How to Solve Windows Install Error 0x800706be
These are the methods that you may apply on your computer and see if any indeed fixes the install error 0x800706be –
1. Uninstall Lately installed cumulative updates
If the error 0x800706be starts appearing after a recent patch update, the lately installed cumulative update must be at fault. There is nothing to worry about as you can always undo the recent changes via either System Restore points, or by uninstalling the buggy cumulative updates.
2. Attempt updating Windows again
At times, Windows updates simply fail because of poor network connectivity or some internal glitches. So, before you jump to any fixes, go to Windows update and hit Check for updates. Here’s how you may find this option on your PC –
- Press Win + I to launch the Settings app.
- Click Windows update (the last option on the left pane).
- You may find the “Check for update” button on the right pane.

- Click this button and let the system download/install the pending updates on your computer.
Note: Sometimes, there’s a retry option instead of the “Check for updates” button. Click Retry so that the available patches get downloaded and installed automatically on your computer.

Similarly, if you do find a link to “Optional updates”, click over it, mark all the checkboxes moving forward, and hit “Download and install“. Proceeding this way, the system will download all the chosen updates and install them on your computer.
3. Clear Windows cache folders
Microsoft releases new security updates every second Tuesday of the month. They even roll non-security updates, out-of-band updates, or optional updates from time to time. When you install these many updates, they all occupy some space on your PC, and the information gets stored inside Windows cache folders. Two main folders of this nature are Catrrot2 and SoftwareDistribution.
With so many patch installations, it is required of you to purge both these folders from time to time. However, we as users, don’t do such acts unless and until we get into bugs or issues. Now that you are already receiving update-related issues on your PC, we suggest purging these folders. You may find the above-mentioned folders at the below locations –
- SoftwareDistribution –> C:\Windows
- Catrrot2 –> C:\Windows\system32

Note: Make sure to disable all update-related services before clearing any Windows cache folders. After you have cleaned both these folders, restart the services that you stopped earlier.
The update-related services that must remain disabled while purging SoftwareDistribution and catrrot2 folders are as follows –
- Windows update
- Cryptographic services
- BITS – Background Intelligent and Transfer service
In case you still don’t know what to do to purge Windows cache folders, you may follow this tutorial on how to reset Windows update components.
4. Run SFC/DISM
The presence of corrupted or outdated system files or Windows 11/10 Image might also trigger errors like 0x800706be. You may manually inspect and repair both system files and Windows Image using SFC/DISM. Here’s how you can run both these tools using Command Prompt (Admin).
- Press Win + R to launch the Run dialog box.
- Type “CMD”, and press Ctrl + Shift + Enter keys altogether.
- Doing so will launch the Command prompt having admin rights.
- Type the following on the elevated Windows console next, and press Enter –
sfc /scannow

- When the system files scanning/repairing reaches 100%, execute the DISM command –
DISM /Online /Cleanup-Image /RestoreHealth

- Let this code complete the 100% mark as well. Once over, you may restart your PC and check if you can now update Windows 11 or 10 PC.
5. Run Windows Update Troubleshooter
Windows Update Troubleshooter is another great tool that you may run to automatically find and fix the underlying causes behind installation issues. To troubleshoot Windows update, use these steps –
- First of all, browse to the following location –
Win + I > System > Troubleshoot > Other troubleshooters
- When you reach out to the patch provided above, search for Windows update, and hit the Run button.

- Click Next and follow the on-screen instructions.
- The troubleshooter will start diagnosing the exact cause behind the install error 0x800706be. In case it does find any solution, that will be either applied automatically or you will be informed what to do next.
6. Manually install pending Windows updates
If you are getting the error code 0x800706be while installing available security/non-security updates, you may find and reinstall them manually as well. Read this guide on how to manually download and install pending Windows updates.
7. Clean Install Windows 11/ Windows 10 21H2
If the error 0x800706be continues to persist even after applying the above fixes, your copy of Windows has reached a stage where it can’t be resolved. In such cases, what you can do at max is download an ISO image of Windows 11/ or Windows 10 21H2 (whichever suits you the most), and clean install it on your computer.


