Recently, several users have encountered the Update Error Code 0xc1900223 message on their PC. This bug comes into reality only after trying to download the recent cumulative Updates on your PC. While downloading any new Build version, the installation process stuck at a certain percentage and results in this failed error message. The prime reasons that cause this Error 0xc1900223 in Windows 10 are – limit set to use data under metered connection, corrupt update components, malfunctioning DNS server, and host files.
The first workaround to deal with this bug is to check whether the Wi-Fi or Ethernet connectivity is properly working or not. Run the Windows Troubleshooter, Reset the update components, and delete the Windows update folder help to fix this error message. Some users succeed to manage this trouble after renaming the hosts’ files or checking the DNS server. If none of these work accordingly, you should manually download the Windows files visiting the Update Assistant.
How to Fix Update Error code 0xc1900223 in Windows 10
To fix the Update Error code 0xc1900223 in Windows 10, use the following workarounds –
1] Check the Internet connection
Sometimes, the improper internet connection or set to use limited data under metered connection leads to the Update Error 0xc1900223. Hence, if you ever encounter any update-related issue, the first workaround is to check whether the metered connection is set to Turn On or not. Follow the below procedure to do this –
- Press Win and X to launch the Power Menu and select the Settings option.
- Here, tap Network & Internet category thereafter Wi-Fi on the left pane.
- Switch to the right side and hit Manage the known network link.
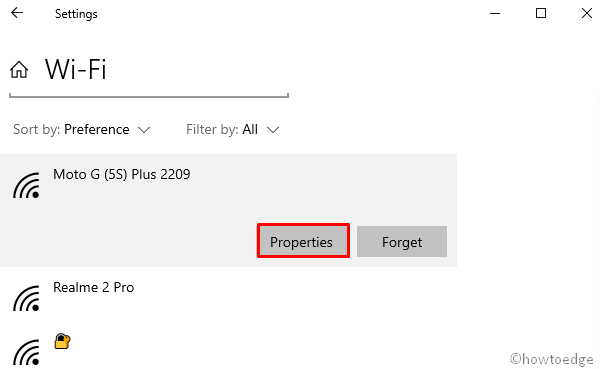
- Afterward, click on your recent WiFi connectivity then Properties.
- Scroll down and turn on the toggle switch under Set as Metered connection.
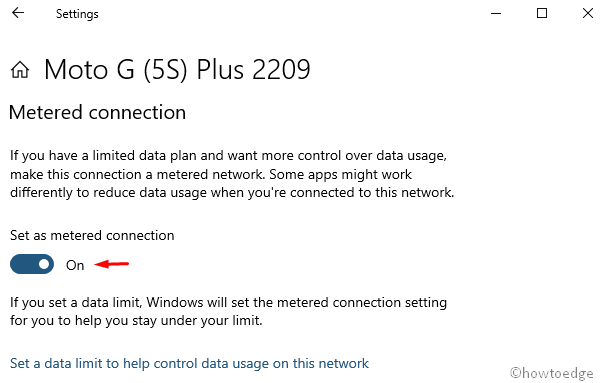
One can close all the running windows and check if the updates still persist or not.
2] Use Windows Update Troubleshooter
The Update Troubleshooter is an inbuilt utility on Windows 10 that can repair any corrupt files. To perform this task, use the below steps –
- Open the Settings app (Win & I) and select Update & Security.
- On the left column, tap Troubleshoot thereafter jump to the corresponding right section.
- Here, scroll to the down and hit Windows Update then Run the troubleshooter.
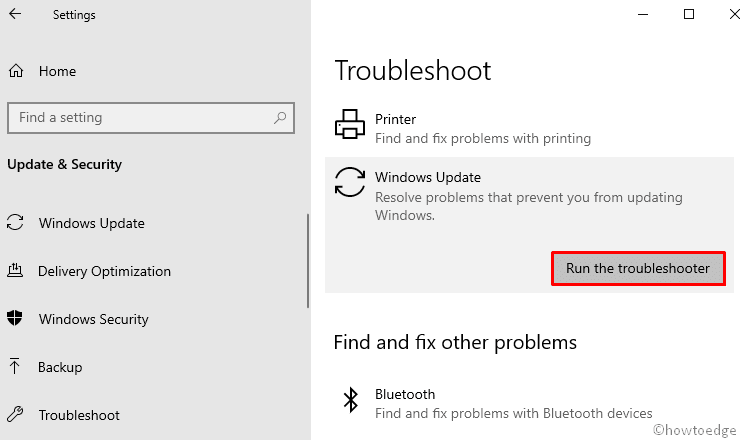
- This process will start detecting and repairing any bugs that lie in your system.
- Once over, Reboot the PC and see whether the problem gets resolved or not.
3] Remove the SoftwareDistribution Folder
The incomplete downloaded files inside the Windows Update directory may also prevent patches from being installed on the computer. To overcome this situation, you should delete the SoftwareDistribution folder and try to re-download the cumulative updates. First and foremost, stop the Windows Update folder then delete the directory using the following procedure –
- Click on the Search icon and type Services in the text box.
- From the appeared list, select the well-matched result to launch the Services window.
- Scroll down and put a right-click on the Windows Update option.
- If there appears a pop-up menu, select Stop to halt each and every running process.
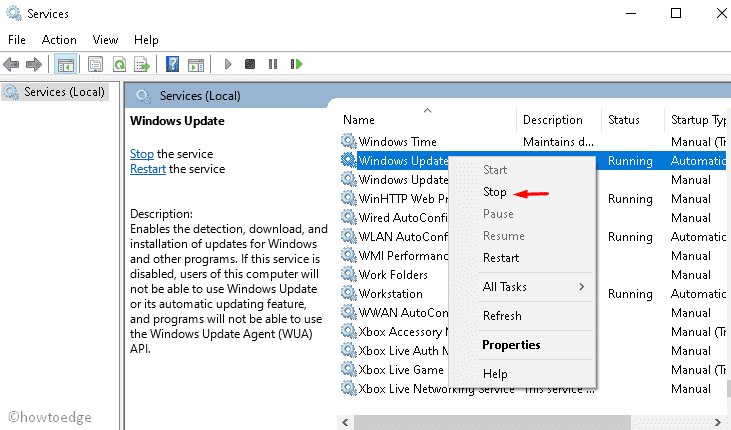
- Close all of the running windows and Reboot your PC.
- On the next login, complete the remaining steps so as to delete the SoftwareDistribution folder.
- Press Win and E shortcut to launch the File Explorer.
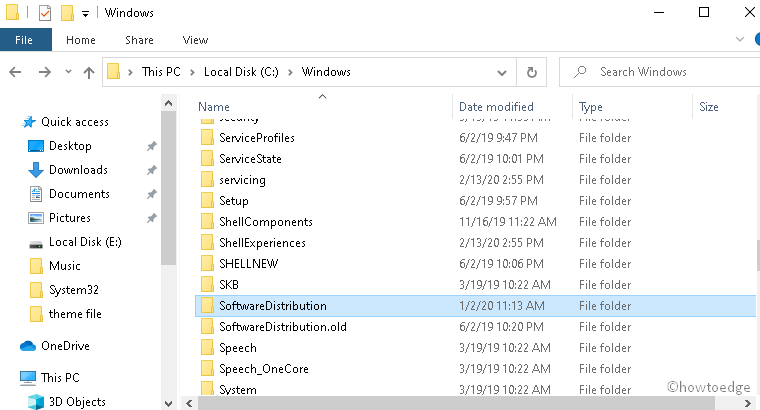
- Navigate to the C:/ Windows then reach out to the SoftwareDistribution folder.
- Here, select the one (as depicted below) henceforth hit the Delete key to completely remove this folder.
- At last, Restart your PC again and try downloading the updates.
4] Rename the Hosts file
In case the above methods fail to resolve the Update Error 0xc1900223, renaming the host file probably fixes the underlying cause. Follow the below guidelines to perform this task –
- At first click on the Search button and type Notepad in the text field.
- Next, do the right-click on the well-matching result and select Run as administrator.
- If the User Account Control pops up, tap Yes to authenticate the access.
- Now, tap the file menu and select open then navigate to the below location –
c:\Windows\System32\Drivers\etc
- Select the Host file and rename the same to Host.old.
- This will ask you to access the permission, click Continue then save the changes.
You may now try updating your system and see if the Update Error 0xc1900223 still exists or just vanishes.
5] Change the DNS server
For security purposes and fix the update-related issues as well, one should try changing the DNS server as the diagnostic tool. Doing this protects your PC from any malware attack and resolves 0xc1900223 error too. Here is the procedure to change the DNS server –
- Right-click on the Win icon and select the Run option.
- Type Control Panel then press the Enter key to launch this application.
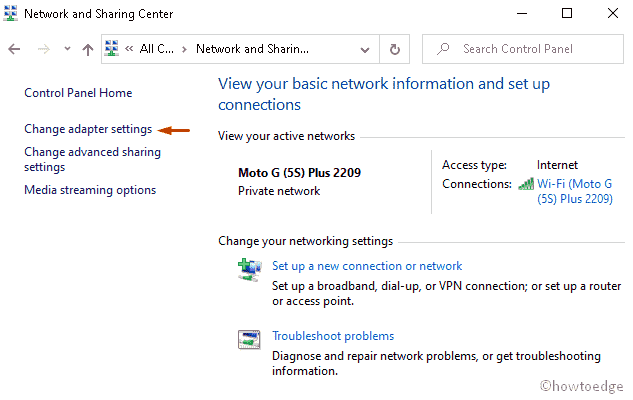
- On the upcoming window, hit Network and Sharing Center.
- Click Change adapter settings thereafter put a right-click on the Wi-Fi and select Properties.
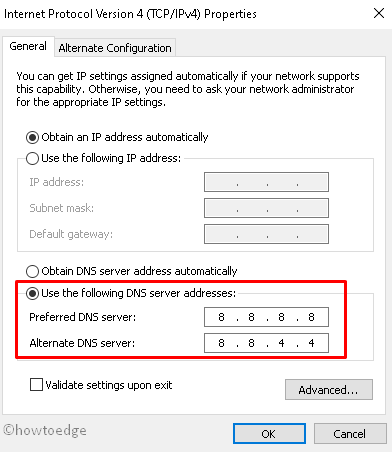
- Here select Internet Protocol version 4 ( TCP/IPv4) then Properties again.
- Now, use the following DNS server radio button and alter as shown in the below snapshot –
Preferred DNS server: 8.8.8.8
Alternate DNS server: 8.8.4.4
- Click OK to save the above changes and Restart your system.
- From the next login, try to update your system without receiving any interrupting error.
6] Reset Windows Update components
If some of the Windows components get damaged, this may prevent any update of the system. As a result, the Update Error Code 0xc1900223 appears on your PC while updating the existing Windows 10 Build version. To resolve this bug, you should manually reset the update components using the following steps –
- Press WIN & S hotkey to launch the search bar.
- Type Command Prompt and do the right-click on the well-matching result.
- Select Run as administrator from the context menu.
- You will receive the UAC prompt, tap Yes to authenticate this process.
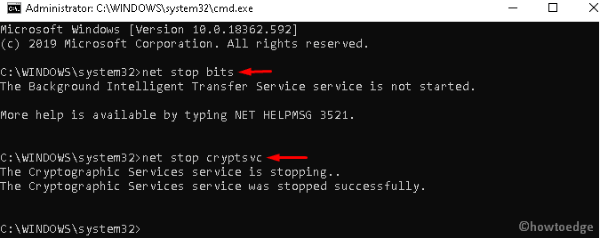
- On the elevated prompt, run the following codes one by one and hit Enter key at the end of each command line.
net stop bits
net stop cryptsvc
net stop wuauserv
net stop msiserver
Ren C:\Windows\SoftwareDistribution SoftwareDistribution.old
Ren C:\Windows\System32\catroot2 Catroot2.old
net start bits
net start cryptsvc
net start wuauserv
net start msiserver
- Once the task executes successfully, Restart your PC and try to update the operating system.
7] Install update using Upgrade Assistant
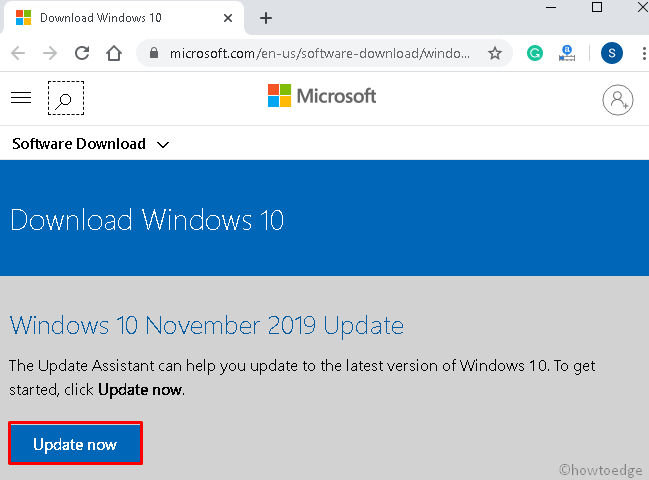
The Windows Upgrade Assistant is the official method to download the recent patches by Microsoft. This utility is, in general, used if the automatic updates won’t work or fail to install the specific update. Follow the below procedure to perform this task –
- Navigate to the Microsoft website and click on the Update now button.
- This will start downloading the setup. Once completed, click on the Run button then permit to install the file.
- Tap the Update now option and wait a couple of minutes to let begin the process.
- Now follow the on-screen guide to complete the remaining steps.
- After this is over, Reboot your PC and enjoy the latest version of Windows 10.


