Error Codes 0x80240023 and 0x80240022 are two update-related issues that may still occur on account of different reasons even to this date. In this article, we have come up with seven fixes that should help you fix the underlying causes and overcome these issues on Windows 11/10.

What are Errors 0x80240023 and 0x80240022?
Update Error Codes were very common on Windows 10 PC. With the introduction of Windows 11, Microsoft has worked on its operating systems. As a result of this, very few error codes appear these days either while installing or upgrading to the next available OS Build.
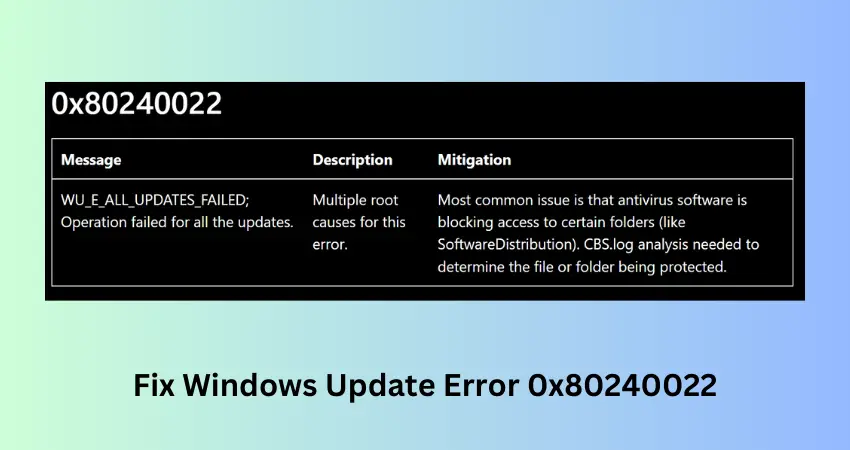
While the update error 0x802400223 occurs due to some expired licenses, the error 0x8240022 appears when some internal operations fail. This is evident from the error messages that appears along with these error codes –
WU_E_EULAS_DECLINED Error 0x80240023, The license terms for all updates were declined.
WU_E_ALL_UPDATES_Failed Error 0x8240022; Operation failed for all the updates.
This post discusses all possible reasons that may invoke such update issues along with seven possible solutions for these error codes.
Fix Windows Update Error 0x80240023 or 0x80240022
To solve the update error code 0x80240023 or 0x80240023 on Windows 11/10 PC, read and apply the below fixes –
- Purge Windows Update Cache Folder
- Run Windows update Troubleshooter
- Run SFC utility
- Install OFV.msi file
- Correct Date and Time
- Clean Windows update download path
- Manually install Windows 10 updates
1. Purge Windows Update Cache Folder
The presence of too much information inside the cache folder may also prevent Windows 10 from updating to the next build version. In order to fix this, you must purge this folder following the below steps –
- Press “WinKey + R“.
- Type “
services.msc” in the Run dialog box and press the OK button. - When the Services window launches, scroll down and search for “Windows Update“.
- Right-click on Windows update and choose the Stop button. Follow the same procedure for these services – Background Intelligent Transfer Service, and Cryptographic service.
- Next, start the run dialog again by pressing Win + R.
- Type “%Windir%SoftwareDistribution\Datastore” and hit the OK button.
- This will redirect you to the SoftwareDistribution folder.
- Press Ctrl + A to select all items and hit the Delete button.

- Next, open the catroot2 folder by using the command “%Systemroot%\System32\catroot2
” on the Run command. Select and delete its contents as well. - After you delete all the items present inside the above two folders, re-open the Services window, and enable the services that you have stopped earlier.
- Wait for a few seconds and restart your computer.
From the next logon, check if you are now able to update Windows 10 or not.
2. Run Windows Update Troubleshooter
If the error 0x80240023 is still occurring, run the Windows update troubleshooter. This is developed in such a way that it can find and repair all issues that are blocking the normal update process. Here’s how to perform this task –
Windows 11:
- Press Windows + I to launch Settings.
- Go to System > Troubleshoot > Other troubleshooters, and locate Windows Update.
- Once you find this section, locate and click on the Run button available on its right end.

- When the troubleshooter launches, click Next and follow the on-screen instructions.
Windows 10:
- Right-click on the Start button and select Settings.
- Go to the Update and Security option.
- Select Troubleshoot on the left pane thereafter Additional troubleshooters on the right side.
- Select Windows Update (under the “Get up and running” section).
- Next, hit Run the troubleshooter.

- Wait for a few minutes while the troubleshooter searches for possible issues on the computer.
- When this provides any resolution, go and follow the same.
In case it doesn’t fix the above problem, try out the next workaround –
3. Run SFC Utility to fix Error 0x80240023
At times, such errors occur just because of the presence of some corrupted or missing files on the computer. If that’s the case, you may run the System File Checker (SFC) utility to fix this error.
This handy built-in tool will check all files/folders on the computer and repair the corrupt ones. Additionally, this utility can also fix the issue of missing files on Windows 10. Here’s how to run this tool –
- Open Command Prompt as an Administrator.
- On the elevated console, type “
sfc/scannow” and press the Enter key.

- Usually, this takes 15-20 minutes to complete the scanning/repairing process, so wait patiently.
- As soon as it finishes, restart your Windows 11/10 PC.
From the next login, you may try again to update your operating system.
4. Install OFV.msi File
The Windows Update process might also fail to occur because of some missing files on the device. One such file that may prevent Windows 10 from updating is the OFV.msi file. Go and check if your PC has this file or not. If not, use the below guideline to get it back –
Note: This method is applicable only to those users who have Office 2007 running on their PCs.
- Press “Windows key + E” and reach out to the below location –
C:\Windows\SoftwareDistribution
- Here, look for the file – OFV.cab.
- When found, double-click over it. Locate and double-click on OFV.msi to validate MS Office 2007 on Windows 10.
- Hit Yes on the “User Account Control” window.
- Now that you have enabled the OFV file, check if you are able to update Windows 10 or not.
5. Correct Date And Time
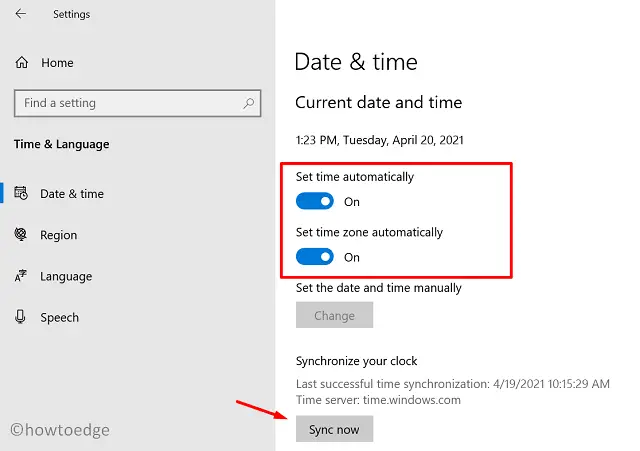
An incorrect Date or Time on Windows 10 may prevent your PC from accessing Microsoft servers. So, you must correct the Date and Time if they are displaying incorrect values. Here’s how to correct them –
- Press Win + I.
- Select Time & Language.
- Click Region and select the country where you are currently residing.
- Subsequently, hit Date and Time on the left pane.
- Jump to the right side and enable the toggle switches – “Set time automatically” and “Set time zone automatically”.
- Scroll below to Synchronize your clock and hit the “Sync now” button.

6. Clean Windows Update Download Path
If the error 0x80240023 is still occurring, try clearing the Windows update download path. Here’s how to perform this task –
Note: Make sure to create a full registry backup before applying the below steps. Doing so will help you in recovering the registry in case anything goes wrong.
- Right-click on the Windows icon and select Run.
- Type “
regedit” and press Enter. - Reach out to the Windows update registry by expanding the sections on the left pane.
HKey_Local_Machine/Software/Policies/Microsoft/Windows/WindowsUpdate
- Once you are there, search for WUServer and WIStatusServer on the right pane.
- Do the right-click on both separately and choose the Delete button.
7. Manually download and install pending Windows 11/10 updates
Whenever Microsoft releases new updates for Windows 10, they upload their standalone packages as well on their official site. So, if you are not able to upgrade your system to a particular build version, you may manually install it by downloading their respective standalone packages.
Note: Windows 11 users may follow this guide on how to manually download and install standalone packages on their PCs.
How do I fix error 0x800f0823?
Just like error code 0x80240023, error 0x800f0823 is also an update-related issue and it might prevent you from upgrading your operating system. To resolve this problem, you may either follow the above workarounds or simply follow this guide.


