Hide Recycle Bin in Windows 11 effortlessly! Keep your desktop clean and organized by learning how to conceal the Recycle Bin with easy steps. Unlike other icons, the Recycle Bin is undeletable and always present on a new Windows 11 desktop.
Deleted files linger until the Recycle Bin is emptied, posing a potential privacy risk. Easily achieve a sleek and clutter-free workspace by hiding the Recycle Bin and eliminating unnecessary icons from your Windows 11 desktop. Follow these simple steps to hide or remove the Recycle Bin for a cleaner desktop appearance.
Fix: Can’t delete files from Recycle Bin in Windows 10
Hiding Recycle Bin from the Desktop on Windows 11
You may hide the Recycle Bin from your Windows 11 Desktop Screen by following these easy steps –
- Press Windows + I to launch Settings.
- Next, navigate to the below path on it –
Personalization > Themes
- Scroll down to Related settings and click on “Desktop icon settings“.
![]()
- The Desktop Icon Settings pop-up window will appear next. Uncheck the boxes left of Recycle Bin, and hit Apply followed by the OK button.
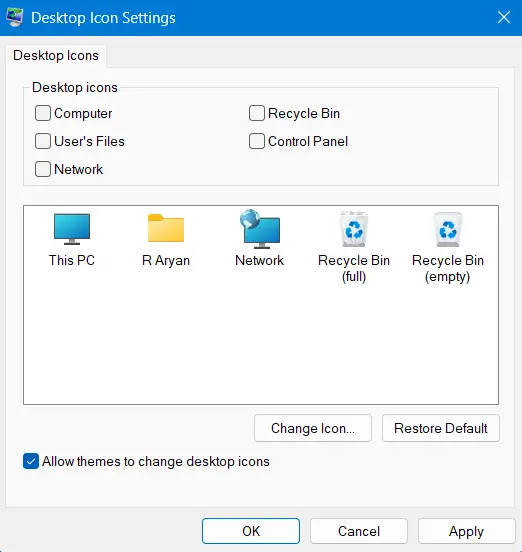
That’s it, you have successfully hidden the Recycle Bin from your desktop screen. In case you ever want this icon back on your PC, you may re-visit the above steps, check the respective box, and hit Apply > OK.
How do I momentarily disable displaying Desktop icons?
If you don’t want to hide the recycle bin, rather just stop displaying it for some time, you may turn off the “Show Desktop Icons” toggle switch. Here’s how to do that –
- Right-click anywhere on the Desktop Screen, and choose View > Show Desktop icons.
![]()
- All items that were earlier on your desktop screen will now disappear. You may now enjoy the Wallpaper that you have put down on the front screen.
- To access all the icons back, right-click again and this time choose View > Show Desktop icons.
![]()
All hidden desktop icons will resurface exactly where they were before hiding them momentarily.
How do I access the hidden Recycle Bin?
In case you want to access the hidden recycle bin on your computer, you may do so by following either of these three options.
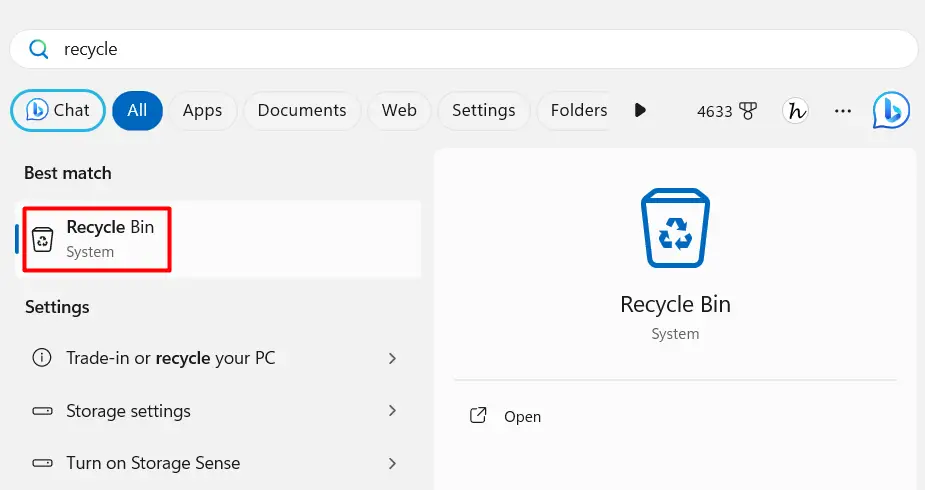
- Using the Search Window: Press Windows + S to launch the Search Window, and type Recycle Bin. Click on the top result and you can all its contents.
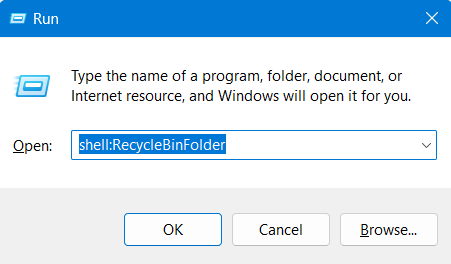
- Using the Run dialog: Press Windows + R, and type “
shell:RecycleBinFolder” without quotes on it. Click on the OK button and this will open the hidden Recycle Bin.
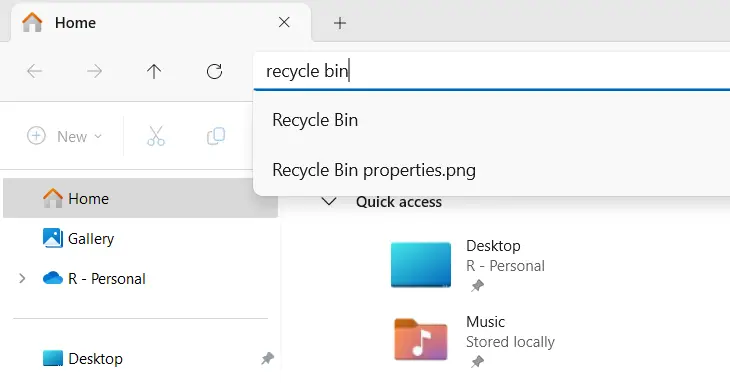
- Via File Explorer: Press Windows + E to launch the File Explorer. Type Recycle Bin in the address bar and press the Enter key. That’s it, you have successfully entered the Recycle Bin on your computer.
Now that you are inside the Recycle Bin, you can view all deleted files from your system. You may choose to either recover or delete all files from here. Alternatively, you may also select and restore or select and delete files from here.
How to Skip Deleted Files Moving to the Recycle Bin
Assuming you did hide the Recycle Bin on your computer, you won’t be able to empty the same whenever you delete any files or folders. In such cases, the recycle bin will keep on gathering deleted files and thus end up consuming a big chunk of your hard drive.
It is better to skip the deleted files moving to the recycle bin so that you don’t need to manually delete files that are stored inside the Recycle Bin. Do note that this way you might lose those files which were deleted accidentally. So, proceed only after when you understand what exactly are you going to do.
Here are the steps required to skip deleted files entering the recycle bin on Windows 11 –
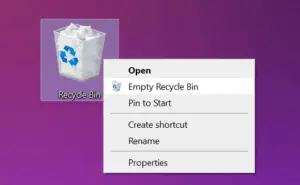
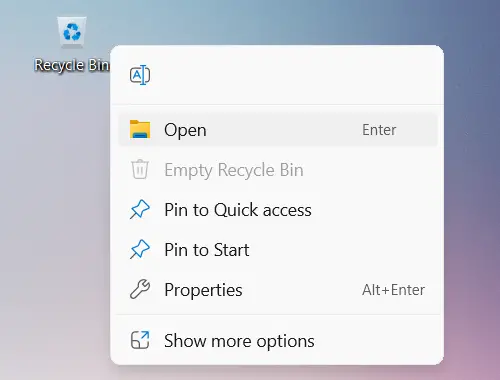
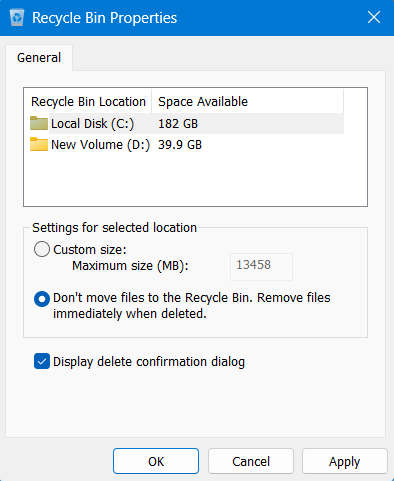
- Right-click on the Recycle Bin icon and select Properties.
- When its Properties window opens up, select the Root drive i.e. C:, and tick the radio button – “Don’t move files to the Recycle Bin. Remove files immediately when deleted.”
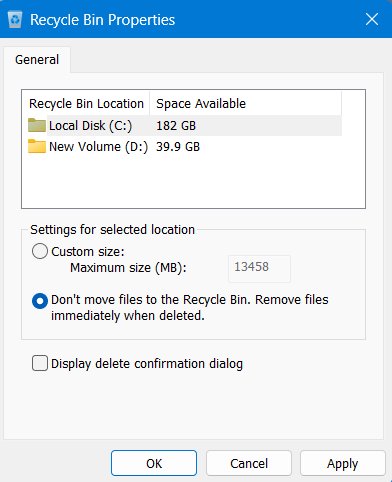
- Click Apply and then OK to confirm this change on your computer.
Note: Many of us disable the “Display delete confirmation dialog” feature as we know the deleted files will go directly into the Recycle Bin. However, since you are skipping this part, we suggest you enable the “Display delete confirmation dialog” to minimize accidental deletion of important files and folders on your PC.
From now onward, whenever you delete any file on your computer, you will see a prompt whether you would like to delete the selected files or not. Once you accept to delete those files, the files will be deleted permanently.
In case you have deleted something important accidentally, you may recover only those files and folders that are backed on your OneDrive account.