Several companies have already started using the Zoom app for video conferencing, peer talks, etc. If you are stuck at home and wondering how to install or create a zoom account in windows 10, follow this article in detail. This is a quick guide featuring the basic details like its pricing, installation, use one-to-one video calls, and others.
The usage of the Zoom platform increased recently due to the quarantine measures adopted by many countries across the globe. This provides unlimited person-to-person video calls and 40 minutes of video conferencing in its free version. In case you want to exceed this limit, opt-in for either pro ($14.99 per host per month) or enterprise/ business ($19.99 per host per month) versions.
Read how to Download and Install Zoom App in Windows 10
How to Create Account in Zoom App in Windows 10
To create a Zoom account in Windows 10, use the following steps –
- At first, open any of your web browsers and visit the Zoom official website.
- On its interface, confirm your date of birth in MM-DD-YY format and press the continue button.

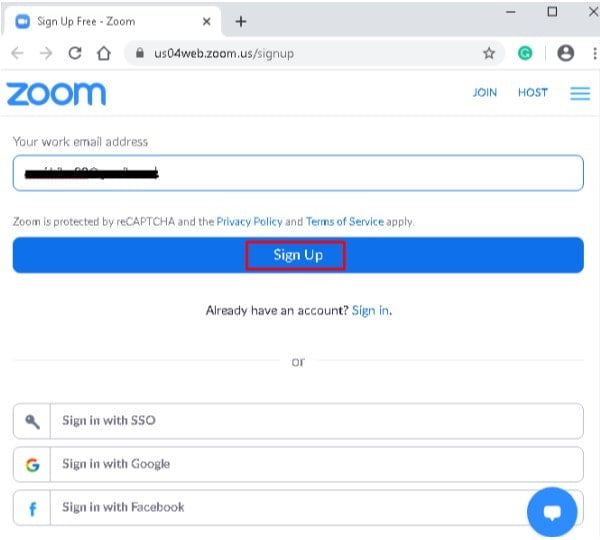
- Now, enter the email id that you want to use and click the Sign-up button.
Note: Alternatively, you may also sign-in using either SSO, Google, or Facebook account.

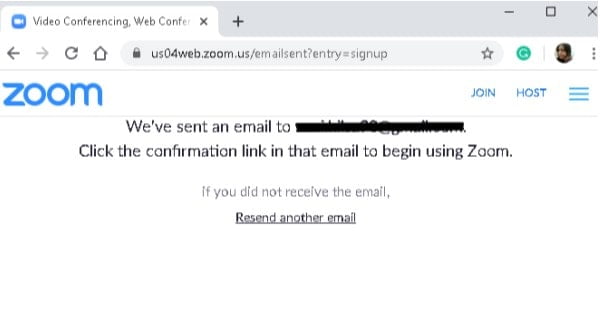
- You will receive an authentication message on the mail id.

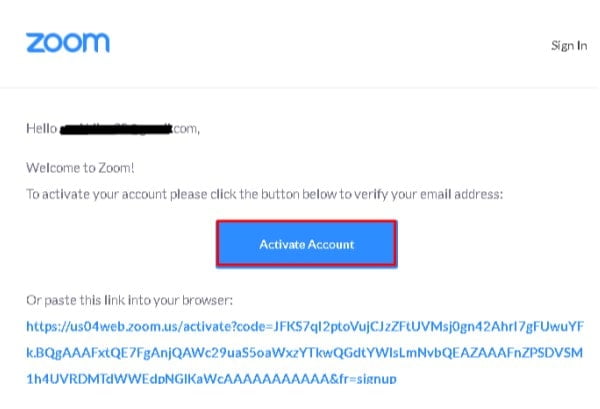
- Sign-into your email account, open the mail sent by the Zoom app and click Activate Account button.

- If this asks “Are you signing up behalf of a School“, check No thereafter Continue.
- On the succeeding screen, fill in the essential information followed by Continue again.

- The next window asks you to invite the people, you can Skip this step for now.
- After completing the above steps successfully you must be able to start meeting among your peers.
That’s it, I hope you find this article helpful in creating your zoom account. If you have any queries, ask us in the comment box.


