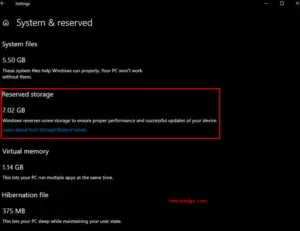
Starting with Windows 10 1903, Microsoft introduced Reserved Storage which allocates a portion of the disk for upcoming updates and fixes. The presence of extra space reserved for cumulative updates resolves several bugs that occur due to not having enough storage. Previously, users need to make a few changes inside the registry to either enable or disable Reserved Storage on their PC. However, one can perform this task simply using the DISM utility.

The company adds three commands – the first one to view its current status, while the second and third ones are to enable and disable Reserved Storage on Windows 10 version 20H1 respectively. Let’s explore how-to run these codes effectively –
How to Turn On or Off Reserved Storage using DISM
Here’s how to either enable or disable reserved storage on Windows 10 devices –

Note: The below methods are applicable only if you have already upgraded your operating system to 20H1. If you are using either Windows 10 19H1 or 19H2 version, read how to enable or disable reserved storage on Windows.
How to Enable Reserved Storage using DISM Command Tool
To enable reserved storage using the DISM Command tool, use the steps –
- Open Command Prompt as an administrator.
- If the UAC prompts on the screen, click on the Yes button.
- Once the elevated command prompt opens, you need to confirm whether the reserved storage is enabled or disabled.
- To do this, type the below command and then hit the Enter key
dism /Online /Get-ReservedStorageState
- In order to enable Reserved Storage, type the following command and then press Enter –
dism /Online /Set-ReservedStorageState /State:Enabled
Once you complete the above steps, Reserved Storage gets enabled on your device. It will preserve your device from having problems while updating and upgrading process.
How to Disable Reserved Storage using DISM Command Tool
To disable reserved storage using the DISM Command tool, use the steps –
- Press the Window+R shortcut key to open the Run dialog box.
- In the text area, type “cmd” and press Ctrl+Shift+Enter together to launch the elevated Command Prompt.
- When the UAC prompts on the screen, click on the Yes button.
- In the Command Prompt window, type the following code and press Enter to know its current status –
dism /Online /Get-ReservedStorageState
- To execute the above command lines, press the Enter key.
- In order to enable Reserved Storage, type the following command and then press Enter –
dism /Online /Set-ReservedStorageState /State:Disabled
After performing the above steps, you can disable the Reserved Storage on your device. It unlocks the storage previously reserved to hamper the issues during updating and upgrading issues without requiring to free up space.
Should I disable reserved storage Windows 10?
If you have no available space on your computer to install Windows updates, you can remove and reinstall them. However, this is not a good situation for users and could lead to further issues in the future. In case you need to reduce storage, you should turn off reserved storage.
That’s it.

