Today, in this article, we discuss Windows 10 Update Error 0x800f0982, its probable reasons and a few ways to resolve this bug. The above error message appears primarily while applying the recent Windows 10 Builds. This bug may also arise while installing the latest cumulative updates (specific KB) in both x64-based or x84-based PCs.
Run the troubleshooter is the first workaround to deal with the update Error 0x800f0982. Alternatively, repair the corrupt system core files using SFC and DISM may also help to manage these update issues. If there are indeed corrupt files inside SoftwareDistribution and SoftwareResources, try to remove its obsolete contents. You may even try Reset Windows Components and clean boot your system to download the updates without any interruption.
Ways to solve Windows Update Error 0x800f0982
Here are the step-wise workarounds to resolve the Windows Update Error 0x800f0982 on your PC-
1} Run the Windows Update Troubleshooter
Running troubleshooter is a built-in app of Windows 10 that can repair damaged files while updating. Hence, follow the below guidelines to run this tool-
Step-1: First of all click on Windows and hit the Gear icon (Settings) from the left pane.
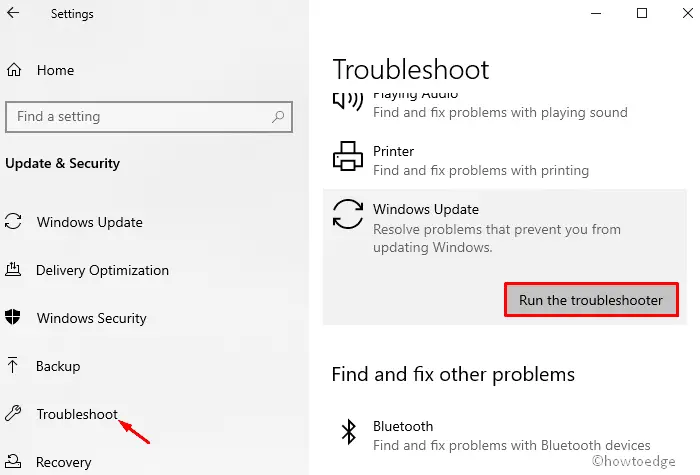
Step-2: When the app appears, select Update & Security thereafter Troubleshoot from the left column.
Step-3: Jump to the right pane, scroll down and tap the Windows Update option.
Step-4: Next, hit Run the troubleshooter button and let Windows detect and repair the pertaining issue.
Step-5: Once the above task finishes, Reboot your computer and check the pending updates again.
Step-6: Hope this time, you do not experience Windows Update Error 0x800f0982 on your system.
2} Perform System File Utility command
In case, somehow any of the system files got damaged, it leads to the above error. The SFC scan will detect these faults and repair them if possible. Here are the essential steps-
- Type Command Prompt in the search bar and right-click on the well-suited result.
- From the context menu, choose the Run as administrator option.
- This process requires administrator rights, so press Yes to authenticate.
- Now on the blank surface, type
sfc/scannowand hit Enter key to let the process begin.
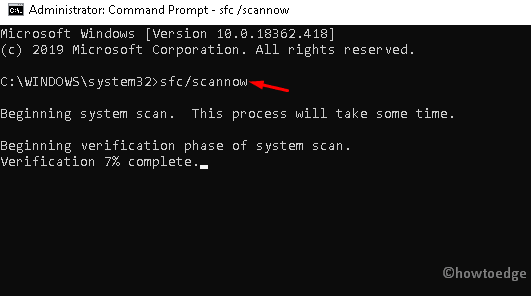
- Once the task reaches 100%, Restart your computer and update your computer without experience Update Error 0x800f0982.
3} Run DISM scan
Similar to the SFC scan, Deployment Image Servicing & Management (DISM) can also detect the faulty system’s image files and rebuild these files. Let’s see how to proceed-
- Perform a right-click on Windows and select Run using the Power menu.
- In the text surface, type cmd and simultaneously hit Ctrl + Shift + Enter keys.
- Now on the administrative wizard, tap the Yes option.
- Near the blinking cursor, copy/paste the following codes and press the Enter key at the end.
DISM /Online /Cleanup-Image /RestoreHealth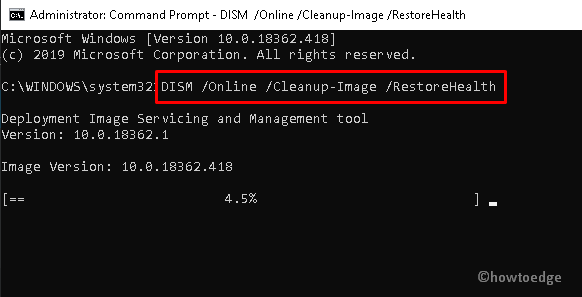
- Keep patience till the task completes henceforth Restart your computer.
- When the OS reloads, install the pending updates without any hassle Error 0x800f0982.
4} Download the Required Updates Manually
If any specific KB is causing the trouble, you should re-install the patch-up file manually from Microsoft Update Catalog. Here are the steps to follow-
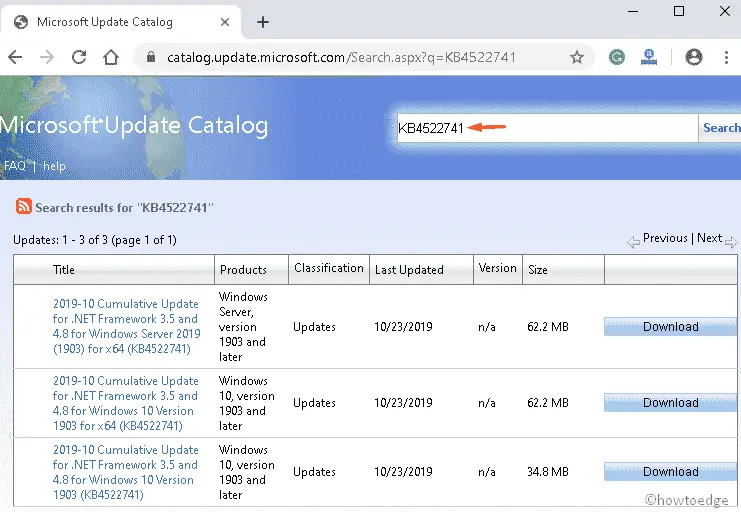
- Firstly visit Microsoft Update Catalog and type the KB number (eg: KB4522741) in the search box.
- A new web page comprising compatible cumulative updates for x64 or x86 based systems will appear instantly. Here, press the Download button next to a particular patch.
- When the file is downloaded completely, install this setup on your PC.
- Once over, Reboot your computer and see if the Update error 0x800f0922 has resolved or not.
5} Start the Windows Modules Installer Service
If the error code continues to persist, make sure Windows Modules Installer Services is enabled on your system. If not, turn this feature on and update the platform again following these simple steps-
- Click on the Search box and type cmd in the text box.
- When the Command Prompt option appears, right-click on the same and choose Run as Administrator.
- When the User Account Control wizard pops up, press Yes to permit the access.
- Now copy and paste the following code and hit Enter key at the end of each line.
SC config trustedinstaller start=auto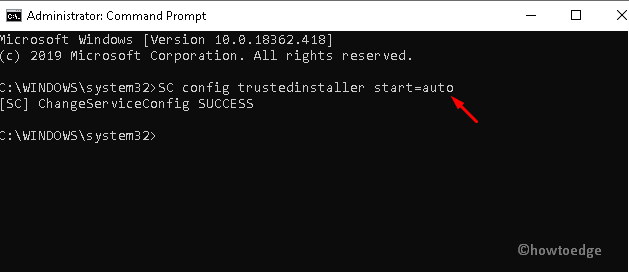
- Lastly, Reboot your PC to save the changes performed so far.
6} Clear the SoftwareDistribution and SystemResources Folder
The unnecessary cache stored in the SoftwareDistribution or SystemResources folder may also arise from Update error 0x800f0922. It is thereby recommended to clear the contents of these documents. To do so, follow these easy steps-
- At first, click on the Start menu and type cmd in the void area.
- From the appeared list, right-click on Command Prompt and select Run as administrator.
- If UAC prompts, tap Yes to sanction the access.
- Next, input the below command codes separately on the elevated command prompt and hit the return key at the end.
net stop wuauserv
net stop bits
- Succeeding that minimize the command prompt and press Win and E jointly to launch File Explorer.
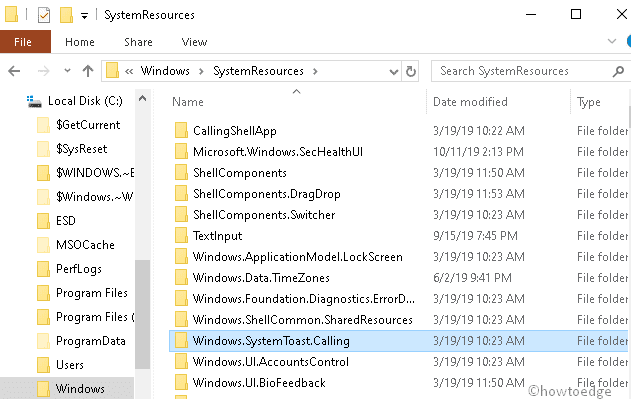
- Navigate to the following path: C:> Windows > SoftwareDistribution
- Once you reach the above directory, press Ctrl + A to select all the contents inside the SoftwareDistribution folder.
- Thereupon, press the Delete key using the keyboard.
- Afterward, move to the home page on file explorer and copy/paste the following path at its address bar-
C:\Windows\SystemResources
- Make sure to delete all the items inside this folder.
- Succeeding that, open the command prompt and restart the services that you have earlier disabled.
net start wuauserv
net start bits
- After going through the above steps successfully, Restart your computer and update your System without facing any interrupting issue.
7} Reset all Update Components
Another probable reason to cause error 0x800f0982 while installing the latest patch is the presence of faulty update components. Resetting these files manually helps to resolve this update-related issue. To perform this task, you are required to login as an administrator then execute a few codes.
Step-1: At first, cite the Command Prompt as an Admin.
Step-2: If UAC prompts, tap Yes to proceed.
Step-3: Before repairing the components, you should temporarily disable certain services. Here is the complete list of such services-
net stop bits
net stop wuauserv
net stop appidsvc
net stop cryptsvc
Step-4: Subsequently, clear the qmgr*.dat directory using the below command line-
Del “%ALLUSERSPROFILE%\Application Data\Microsoft\Network\

Downloader\qmgr*.dat
Step-5: Going ahead, you need to rename the SoftwareDistribution and Catroot2 folder with the help of the following codes-
-
rename %windir%\SoftwareDistribution SoftwareDistribution.bak -
xcopy %systemroot%\system32\catroot2 %systemroot%\system32\
catroot2.bak /s
Step-6: Now, Restart the pending turned-off services.
net start bits
net start wuauserv
net start appidsvc
net start cryptsvc
Step-7: At last, Restart your system and download the pending available cumulative updates.
8} Try Clean Boot
If the above process does not solve the update error 0x800f0982, this may interrupt the smooth working performance of the system. The clean boot may help to resolve this bug. Here are the steps to follow-
- At first, sign in to your PC as an administrator; If you do not have this account create it manually.
- Next, press Win + R and type MSConfig near the blinking cursor followed by the Enter key.
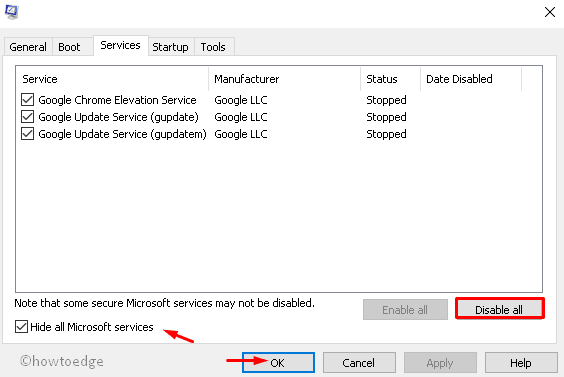
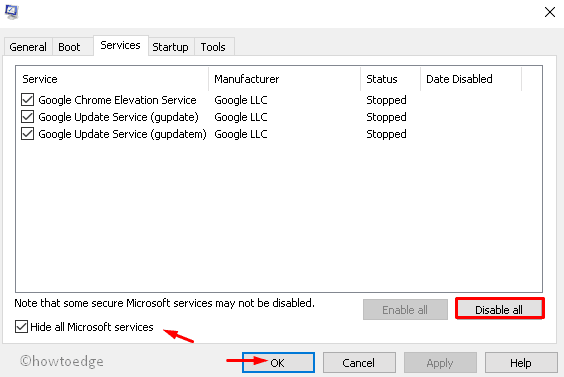
- When the System Configuration windows appear, hit the Services tab.
- Here, mark the box Hide all Microsoft services henceforth Disable all button.
- Thereupon, switch to the Startup tab and open the Task Manager link.
- Succeeding that select each item separately and hit the Disable button (if enabled).
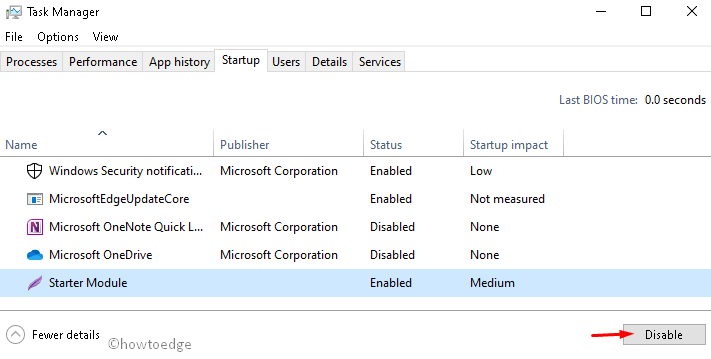
- Next, close the Task Manager. Click OK on the System Configuration window and Restart your system.
- Finally, update your computer and check this time whether you succeed to solve this bug.


