If you are encountering an error message stating “Couldn’t Mount File”, this means that you don’t have the required permission to mount that particular file. Such type of error messages typically appear when you are trying to mount an ISO image onto your computer.
Well, worry not, as here in this article, we will discuss quite a few solutions that will help you resolve this issue and get your ISO file mounted easily. Let’s first discuss what causes such type of error messages in Windows.
Why is my ISO file not mounting?
The “Couldn’t mount file” error is a direct result of different issues prevalent on your computer. Some of these are –
- File corruption: Some of the internal files and folders must have been corrupted due to third-party apps.
- Sparse ISO files: The ISO file may be sparse, causing permission issues.
- Interference from Security Software: Antivirus or security software might interrupt the mounting process.
- Uninitialized Disk Image: The disk image may not be properly initialized.
- Corrupted Disk Image File: The ISO file itself could be corrupted.
Now that you know what possibly might cause this issue on a Windows PC, let’s delve into the rightful solutions –
1. Check File Properties
There’s a possibility that you have downloaded a sparse ISO file and hence you are not able to mount it on your PC. You may check the same by following these easy steps –
- Right-click on the ISO file and select Properties.
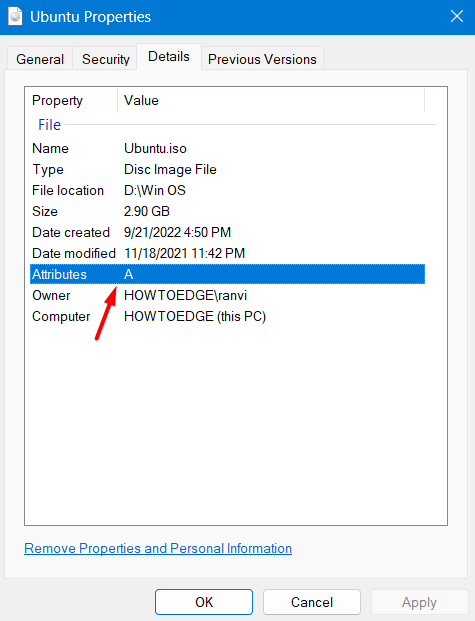
- Navigate to the Details tab and check the letter beside Attributes.
- If the letter is “P,” the file is sparse. You may see in the below screenshot, the letter “A” beside Attributes, and this signifies that you have a correct ISO image file.
- Assuming you did find a sparse image file, consider copying it to a different folder and renaming it to something different. Doing so might remove the sparse attribute.
- If the moved file also displays the same attribute, consider re-downloading the ISO image from its official website.
2. Mount ISO File using Terminal
If your ISO image file is indeed not sparse (as displayed in the above solution), you may use the terminal to mount it on your PC. Here’s how –
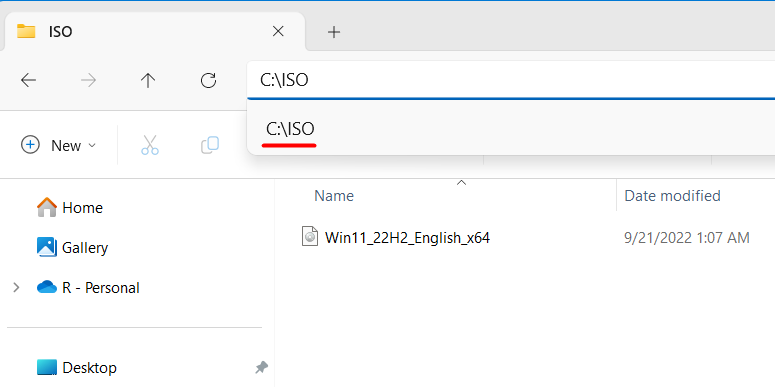
- First of all, open File Explorer and navigate to the folder containing the ISO image file.
- Go to its address bar and copy the file location.
- Next, press Windows + X, and select Terminal (Admin).
- When the UAC window prompts, hit Yes.
- Inside the terminal, copy/paste the below cmdlet and press Enter.
Mount-DiskImage -ImagePath Your_ISO_File_Location
For example Mount-DiskImage -ImagePath C:\ISO\Win11_22H2_English_x64
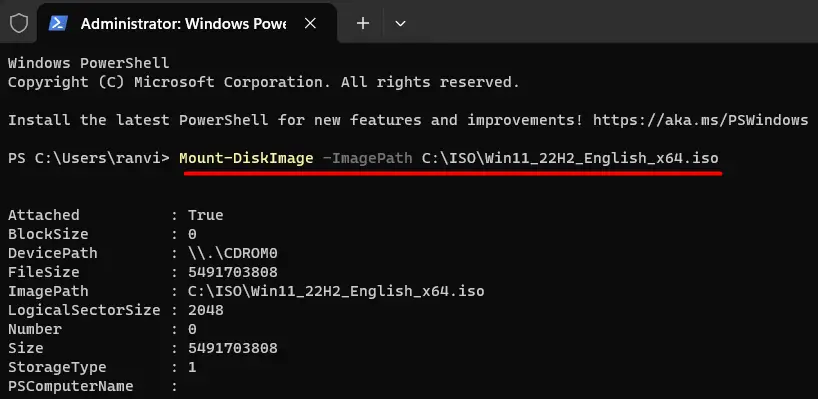
That’s it, you will find the selected ISO image mounted in one of the DISCs on your computer.
3. Disable Antivirus or Security Software
Certain antivirus or security programs are known to interfere with the mounting process. If you are using some third-party antivirus program, make sure to disable it first, and then try mounting ISO images on your computer.
Note: Don’t forget to re-enable the security app after you have mounted an ISO image on your Windows PC.
4. Reconnect the Media Containing the ISO File
In case the ISO file is on a removable disk drive, you may first eject and then re-connect it to your PC. Doing so re-assign letters to a lower drive letter and this helps significantly in resolving issues like “You don’t have permission to mount the file“.
5. Try third-party tools
If none of the above fixes work to resolve the mounting issue, you may take the help of a third-party application as well. 7-ZIP, WinRAR, and PeaZip are a few software to go for if you can’t mount an ISO image normally on your computer.
That’s it, I hope you find one of the above fixes useful and are now able to mount an ISO image successfully on your PC.
How do I mount an ISO file?
In Windows, you may mount an ISO image by simply following these easy steps –
- First of all, navigate to the folder containing the ISO image.
- Right-click on the file and select Mount.
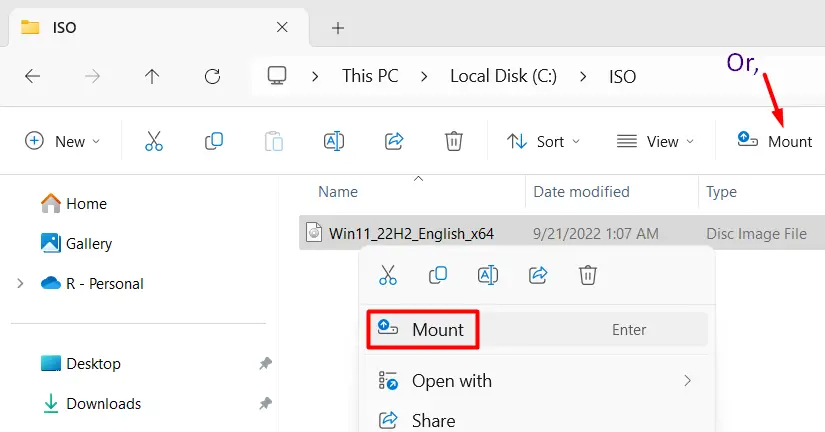
- Alternatively, one may also click on the Mount button available in the Menu bar.
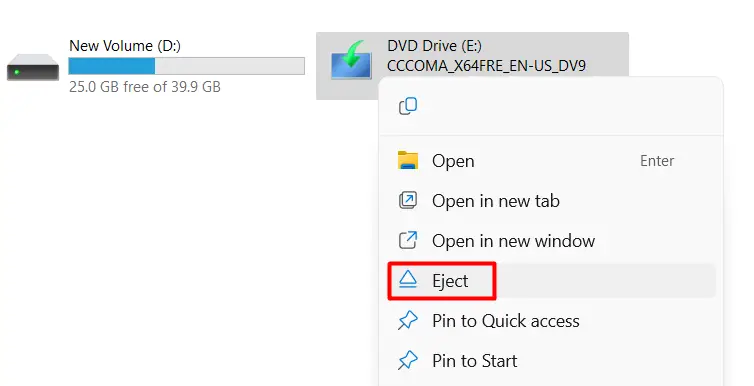
How do I unmount an ISO image in Windows?
Unmounting an ISO image file is quite easy in Windows. To perform this task, right-click on the mounted disk, and select Eject in the context menu.
Can I open an ISO file without mounting it?
Yes, it’s possible to use an ISO file without even mounting it on your Windows PC. However, for this, you must use compatible third-party software like WinRAR, or others. Once you have installed compatible software on your PC, go to the file location where you have kept the ISO file, and right-click on it.
You will see the option to Extract here in the context menu. Well, click on it, and the chosen file will be unzipped to the chosen location.
Read Next: How to Reset ASUS BIOS Correctly