Sometimes our PC reboots unexpectedly thus leaving all of us in curiosity why does it shut down. If this ever occurred on your PC, you do want to know either the exact time of reboot or the reason behind this. Well, today in this guide, we illustrate some easy workarounds that can help to find out the Windows Server Last Reboot Time.
Windows users may take the assistance of either Event Viewer or run a small code on Console to figure out the last rebooting time. One can reschedule the Server Restart Date as well as Time utilizing the built-in Task Scheduler application.
Related: Fix- DPC_WATCHDOG_VIOLATION error 0x00000133 in Windows 10
How to know the Windows Server Last Reboot Time
Here, we discuss three different ways to find out the last reboot time of Windows Server including a proper method to reschedule the Restart date and time.
1} Using System Event viewer
The event viewer utility is a built-in app of Windows 10 that stores several data related to the Server including its last reboot time. You can get all the details by just following these easy steps –
- Go to the Start and type Event Viewer in the search field.
- When the well-matching result pops up, click the same.
- Move to the adjacent right window and tap the Create Custom View option.

- Next, select the Windows log using the Event log drop-down menu.
- Afterward, move to the <All Event IDs> section and add 6009 thereafter hit the OK button.

- On the following wizard, enter a “name” to create a custom view.
- Switch back to the Event viewer again and you may now see the logs of Windows Server reboot time.

2} Via Command Prompt
Alternatively, you may execute a simple code on Command Prompt to see the Windows server rebooting time logs. Here’s how to proceed-
- Go to the Run dialog (Press Win and R together) and type cmd in void area.
- Now press Ctrl+Shift+Enter keys simultaneously to invoke the Command Prompt as Admin.
- If UAC prompts, tap Yes to go ahead.
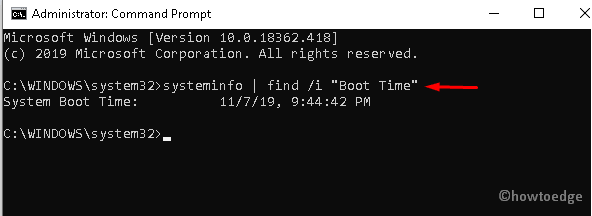
- On the elevated prompt, copy/paste the below code and hit Enter key at the end.
systeminfo | find /i “Boot Time”

- Once the code runs successfully, will display the Windows Server Last Reboot Time data.
3} Set Reboot with Scheduled Tasks
Usually, one can view the Windows server last reboot time using both methods (illustrated above). However, if you do want to change the login sequences, set a scheduled date and time using Task Scheduler Utility. Here are the essential steps to do so-
- Press the Win logo and S jointly and type Task Scheduler in the text area.
- On the appeared page, select Add a New Scheduled Task then Next to go ahead.
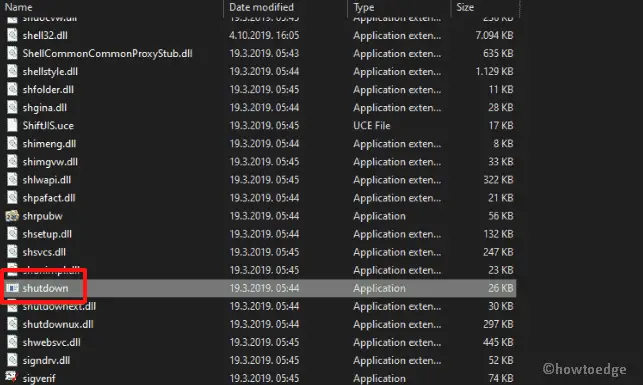
- Afterward, navigate to the following path –
C:\WINDOWS\System32\shutdown.exe

- Rename this entry as “shutdown” thereafter select the shutdown frequency.
- You may now reset the date and time accordingly to reboot the Windows Server.

- Succeeding that put in your credentials and confirm the following setup.
- Henceforth, mark the Open Advanced options when I click Finish box checkbox followed by the Finish button.
- The new wizard will come in to view, replace the below code using the default one.
C:\WINDOWS\system32\shutdown.exe -r -f -t 01
- Hit Apply then OK to confirm the changes.
One can now see the details when the system was last restarted on Windows Server, using either the first or second method.