- Are you experiencing connectivity problems? Don’t worry. Here in this article, we will explain two methods to reset the network settings of Windows 11 so that everything is back to normal.

Is it a Good Idea to Reset my Network Settings?
When you reset the network settings of Windows 11, it will uninstall and then reinstall the network adapters. It will also restore the default settings of other devices. So, if you are having connectivity problems, resetting the Windows 11 network settings is always the last resort.
Generally speaking, it is recommended to avoid fiddling with Network Settings and to use an alternative. However, if you’ve already done everything else, including installing the latest drivers, changing your modem and router settings, rebooting your PC, etc., you might want to reset your Network Settings.
How to Reset the Network Settings on Windows 11
Connecting to the internet depends on what network settings you have on your PC. Even Windows OS lets you modify these settings as you wish. These changes can, however, sometimes backfire. If this happens, you might consider resetting the Network Settings on Windows 11 as a last resort.
1. Use Windows Settings
There are two ways to reset the Windows 11 network settings to their original state:
- Open Windows Settings using the Windows+I keys.
- From the left pane, click the Network & internet option.
- Scroll down to the right and click on the Advanced network settings option.

- Select Network reset in the More settings section.

- Click Reset now to complete the process.
- Afterward, you will be asked if you wish to reset the network.

- Click Yes to begin the process.
Upon completing the reset, you will be prompted to restart the computer. This will ensure all changes are successfully implemented.
2. Use Command Prompt
If you prefer the command line interface over the GUI’s user interface, you can reset the Network Settings by just running a few simple commands:
- Open the Command Prompt window with admin access.
- Now copy and paste the below commands and press Enter after each command:
ipconfig /release
ipconfig /flushdns
Copyipconfig /renew
netsh int ip reset
netsh winsock reset
Note: Please note that certain errors might appear during the execution of these cmd commands, but do not worry, it is completely normal.
- Finally, restart your computer to complete the process.
How to reset network settings on Windows 10?
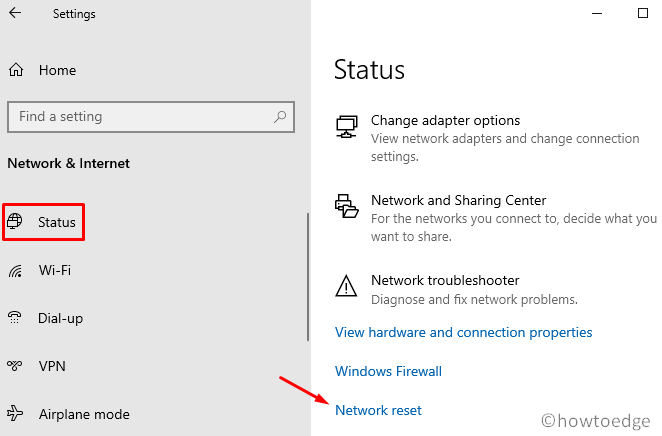
Here’s how to reset network settings on Windows 10:
- Right-click on the Start menu.

- Select Settings > Network & Internet > Status > Network reset.

- Click on the Reset Now button.
- Select Yes to end the process.
Read Next:

