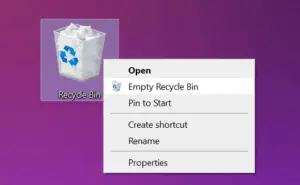
Nothing can be more annoying than a sluggish computer especially when you have to finish some important tasks within a specified time frame. Definitely, a pile of unnecessary junk files, temporary data, and other space-hogging applications can be the reason behind this. Fortunately, there are two ways applying which you can empty your Recycle Bin automatically.
In this blog post, we have explained two methods that allow you to empty your Recycle Bin on a schedule. To make it worked, Windows 10 uses the built-in feature Storage Sense on your computer.
Learn how to clear your Recycle Bin every time you sign out of Windows 10.
Empty Your Recycle Bin on a Schedule in Windows 10
To empty your Recycle Bin on a schedule, use the instructions below –
1] Enable Storage Sense
- First of all, open the Windows 10 settings using Windows + I shortcut key.
- On the Settings page, click the System category and then go to the Storage tab.
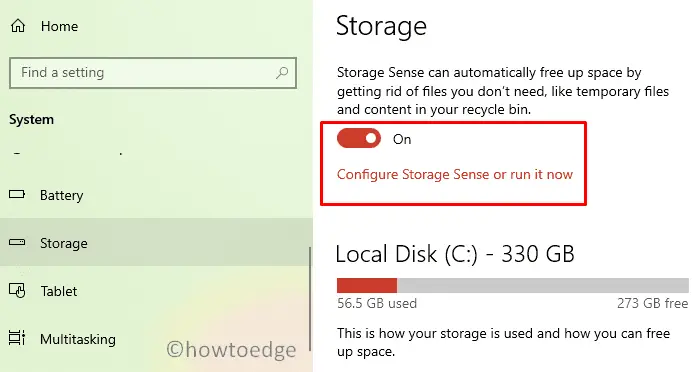
- Now go to the right pane and you will see a Storage section.
- Click on the toggle button to activate the Storage Sense and then click on the below link entitled Configure Storage Sense or run it now.
- On the next page, you will have to configure Storage Sense. Because Storage Sense runs based on the frequency, so first set the frequency using the drop-down menu named Run Storage Sense.
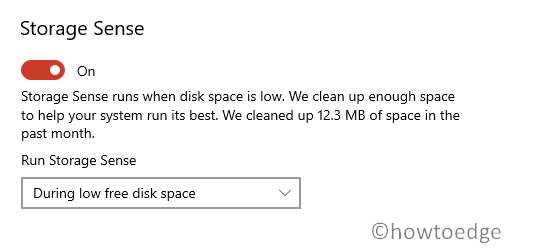
- In the drop-down menu, you will get choices to select either every day, every week, every month or during low free disk space. So select the option from the list that is most suitable for you.
- Moving ahead you will get the section labeled Temporary Files. Here uncheck the checkbox next to “Delete temporary files that my apps aren’t using”. Although if you want to delete some temporary files that your apps aren’t using then you can keep the checkbox remain checked.
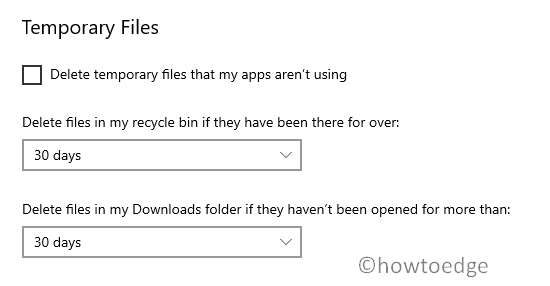
- Thereupon you will get a drop-down menu named Delete files in my recycle bin if they have been there for over. On clicking the menu, you need to select the time period after completion of which the files available in your recycle bin will be removed forever. The options you can select through the menu are “Never, 1 day, 14 days, 30 days, or 60 days.”
Likewise, you can select the time period, after that the files present in your download folder will be deleted automatically if they haven’t been opened for more than the selected time period.
- To set the time period, click on the drop-down menu of Delete files in my Downloads folder if they haven’t been opened for more than and select the option you prefer.
The options you can choose from the menu list are “Never, 1 day, 14 days, 30 days, or 60 days.” Once you complete the procedure, close the settings window and you’re done.
2] Using Task Scheduler
Users may also create a schedule to empty the Recycle Bin using the tool – Task Scheduler. Using this tool, one may schedule a different set of events like starting some programs, cleaning files, etc. Here’s how to use this utility program to plan automatic deleting of files/folders inside the Recycle Bin –
- Press Win + S, start typing “Task Scheduler“, and click over the top result.
- Subsequently, click once then right-click on Task Scheduler Library, and select “New Folder“.
- Name this folder – “Delete Automatically files and folders”.
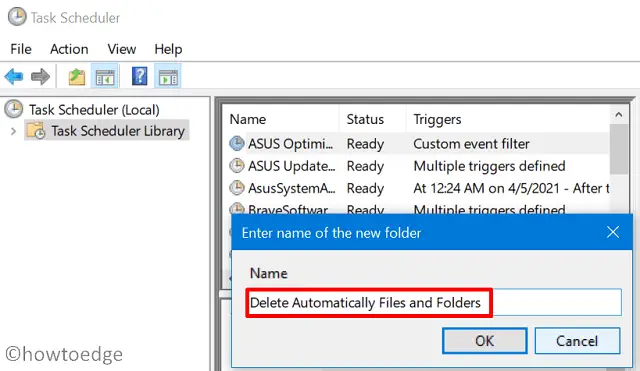
Note: You may choose to name it some different as well. However, make sure to use some appropriate letters so that you can recognize this immediately in the future.
- Expand the Task Scheduler Library and select the newly created folder.
- Next, right-click over this folder and choose – Create Task.
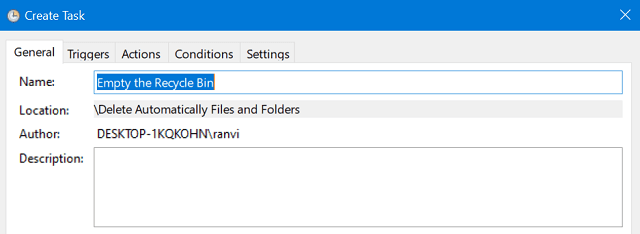
- By default, the scheduler will take you to the General tab. Type “Empty the Recycle Bin” without quotes in the Name field.
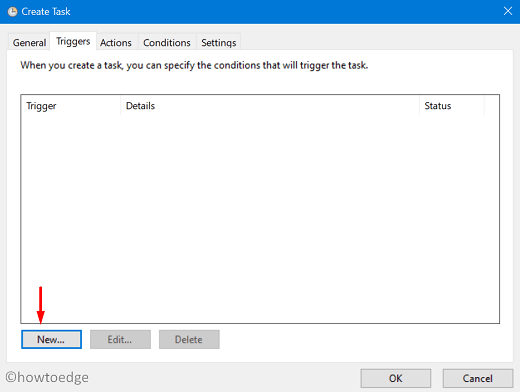
- Go to the next tab i.e. Triggers. Click over the New button to create an action that will cause this task to start.
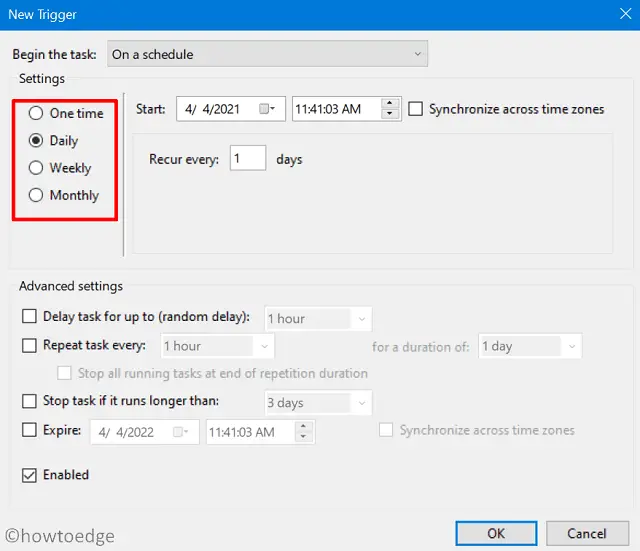
- Choose appropriately when you want to trigger this event. The best way to schedule an event of emptying recycle bin is by selecting the proper time. You may choose in between One Time, Daily, Weekly, and Monthly.
- Go to the Actions tab and click over the New button.
- Locate Programs/script under the Settings section. Here, type “cmd.exe” in the blank field.
- Copy/paste the below paraphrase on the blank field next to the Add Arguments (optional).
/c "echo Y|PowerShell.exe -NoProfile -Command Clear-RecycleBin"
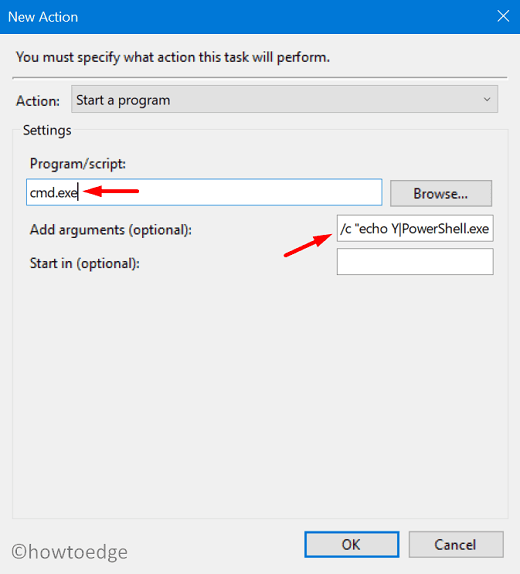
- Lastly, hit OK to close this New action, then OK again to confirm scheduling this task.
- Restart your computer next so that changes made come into effect.
From the next logon, Recycle Bin should empty itself at the time you have set above.
That would be all.
