The error code 0x80243FFF is an update-related issue and when it occurs, you face difficulty downloading or installing the pending updates on your Windows PC. If you are looking for a solution to this error code, you have come to the right spot.
In this post, we will discuss all possible reasons that may cause this update error 0x80243FFF and four relevant fixes to address this issue on Windows 11/10 PC.
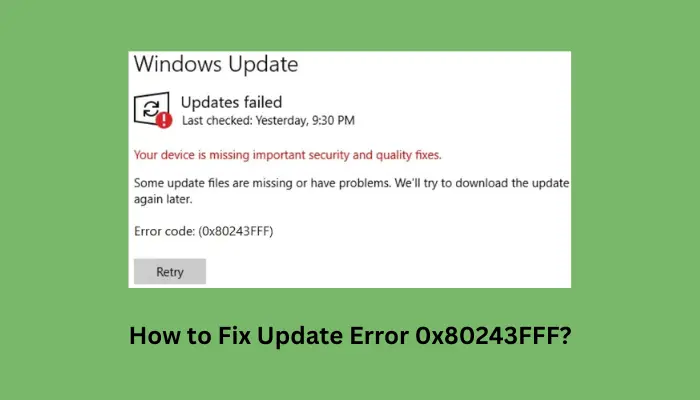
Update Error 0x80243FFF: Causes & Fixes
This update error 0x80243FFF mostly appears due to some internal glitches or corruption within the update services or components. Start with troubleshooting your Windows Update, and this might resolve this error code on your PC. If this doesn’t work, try resetting all Update components which includes purging both cache folders.
If this error continues to appear, this must be due to the presence of some faulty apps or services running on your device. Boot into Safe Mode on your computer and try installing the pending updates while remaining in this mode. In case none of these solutions help, you may manually download and install the pending updates on your Windows 11/10 PC.
1] Troubleshoot Windows Update
When you receive an update error 0x80243FFF while trying to install a pending update on your PC, you should try to troubleshoot Windows Update. This tool looks for the underlying causes within your system and resolves them (once found).
Windows 11:
- Press Windows + I to launch Settings, and navigate to the below path inside it.
Settings > System > Troubleshoot > Other troubleshooters
- Locate Windows Update under the Most Frequent section, and hit the Run button available beside it.

- Wait for the troubleshooter to launch and when it does open, hit the Next button.
- Follow the on-screen instructions and when it finishes, restart your PC.
Windows 10:
- Open Settings (Win + I) and select Update & Security.
- When this opens up, go to Troubleshoot > Additional troubleshooters.
- Click to expand Windows Update, and hit Run the troubleshooter.

- When the troubleshooter starts, hit Next and follow the on-screen instructions.
- Hopefully, this tool alone resolves the issue that you are struggling with.
- Restart your computer after the troubleshooting completes.
Sign back into your device again and check if you can update Windows without getting an error code 0x80243FFF.
2] Reset Windows Update Components
Another effective way to resolve an update error 0x80243FFF in Windows is by resetting the update components. This includes stopping all update-related services, purging Windows Cache folders, and then re-enabling those services that you stopped before.
Follow these steps on how to proceed with this task –
- Press Windows + X, and select Terminal (Admin).
- When the UAC prompts, hit Yes to authorize opening the terminal as an administrator.
- Press Ctrl + Shift + 2 to launch CMD inside the terminal.
- When Command Prompt indeed opens, execute the following codes one after another –
net stop bits
net stop wuauserv
net stop appidsvc
net stop cryptsvc
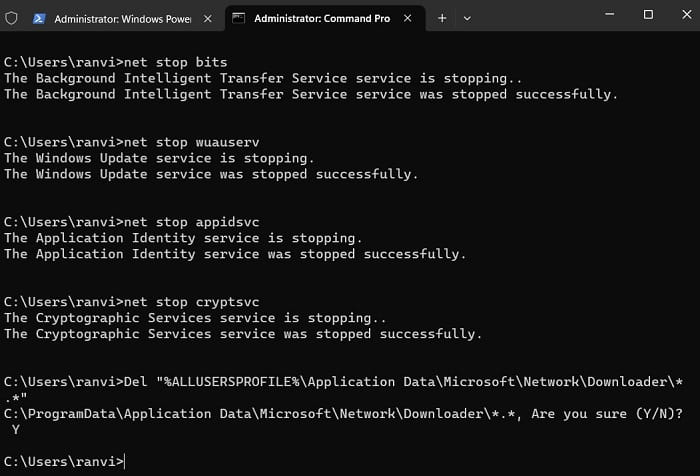
- These codes will stop all update-related services, be it Background Intelligent Transfer Service, Windows Update, Cryptographic services, and Application Identity Service.
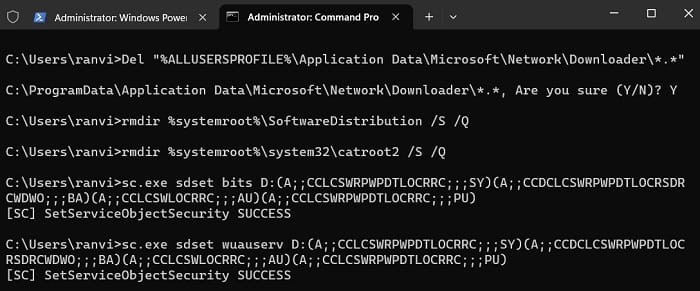
- Delete all the mgr*.dat files created by BITS from your PC by executing this command on the same prompt –
Del "%ALLUSERSPROFILE%\Application Data\Microsoft\Network\Downloader\*.*"
- Next, rename the Windows Cache folders i.e. SoftwareDistribution and Catroot2 folders by running these two codes –
rmdir %systemroot%\SoftwareDistribution /S /Q
rmdir %systemroot%\system32\catroot2 /S /Q
- Reset BITS and Windows Update Services to their default security descriptor by executing this command –
sc.exe sdset bits D:(A;;CCLCSWRPWPDTLOCRRC;;;SY)(A;;CCDCLCSWRPWPDTLOCRSDRCWDWO;;;BA)(A;;CCLCSWLOCRRC;;;AU)(A;;CCLCSWRPWPDTLOCRRC;;;PU)
sc.exe sdset wuauserv D:(A;;CCLCSWRPWPDTLOCRRC;;;SY)(A;;CCDCLCSWRPWPDTLOCRSDRCWDWO;;;BA)(A;;CCLCSWLOCRRC;;;AU)(A;;CCLCSWRPWPDTLOCRRC;;;PU)
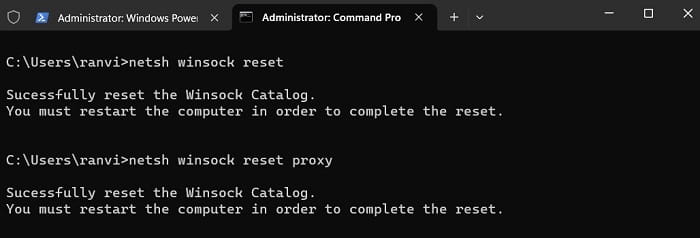
- Run the following two codes to reset the network configurations on your computer.
netsh winsock reset
netsh winsock reset proxy
- Restart all those services that you stopped before at the beginning of following this resetting process. For this, you need to run the below codes one after another –
net start bits
net start wuauserv
net start appidsvc
net start cryptsvc
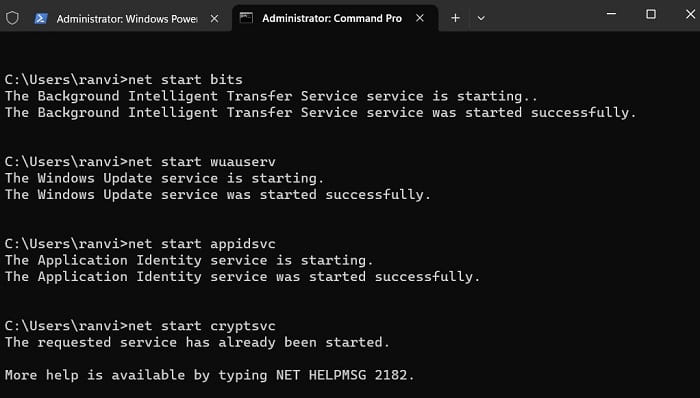
- That’s, it, you have successfully reset all update-related components on your Windows PC.
Reboot your computer and when it does complete, go to Settings > Windows Update, and check if you can update your PC without getting into the same error code 0x80243FFF again.
3] Install Windows Update in Clean Boot
If the update error 0x80243FFF is still appearing, this must be because of the presence of some faulty apps or services. To overcome this issue then, you should boot your device into Clean Boot and check if you can update Windows normally here in this state. Here’s how to follow these steps –
- Press Windows + R to launch the Run dialog.
- Type “
msconfig” on it and hit OK. - Doing so will invoke the System Configuration window.
- Go to the Services tab, and tick the checkbox that says – “Hide all Microsoft Services“.
- Click “Disable all” and head over to the Boot tab.

- Tick the checkbox left of “Safe boot” under “Boot options” and hit Apply > OK.

- This will prompt you to restart your computer. Well, do so and you will enter the Safe boot from the next login.
- Go to Settings > Windows Update, and hit Check for updates.

Since Safe Mode prevents all third-party services and apps from opening on their own, there won’t be any interferences from their sides. As a result of this, you must be able to download and install pending updates on your computer.
4] Manually download and Install pending Windows updates
Microsoft provides standalone packages for each and every update that comes for your device. You may find these packages available at its official catalog site. However, to download any update from here, you must know the relevant cumulative update number which is failing to install normally on your Windows PC.
If you are not able to install a particular update, note down its KB number and search for the same inside Microsoft’s Update Catalog. A list of matching results will appear on the subsequent screen. Pick the update that best matches your system architecture, and hit the Download button. This will open a new window, click the top link to start downloading the failing KB update from here.
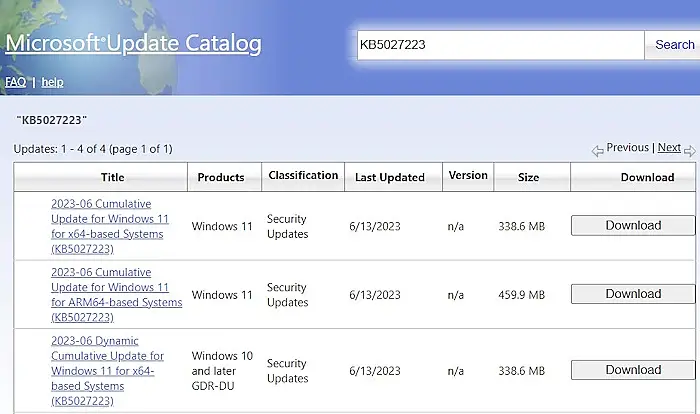
The update downloads as “.msu” file format which you may install by double-clicking on the setup file. To know more about downloading and installing updates from Update Catalog, you may read these guides.


