While setting up a Windows PC, users often make mistakes selecting a different time zone or regional settings. If you have also wrongly configured Date & Time or Region and want to change the Time zone on your Windows 11 PC, read this guide till the end.
Similar to that on Windows 10, Microsoft also allows setting up Date & Time automatically for its Windows 11 users. However, if this feature is not working for any reason, you may manually change the related setting on your computer.
How to Change Time Zone in Windows 11
Considering you have accidentally chosen a different Time Zone, or have forgotten to add your region while setting up your Windows 11 PC, follow the below steps. By the end, your device Date & Time will match your locale –
- Press Win + I to open Settings.
- Select Time & Language on the left navigation pane.
- Head over to the right side and click Date & Time.

- Use the drop-down menu next to the Time zone and select the region where you reside.

- Now, ensure the “Set time automatically” toggle switch is turned On. If you find this toggle switch “enabled”, turn it Off and then turn it On again. Do the same for the “Set time zone automatically” setting as well.
- Scroll down to Additional settings and hit the Sync now button.

- Check the current timing on the right bottom of your display screen. You will find the current date & time on your PC matching your locale setting.
How to manually set the Date & Time on your computer?
If for any reason, the time displayed is still incorrect, you may change “Date & Time” manually as well. To do so, follow these easy steps –
- First of all, disable the toggle switch – “Set time automatically“. If not, the setting to manually “change date & time” remains greyed out.

- After you turn off setting time automatically, click the Change button available beside “Set the date and time manually“.
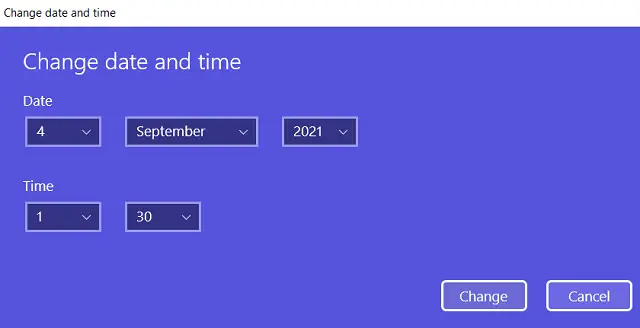
- On the next window, modify the date and time as per your locale settings.
How can I change my region on Windows 11?
While setting up a Windows PC for the first time, many users simply skip changing the default location. At a later stage, you notice this flaw and want to correct it. If that’s the case, use the steps below to change the regional settings –
- Right-click on the Windows icon and select Settings.
- Select Time & language and then Language & region.
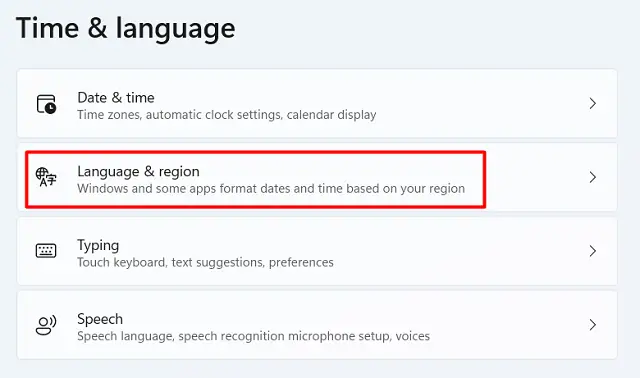
- Scroll down to the Region, use the drop-down menu available next to it, and select your native country.
Alternatively, you may also directly click on your country name to reach out to the Region setting page.

How do I add an additional Clock on Windows 11?
If you want to add an additional clock to your Windows 11 PC or simply change the time format, do the following –
- Launch Windows Settings by pressing the Windows key and I.
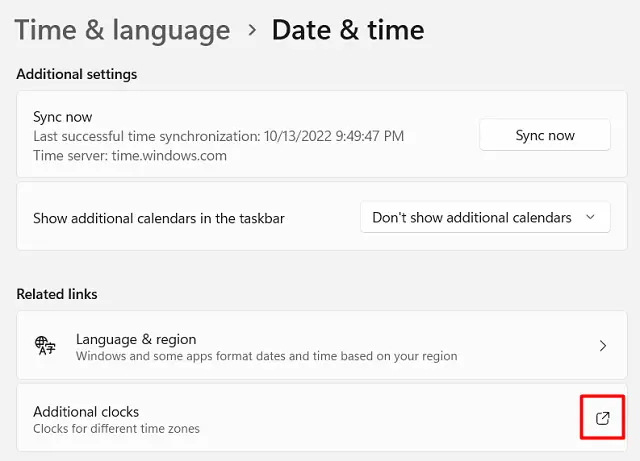
- Go to Time & language > Date & Time next.
- Scroll down to the Related links section, and click on Additional clocks.
- The date and time window will pop up next. You will be on the Additional Clocks tab.
- Tick the box against both checkboxes and choose your two different time zone.
- Click Apply then OK to confirm the recent changes.
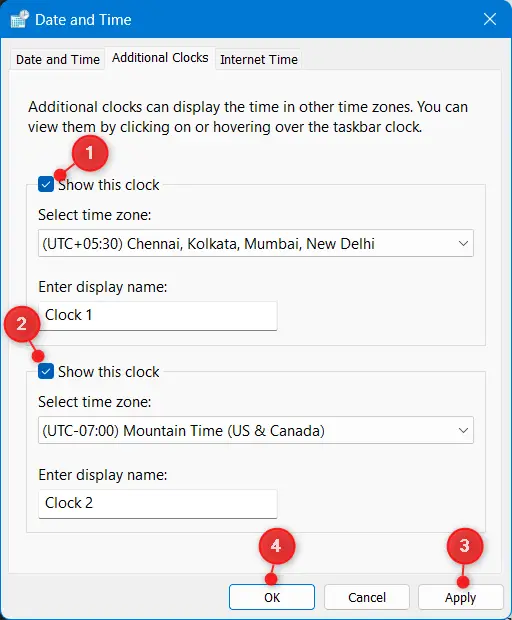
That’s it, from now onward, whenever you click once on the Date & Time on the taskbar, you will see two different clocks.
How to change the Time format on Windows 11
If you want to change the time format on your Windows 11 PC, follow these easy steps –
- Launch Settings (Win + I), and navigate to the below path first –
Time & language > Date & Time > Additional Clocks (under Related links)
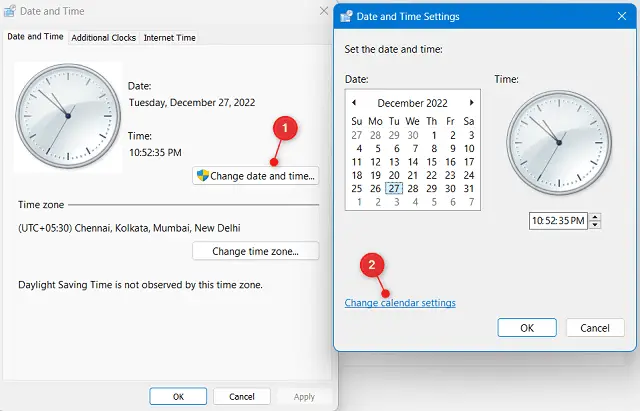
- When a pop-up window appears, go to the Date & Time tab.
- Click the button – “Change date and time“.
- On the Date and Time Settings window, locate and click on the link – Change calendar settings.
- You may now make the necessary changes under the Date and time formats section to change how it appears on your display screen. All you require here is to use the drop-down menu next to Short date, Long date, Short time, or Long time, and see how it changes Date & Time on the taskbar.
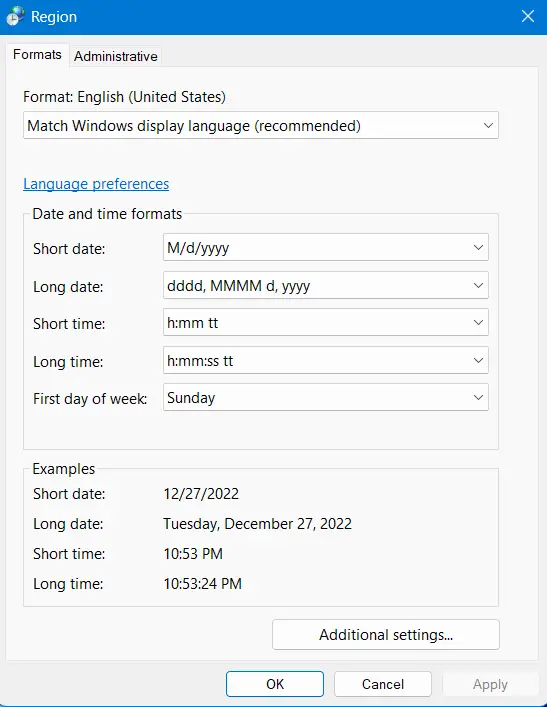
- The chosen setting will display how it looks in a box under Examples.
- Click Apply then OK to confirm the recent changes.
- You will be back on the Date & Time settings window. Click Apply and then OK here as well.
Click Apply and then OK on the Date & Time window again and your preference will start appearing on the taskbar.
What if I continue using incorrect “Date & Time”?
Normally, this would not affect any basic operation or functionality on Windows 11. However, at times, this may start causing update-related issues on your computer. This is because of the fact that the system requires connecting to Microsoft servers online and searching for pending updates. Amidst searching for available updates for your device, incorrect Date & Time may prevent the updates from installing. So, you should always correct the Date & Time when you find this wrongly set.
Read Next

