Windows 11 22h2 is out and available to all users starting 20th September. One thing users were hoping to get was Tabs inside File Explorer. This feature is still missing on the new operating system, however, there’s a way by which you can enable Tabs in File Explorer.
To enable this feature, you have to first install an application and configure its settings on Windows 11 PC. After you turned On the tabbed File Explorer, it resembles exactly like Chrome, Firefox, or any other web browser. Let’s see what that tool is and where you can get this tool online.
Enable Tabs for File Explorer in Windows 11
If you would like to enable tabbed Windows Explorer in Windows 11, follow and apply these simple steps –
1] Via Out-Of-Band Update Windows 11 KB5019509
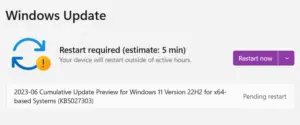
Oct 18, 2022, Out-Of-Band Update KB5019509 brings the long-awaited features like tabbed File Explorer, Taskbar Overflow Menu, and selective addition of items to Widgets on its version 22h2. You may get this update directly from Microsoft Update Catalog based on your system architecture. Visit there and download the respective Standalone package. As this update is available in .msu file format, all you require is to double-click on it, and your Windows 11, version 22H2 upgrades to OS Build 22621.675.
2] Using Third-Party too available at GitHub
- First of all, visit the GitHub website and search for ViveTool v0.2.1.
- Download the ViveTool v0.2.1 zipped format.
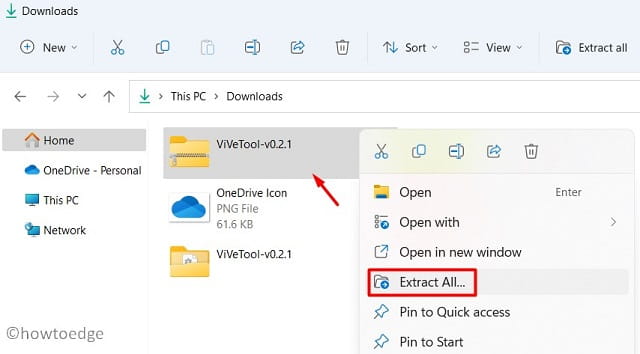
- After you downloaded its zip folder, right-click on it, and select Extract all. See the Snapshot below –

Now that you have the required setup file, install it on Windows 11 via Command Prompt. To do so, follow the steps outlined below –
- Open the extracted folder and copy its URL.

- Press Win + R, type CMD, and hit Ctrl + Shift + Enter keys altogether.
- Doing so will invoke Command Prompt as administrator.
- Copy/paste “cd copied URL” without quotes and press Enter to install ViveTool on your computer.
cd\
- The above command will take you to the root drive. Now, run these codes one by one, and don’t forget to press the Enter key separately.
cd C:\users\User_Name\Downloads
cd ViveTool-v0.2.1
start vivetool
- The code should resemble the below path –
- Make sure to replace the username with your own username on the computer.
- Next, execute this command to enable tabs in File Explorer on your Windows 11 PC.
vivetool addconfig 34370472 2

That’s it, close CMD and press Win + E. Check if the File Explorer is now opened with the tabbed feature. In case, there aren’t any tabs in File Explorer, you need to enroll in the Dev Channel using Windows Insider Program.
After you become an insider, re-follow the above steps and you will see the tab-creating feature inside File Explorer. For enabling this feature on Windows 11, you must be on OS Build 22572 or a higher version.
How can I disable the tabbed feature on Windows 11?
Disabling tabs in File Explorer is quite an easy process. All you require is to open CMD as administrator, and run the following code –
vivetool delconfig 34370472 2
Windows Explorer will now stop displaying the tabbed feature on your computer. I hope this article helps to launch the tabbed feature inside File Explorer.
More on tabbed Windows Explorer
The developers at Microsoft were long working on a project that adds tabs in File Explorer on Windows 11. They finally introduced this feature on its preview build update 22572 in the Dev Channel of the Windows Insider Program.


