The error code 0x80072F8F is basically an activation issue and may prevent Windows updates from installing as well. When this occurs, you may receive an error message that reads – “a security error occurred“. However, it mostly appears due to incorrect Date & Time settings on your Windows 11 or 10 PC.
Apart from this, there are other reasons as well that may trigger this issue like – corrupted DLL files, enabled Firewall, etc. Well, worry not as you can easily fix this issue by applying the five-six workarounds discussed in this guide. Let’s explore the solutions in detail –

Fix Windows Update and Activation Error Code 0x80072F8F
If you are getting an error code 0x80072F8F while updating Windows or during its activation, you may try out the below workarounds and see if any resolve this issue.
1] Disable Windows Firewall
Often it has been found that the Windows firewall prevents new updates from installing due to some internal glitches. It is thus recommended to disable Windows Firewall and check if you can now install pending updates on your computer. Here’s how to disable Firewall in Windows 11/10 –
- Press “Windows key + R” to launch the Run dialog.
- Type “
firewall.cpl” and hit OK to launch firewall settings. - On the left pane, you may find a setting – “Turn Windows Defender Firewall on or off”. Well, click on it.

- Tick the checkbox – “Turn off Windows Defender Firewall (not recommended)” under both Private as well as Public Network settings.
- Click OK to confirm this setting. Don’t restart your PC as the Windows Firewall will then resume interfering with the update process.
Now, check if you can install pending updates or activate your Windows copy.
2] Modify “Date & Time” to match your locale
In case your device date & time is not matching with the region where you reside, this may cause Windows updates to fail while installing. This might also result in activation issues on Windows 11 or 10 PC. So, go and check if your device date & time match the time zone where you live in. If you do find this mismatching, correct it by following the below steps –
- Right-click on the Windows icon (Win + X), and select Run.
- Type “
timedate.cpl” and click OK.
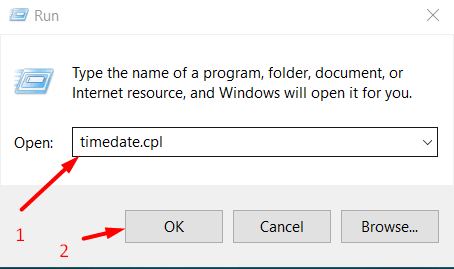
- Check if the time zone matches your regional area. If not, click on it and use the drop-down menu to select the appropriate time zone.
- If changing the time zone doesn’t correct the date and time on your computer, click “Change date and time”, and manually set it to match your regional area.

- Click Apply then OK to confirm the above changes and restart your PC.
I hope the error code 0x80072F8F resolves from the subsequent login.
3] Download and Install Root Certificate Update
Several users have reported that they were able to resolve this error code 0x80072F8F by simply installing the root certificate update on their PCs. Since you are still getting this bug on your computer, go and try installing this certificate. For this, do the following –
- First of all, open your web browser and search for – “Microsoft Update Catalog”.
- Click the first result, or simply visit this site.
- On its search bar, copy/paste “Root Certificate Update” without quotes and press Enter –
- Pick the one that best matches your system configuration and hit the Download button.
- Click the top link on the upcoming window and wait while the downloading finishes.
- Once the download completes, open the folder containing the setup file, and double-click on it.
Reboot your PC and check if you can update Windows without receiving an error code 0x80072F8F.
4] Re-register corrupted DLL files
The presence of third-party applications may interact with the system DLL files and make them corrupt. As a result, Windows fails to update or activate when attempted. If that’s the case, you must re-register the corrupted DLL files by following the below guideline –
- Launch CMD as administrator first.
- When the UAC window prompts, hit Yes.
- On the elevated console, execute the below codes one after another. Make sure to press the Enter key after each code –
regsvr32 softpub.dll /s
regsvr32 wintrust.dll /s
regsvr32 initpki.dll /s
regsvr32 mssip32.dll /s
- After you re-register all the above files, come out of the Command Prompt and restart your PC.
Sign back into your device again and check if the problem resolves.
5] Configure the corrupted registry
There is a possibility that the registry itself has been corrupted somehow. In such cases, you need to manually configure the relevant registry entries. Here’s how to do this –
- Press Win + R to launch the Run dialog.
- Type “
regedit” and hit OK. The UAC window will appear next, hit Yes to authorize opening it. - Inside the registry, use the left navigation to reach out to the below path –
HKEY_LOCAL_MACHINE/Software/Microsoft/Windows/CurrentVersion/Setup/OOBE
- Once you are there, look for the DWORD value named “MediaBootInstall”.
- When found, right-click on it and select the option – Properties.
- Change its value data field to “0“. Click OK to confirm the recent changes and close the registry window.
Now that you have modified the registry, launch Command Prompt as administrator and do the following –
- Copy/paste the below command and press Enter –
slmgr /rearm
- When this code runs successfully, you will see a success message.
- Type “exit” to come out of the Command Prompt and restart your PC.
- Check if your Windows copy is activated now.
6] Manually activate your Windows version
If for any reason, the activation issue is still there, manually activate your Windows version. Here’s how to do this –
- Press Win + S, and type “slui.exe” in the text field.
- Press Enter to visit
System > Activation. - When the UAC prompts, hit Yes.
- You may now activate your device using either Digital License linked to your Microsoft account or simply via using your genuine product key.
How to manually install Pending Windows updates
If the error code 0x80072F8F resolves, however, you are still unable to update your Windows 11 or 10 PC; you may download the relevant standalone package from Microsoft Update Catalog, and manually install it on your PC.
How do I solve an error code 0x8007000e in Windows?
The error code 0x8007000e is a Store-related issue that occurs mainly when installing new apps, upgrading existing ones, or sometimes even while opening Microsoft Store.
A few users reported receiving the same error code when they were trying to install a game or an application over Xbox. If that’s the case and you don’t know what to do next, here’s an article that might help you to overcome this issue on Windows PC.


