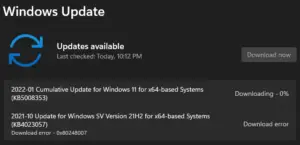
The error 0x800f08a is an update-related issue and it often occurs when you are installing the latest cumulative update on your Windows PC. Several users have raised the issue of “being not able to install the security patches” on their PCs due to reasons unknown.
This error accompanies an error message that reads – “There were some problems installing updates, but we’ll try again later with bug check value 0x800f08a“.

What causes Windows Updates to fail on Error 0x800f08a?
This update error usually occurs when your system meets one or a combination of the following conditions –
- File Corruption due to third-party antivirus
- Corrupted Windows update components
- Corruption inside the WinSxS folder
Now that you know the probable reasons behind this error code, let’s learn the six different ways to address this issue on Windows 11/10 PC. If you don’t want to go through a series of solutions, you better check this solution.
Windows 11/10 Update Error 0x800f08a Solutions
If you are failing to update your Windows operating system on account of this error code, consider applying these fixes –
1. Run Windows Update Troubleshooter
The built-in troubleshooter is the best way to resolve any update-related issue on Windows 11/10. So, we will first see how to use this tool and repair the underlying causes behind this error code. Here’s how to run this tool –
Windows 11:
- Press Win + I to launch Settings.
- Go to System > Troubleshoot > Other troubleshooters next.
- When this section expands, search for Windows Update under “Most frequent”.
- Once found, click the Run button available on it.

- Wait for the troubleshooter to start, and when it does, follow the on-screen instructions.
I hope the error 0x800f08a resolves following this fix alone. If not, follow the below set of solutions.
Windows 10:
- Use WinKey + I to start the Settings app and select Update & Security.
- Click the Troubleshoot option on the left column.
- Move to the right side and click the “Additional troubleshooter” link.
- On the subsequent screen, click to expand Windows Update.
- Now, hit “Run the troubleshooter” on the extended pane.

- This tool then immediately starts looking for corrupt files and repairs them.
- Once this completes the repair process, reboot your Windows.
2. Reset Windows Update Components
In case the error still persists, there might be corruption within the Update components. Or, you have installed a faulty cumulative update on the computer. To correct this, one should purge the Windows Cache folders along with closing and restarting the essential services.
Here’s what you need to perform on your Windows 11/10 PC –
- First of all, open Command Prompt with admin rights.
- On the elevated console, run these codes one after another to stop some essential services. Don’t forget to press the Enter key after each command –
net stop wuauserv
net stop cryptSvc
net stop bits
net stop msiserver
- Next, copy/paste these two codes separately followed by the Enter key to rename Softwaredistribution and Catroot2 folders –
ren C:WindowsSoftwareDistribution SoftwareDistribution.old
ren C:WindowsSystem32catroot2 Catroot2.old
Quick Note: You may check whether this renames the corresponding folders or not by visiting their respective locations –
|
- Now, restart the services that you stopped earlier using the below codes –
net start wuauserv
net start cryptSvc
net start bits
net start msiserver
Restart your Windows PC, and when it does, check if the error 0x800f08a resolves.
3. Clean WinSxS
Several users reported solving this error code when they clean the WinSxS folder on their devices. If there is some file corruption within this WinSxS folder, it could cause updates to fail on an error 0x800f08a. Cleaning this folder is quite a simple task which you may do by running a single-line command on Command prompt.
Here’s how to clean up this WinSxS folder –
- Use Win+R to start Run, type cmd, and press Ctrl+Shift+Enter keys together.
- This will invoke the Command Prompt with administrative privileges.
- Now, copy/paste the below code near the blinking cursor –
dism /online /cleanup-image /startcomponentcleanup

- Hit Enter so that DISM starts scanning and repairing any errors inside this folder.
- When you get the “Operation Completed Successfully” message, Reboot your PC.
4. Use System Restore Points
If you have previously generated a system restore point, you may use that to restore your device to an earlier state. As there was no such issue occurring then, reverting back is always a good idea. Of course, if you didn’t have a restore point on your System, you can’t use that. In that case, you may perform a clean installation of Windows.
Assuming you do have a system backup point, follow these steps to revert back your PC to its previous working state –
- Press Win+Pause/Break to enter Control Panel Home.
- Click System Protection available on the left column.
Note: On Windows 10 version 2004, using the above shortcut will open the Settings window. You may find the “System Protection” option in the right column. See the Snapshot below –

- The system will then redirect you to the System Properties window.
- Go to the System Protection tab and hit System Restore followed by Next.
- When a list of available restore points comes into view, choose the recent one.
- Now, click Scan for affected Programs button to check whether this backup contains any bugs or not.
Tip: If this displays “None detected” under the “Programs and drivers that will be deleted”, you are good to go. Otherwise, note down the programs or drivers list that you are going to lose after performing this task.
- Close the current window, re-select the backup point, and tap Next again.
- Let the system restore your PC to its previous state. Once this is over, you won’t be getting the 0x800f08a error anymore.
5. Manually Install Windows 10 latest Security-Patch
Since this bug has occurred after installing the latest cumulative update, you may roll back your PC to the previous state. If not, you can always manually download the patches that come before and install this on your computer. Here’s how to perform this task –
- First of all, Visit the Windows 10 Update History page. Windows 11 users may visit this site instead.
- On the left column, select the Windows 10 version thereafter scroll down to “In this release“.
- Note down the KB number and reach out to the Microsoft Update Catalog webpage.
- Paste the KB number noted down above and hit Enter. A list of matching results will pop up.
- Here, hit the Download button next to the system architecture to which your PC currently belongs.
- On the subsequent screen, click the top link to download the .msu file.
After the file gets downloaded, browse to the Download folder and double-click the setup to install this.
When did this update error 0x800f08a first appear?
This error first appeared on Windows 10 during the installation of updates – KB4566782 and KB4565351.
Conclusion
I hope this guide helps to resolve the Update error 0x800f08a on the computer. However, if not, you are left with only one option i.e. clean installation of Windows 10. Installing a fresh copy will definitely get rid of all such bugs or errors.


