Windows 10 21H2 is out and is rolling to all users via the Windows update section. You may also get this feature update via the Windows Update Assistant tool. However, what if, you want to clean install this new version. Well, to do so, you need to get the Windows 10 21H2 ISO file first via Media Creation Tool/Rufus and make it bootable.
After you have created the bootable image of the Windows 10 21H2 ISO image file, insert the USB/disc into their respective ports, and start upgrading to the new Build OS. Lots of features that Microsoft had decided on for the May 2021 Update were dropped due to the sudden release of Windows 11. With Windows 10 Nov update now available for the general public, it is interesting to find whether those features are now available or not.

Clean install Windows 10 21H2 using an ISO file
To fresh install Windows 10 21H2, you need to first get access to its ISO file. For this, you may either download Media Creation Tool or Rufus (a third-party tool).
1] Get Windows 10 November 2021 Iso File
Windows 10 version 21H2 is now available for all users and you may get its ISO file directly from its official site. Since you are planning to clean install this version, don’t go for Windows update assistant. Instead, scroll below, and hit the button – Download Tool now.

Note: If you are willing to know other ways of upgrading your system to Windows 10 21H2, read this tutorial instead.
Assuming you have downloaded the MediaCreationTool21h2 tool, double-click on it to begin its installation.
- When this tool is installed on your computer, double-click again on it to start this application.
- When the UAC window prompts, tap Yes to authorize the access.
- Subsequently, click Accept to give your consent to “Applicable notices and licenses terms”.
- Tick the “Create installation media (USB flash drive, DVD, or ISO file) for another PC” radio button and hit Next.
- That’s it, this tool now starts downloading the Windows 10 21H2 setup file. This will take some time depending upon your internet speed, so wait accordingly.
- After the download completes, this presents two options – “USB Flash drive”, or “ISO file”. Select whichever mode suits you the most.
Tip: We recommend going for ISO file as this way you can change the boot mode – UEFI or MBR anytime using a third-party application.
- When the Media creation tool finishes its task, hit Finish to close its window.
How to upgrade Windows 10 to version 21H2
Since you already have the Windows 10 21H2 ISO file, make it bootable. Here’s how the process goes –
- Right-click on the ISO file, and select the option – Mount.
- Press Win + E to open File Explorer. You may see Windows 10 Nov 2021 Update ISO image mounted under Devices and drives.
Now that you have the bootable image, open the disc image, and double-click the setup file.
- On the Windows 10 Setup, tick the box “I want to help make the installation of Windows better” and hit Next.

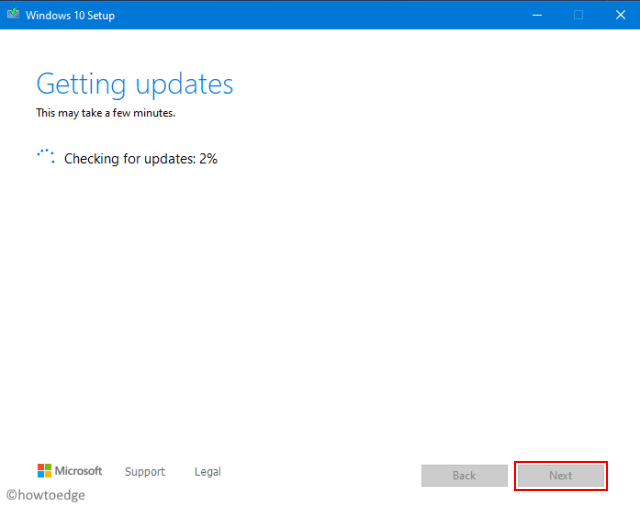
- This runs and looks for any available updates online. Subsequently, select the Windows 10 Edition and click Next again.

- Click Accept to accept all the “Applicable notices and license terms”.

- Now, mark the “Keep personal files only” radio button followed by Next.

- The Setup checks again for any available updates online. Once this finishes press the Next button again.
- Click the “Finish” button to restart Windows. Sit back and relax while the Media Creation tool upgrades the operating system to Windows 10 21H2.
2] Fresh Install Windows 10 21H2 via Rufus
Rufus is a lightweight app that hardly takes 1.5 MB of disk space and is a very effective tool to download and install any version of Windows 11/10 on your computer. Here’s how you can download the Windows 10 21H2 ISO file using Rufus.
- First of all, download Rufus’ latest version.
- Attach a USB drive, and double-click on the Rufus icon to launch this tool. In the screenshot below, we haven’t added any USB drive as we have already downloaded the required setup file.
- During the launch, this may ask – “Do you want to allow Rufus to check for applications updates online“. Click “No” as you already have the ISO file.
- Assuming you didn’t download the ISO disc image above, click the Yes button.
- Now, use the drop-down menu next to Boot selection, and select the option Download. Clicking on this button again will force Rufus to search for available updates on your computer.

- Select version, release, edition, language, and architecture as follows –

- Make sure to mark the checkbox “Download using a browser”, and hit the Download button.
- Wait while this tool downloads the Windows 10 21H2 ISO image file.
- By default, when the download completes, the below settings get auto-selected.
- Partition Scheme – GPT
- Target System – UEFI (non CSM)
- File System – NTFS or FAT32
Note: If your device doesn’t support UEFI, change the above options as mentioned below –
-
- Partition Scheme – MBR
- Target System – BIOS (or UEFI-CSM)
- File System – FAT32
- Hit Start and wait for this conversion to complete.
- Unplug the USB drive when the bootable file is ready i.e. reaches 100%.
How to Clean Install Windows 10 Nov 2021 Update
Here’s how to clean install Windows 10 21H2 using the bootable ISO image –
- Plugin the bootable media into one of the ports and restart your computer.
- While your PC is loading, press the boot menu like – Esc, Del, F6, F9, or F12.
- Select the USB device to launch Windows Setup Screen.
- Choose preferred options on the Windows Setup screen such as – Language, Time/Currency, and Keyboard.
- Click Next followed by Install now.

- Tick the box left of “Accept the license terms” and hit Next again.
- When prompted “Which type of installation do you want”, select the option – Custom: Install Windows only (advanced).
- Select the disk drive on which you want to install Windows 10 21H2 OS, and hit the format button.
- Keep all other hard drivers as they are if you don’t want to get rid of data available on those disks.
- Click Next again and the Windows 10 21H2 starts installing.
- Wait for Windows to install successfully. In the end, you will be greeted by the Out-of-box experience screen.
- Unplug the attached media, and follow the on-screen instructions.
That’s it, your device is now upgraded to Windows 10 version 21H2.

