Recently, a few users receive an error code 0x800f0988 when they were trying to update their existing Build OS. This error might have occurred due to some internal glitches and can be resolved quite easily. All you require is to re-visit Windows Update and click Check for updates. The problem resolves immediately afterward.
However, this error may also occur because of some advanced reasons like – file corruption, stored cache, etc. Well, if that’s the case, you must perform the right solution which you can clearly acknowledge by reading this post. As per several users, this bug appears with an error message that reads the following –
Updates Failed, Error 0x800f0988, There were problems installing some updates, but we’ll try again later.
Why does Error 0x800f0988 occur?
The error 0x800f0988 typically occurs when your system meets one or more of the below conditions –
- Corrupted Windows update components
- No spaces left inside the WinSxS folder
- Missing or damaged system files
- Incorrect Date & Time
Let’s see six working ways running in which you can easily overcome this update error on Windows 11/10.
Update Error 0x800f0988 Solutions
To Fix Update Error 0x800f0988 in Windows 11 or 10 PC, try the below workarounds, and see if any fixes this issue.
1] Manually update Windows
Many a time, errors like this might occur because of network failure of any kind. So, visit the Windows update section, and hit the button – Check for updates. You may find this section in the path below –
Windows 10: Settings > Update & Security > Windows update > Check for updates
Windows 11: Settings > Windows update > Check for updates
If this fails again on error 0x800f0988, you may download the respective standalone package from the Microsoft update catalog, and manually install it on your PC. Here’s how to manually download and install pending updates.
2] Run Windows Update Troubleshooter
The Windows Update Troubleshooter is a pretty powerful utility that can diagnose a variety of update-related issues easily. It repairs the corrupted Windows files by applying the following quick steps –
- Right-click on the Start button and select the Settings option.
- Choose the Update & Security category.
- Click Troubleshoot on the left pane and head over to the right side.
- Here, you will find a link to Additional troubleshooters. Well, click on it.
- On the succeeding window, scroll down and click to expand Windows Update.
- When this box expands, hit the option – Run the troubleshooter.
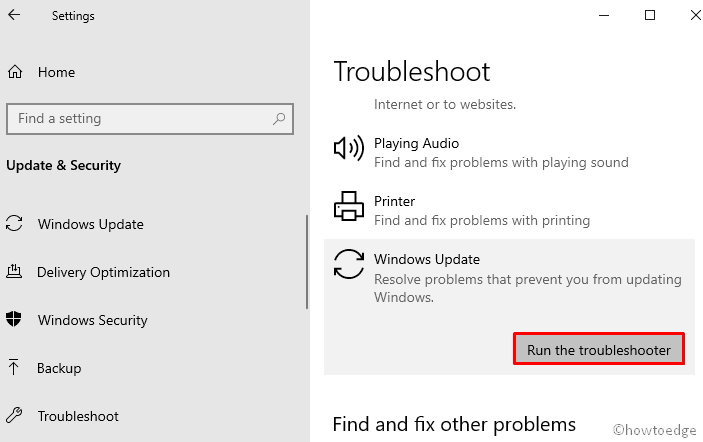
- The system will force launch the troubleshooting window. Hit next and follow the on-screen instructions to fix this issue.
Note: Microsoft has changed the troubleshooter setting on Windows 11. If you are facing this trouble on Windows 11, do the following instead –
- Press Win + I and select System.
- On the adjacent right pane, click Troubleshoot > Other Troubleshooters.
- You will find an option to Windows Update on the next screen, hit the Run button.

3] Clean up the WinSxS folder
Sometimes, the appearance of garbage data under the WinSxS folder prevents installing the monthly patches on the PC. From the user’s perspective, cleaning the directory using DISM helps to sort out the problem. Let’s see how to do –
- Open the Windows Search using the Win+S shortcut key.
- In the text area, type cmd to search Command Prompt.
- Once you find it, right-click on it and then select Run as administrator from the context menu.
- If UAC prompts on the screen, click on the Yes button to give your consent.
- On the following screen, type the following command and hit Enter key.
dism /online /cleanup-image /startcomponentcleanup
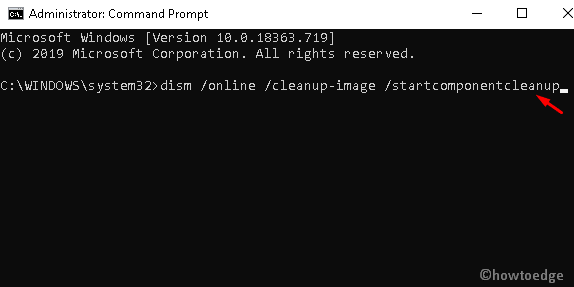
- When it clears the WinSxS directory, restart your system and try to install the pending files again.
4] Uninstall the Additional Languages to Fix Update Error 0x800f0988
Since English is the default language in Windows 10. However, if you select another as a prefixed language, it might create trouble and leads to Update Error 0x800f0988. Follow the below guidance to select English as the prime language –
- Use the “Windows + I” shortcut to enter the default settings page.
- Choose Time & Language category from the available options.
- From the left pane, select Language and then move to the right panel.
- On the right side, locate Preferred languages, and ensure English (United States) has been selected.
- If any other language is set as default, click on it and hit the Remove button as shown in the below snapshot.
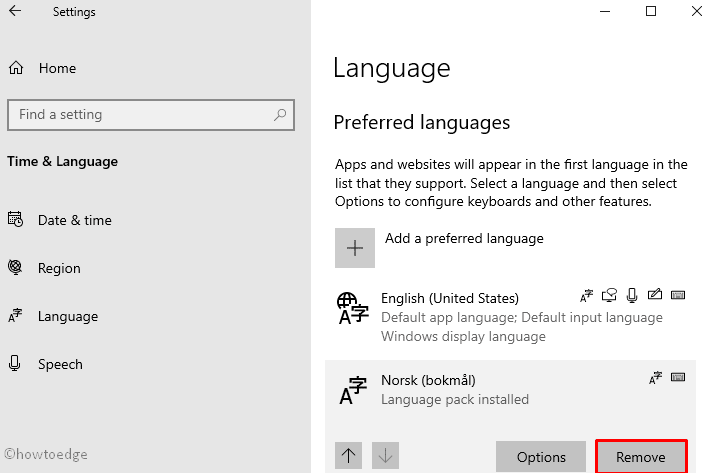
- Once you make the changes, restart your PC and try to install the pending patches available in your system.
5] Reset the Windows Update Components
The error code 0x800f0988 might also be the direct result of corrupted or misconfigured update components. In order to resolve this issue, one must reset all the components and purge Windows Cache folders. Here’s how to do this task –
- Right-click on the Taskbar and select Task Manager.
- When the Task Manager window opens, click on the File menu and select the Run new task option.
- In order to create a new task, type cmd (also check Create this task with administrator privilege box) and then click on the OK button.
- On the following page, type the following command and press Enter after typing each URL.
net stop wuauserv
net stop cryptSvc
net stop bits
net stop msiserver
- The above commands will disable some services running in the background.
- Now, rename the SoftwareDistribution and catroot2 folders using two different commands.
ren C:WindowsSoftwareDistribution SoftwareDistribution.old
ren C:WindowsSystem32catroot2 Catroot2.old
- After that, you need to restart the services which you have previously stopped. So, type the below commands and again type Enter key after writing each URL.
net start wuauserv
net start cryptSvc
net start bits
net start msiserver
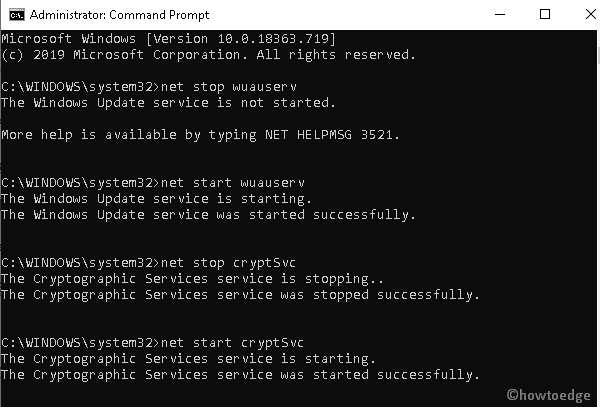
- Once you complete the above steps, it will successfully reset the Windows Update Components. So, now try to download the pending updates on your Windows 10 PC.
6] Reset Windows 10 to Fix Update Error 0x800f0988
If unfortunately, you don’t find any above methods beneficial to fix the Windows Update Error 0x800f0988, resetting the PC will probably help you. So, go to the steps and follow them carefully.
- Click on the Start button and type Reset this PC.
- Locate the result from the list and then open it.
- Navigate to the right pane, and hit the Get Started button under the Recovery tab.

- On the next screen, click Keep my Files followed by Next.
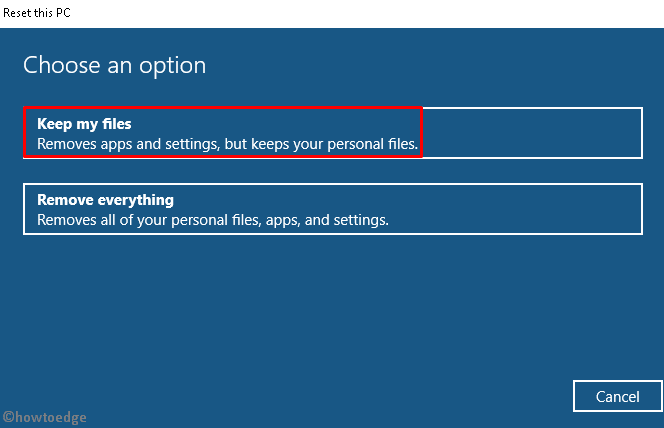
- Now hit Reset to confirm resetting Windows.
Your device will reboot and then begin the restoration process. Wait for this process to complete and once over, sign back into your device and check if the error code 0x800f0988 resolves now.
How do I Fix Boot Failed Error on Windows?
When you press the power button on Windows, it usually displays the operating system loading and you enter the startup screen. However, when the system is unable to load Windows boot files, the normal boot will fail and display some error codes.
This happens mostly because of some internal glitches, or when hardware has gone rogue on your Windows PC. Check for possible hardware corruption by performing CHKDSK and Memory Diagnostic tools. When all seem to be fine, you should check if your system is lacking some latest updates by Microsoft. Download and install the update manually on your computer and see if the error resolves this way.


