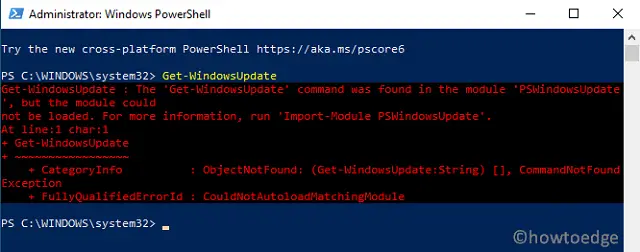
Windows PowerShell is one of the best terminals out there to perform several basic operations, time-consuming administrative tasks, and many others. Some even use this platform to forcibly update Windows 10, prevent buggy updates from occurring automatically, etc. However, in certain cases, you won’t be able to run PowerShell scripts locally without signing.
Well, you are getting the error message just because Windows 10 doesn’t allow running scripts by default. However, it does provide an option to edit this setting for developers under Update & Security. Read the below guideline to modify the related setting in Windows 10 –

Allow Local PowerShell Scripts to run without signing
If you are not able to run PowerShell scripts successfully in Windows 10, use these steps –
- Press WinKey + S to invoke the Search window.
- Type “Allow Local PowerShell Scripts” in the text field.
- Under the Best Match section, you will find a result – “Allow local PowerShell scripts to run without signing”.
- Head over to its preview, and hit Open. See the Snapshot below –

Note: You may get this setting by navigating to the below path as well.
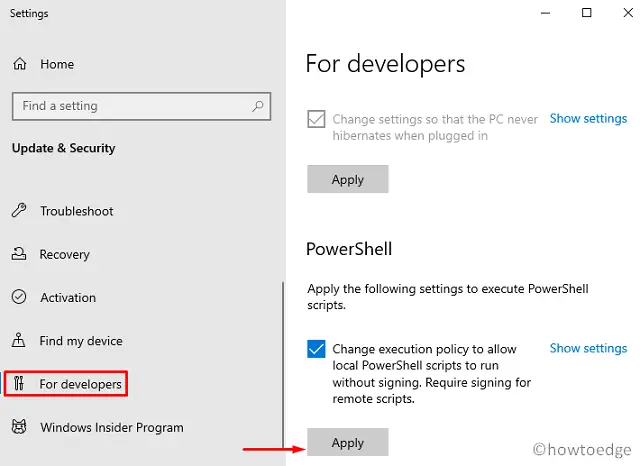
(Win + I) > Update & Security > For Developers
- On the right pane, scroll down to the last section i.e. PowerShell.
- Tick the checkbox – “Change execution policy to allow running local PowerShell scripts”.

- Hit Apply and restart your PC. This setting will become greyed out, so you can’t modify it later.
That’s it, you may run the PowerShell scripts locally on Windows 10 and the same should run without getting into any error messages.
Read Next:


