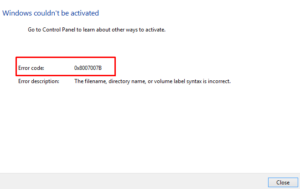
Did you fail to activate Windows 10 because of some activation error 0xC004F213 on your computer? Well, such errors are bound to appear when you replace your old hardware with a new one. Basically, when you install Windows 10 operating system, the company treats it as a fresh one and hence the issues arise.
In order to resolve this activation issue, you may try retrieving the pre-installed product key via PowerShell. Once you get your hands on the genuine product key, use it to reactivate Windows 10. In case this method doesn’t work, run the activation troubleshooter or sign in to your official account. Since Microsoft stores the activation keys in the form of digital licenses, you might succeed to activate your computer. Let’s explore how to troubleshoot fixing error code 0xc004f213 on Windows 10 –

Fix: Windows 10 Activation Error 0xc004f213
If you are not able to activate Windows 10 PC because of the error code 0xc004f213, give a try to these workarounds –
1. Use the Preinstalled Product key
As per several users, they succeed to fix the error code 0XC004F213 simply by using the preinstalled product key on their computers. Performing this, you will reassign your preinstalled activation key to your new Windows 10 PC. PowerShell provides an easy way to do so –
- Press Winkey + X and select Windows Powershell (Admin).
- When the UAC window prompts, hit Yes to grant administrative privileges.
- On the blue terminal, run the following code –
wmic path softwarelicensingservice get OA3xOriginalProductKey
- Running this code will unleash the preinstalled product key. Note it down or use the Ctrl + C shortcut.
- Close the PowerShell window and press Win + R.
- In the text bar, type ‘
ms-settings:activation‘ and press Enter. - Jump to the right pane, and click over the Change Product Key option.
- Use the previously fetched product key followed by Next.

- Now, follow the onscreen instructions to complete the remaining steps.
- If the preinstalled key was valid, you will succeed to end the error code 0XC004F213.
2. Run Windows Activation Troubleshooter
Windows 10 comes with an in-built troubleshooter that can identify and repair the underlying issues (resulting in an activation error). Troubleshooting Windows 10 this way should address the problem or at least provide the reasons behind it. Here’s how to perform this task –
- Press Winkey & I to launch Settings.
- Click Update & Security thereafter Activation on the left column.
- Head over to the right side and hit Troubleshoot link.

- When the User Account Control pops in, hit Yes to permit access.
- Wait for a while until this finds and repairs the probable issues.
Once this is over, Reboot your device and check if the problem gets resolved or is still occurring.
3. Use the Digital License linked to your Microsoft account
The error code 0XC004F213 occurs mostly in cases of replacing the motherboard with a new one. If you had previously logged in to your Microsoft account on previous hardware, the company must have created a digital license and linked that to your profile.
So, just boot into your device using your personal id and password. After you log into your account successfully, let your PC connect to the Microsoft servers. This whole process might take 12-24 hours to complete, so wait patiently.
4. Contact the official Microsoft Agent
If none of the above workarounds provide a definite resolution, you should contact the Microsoft Live agent. They will assist you in remote-activating your device. There are several ways to contact customer care by Microsoft, however, the contact page is the simplest way to reach them.
Just go to the Get help section, and start chatting with an online bot.

Note: This option will work only if you are running a genuine Windows 10 OS and have a valid license key.
That’s it, I hope you are now able to activate your copy of Windows 10.


