When you take a screenshot in Windows, where does it get saved? It depends on how you take the screenshot because there are different ways to do so. Let’s explore all the different methods of capturing screenshots and see where they get saved.
Where Are Screenshots Saved on Windows 11/10?
Both Windows 10 and Windows 11 offer multiple ways to take screenshots, which is why they are located in different places. You won’t have any trouble taking screenshots on Windows 11 if you know how to do it on Windows 10. Here are all the ways to capture a screenshot and where they go.

1] When You Use Print Screen (PrtScn)
Print Screen does not save screenshots by default if you press it to take a screenshot. The picture will instead be copied to a temporary clipboard that can be pasted and copied. In order to save your screenshot to your computer, paste it into a program like Microsoft Paint and save it where you want.
In the same way, you can also take a screenshot by pressing Windows + Shift + S or Alt + Print Screen. These results will be copied to the clipboard rather than saved.
If you need to save a screenshot from your clipboard to your hard drive, use the below steps:
- Click on Start and search for Paint, and then select it from the results.
- Once you’re in the Paint app, press Ctrl + V to paste the image.
- Now press the Ctrl + S keys on your keyboard to save the screenshot to your disc.
- Select the location where you want to save the screenshot, type the filename, and then click Save to save it on your computer.
2] When you’re using Windows + Print Screen
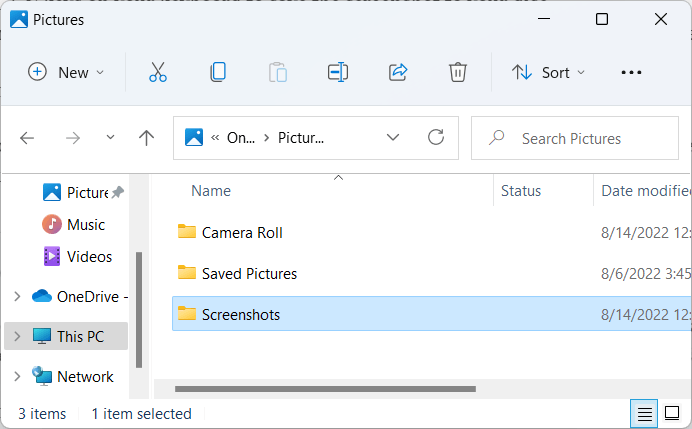
When you press the Windows+Print Screen keyboard shortcut to capture a portion of the screen, it saves the picture in the Pictures > Screenshots folder. If you want to find it, navigate to the following path:

C:\Users\(username)\OneDrive\Pictures\Screenshots
Note: Here, (username) represents the account that you were using at the time of the screenshot.
If you use this method to take a screenshot, it takes a screenshot of your whole screen and then saves it as a PNG file. File Explorer provides easy access to the ‘Pictures’ folder. The screenshots taken this way are stored in a folder called Screenshots.
3] When you’re using Snipping Tool or Snip & Sketch
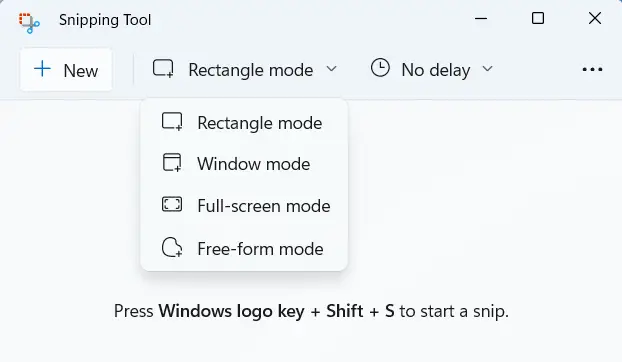
Windows 11 uses Snipping Tool to capture screenshots, while there is Snip & Sketch tool if you’re on Windows 10. To take a screenshot, press Windows + Shift + S on your keyboard. Taking a screenshot will appear at the top of the screen, and it makes the screen dim slightly.

After you take the screenshot, you will receive a notification in the bottom right corner of the screen. Clicking that notification will open the screenshot in the Snipping Tool for editing it. If you take a screenshot using the Snipping tool, the image will be saved to the clipboard, which you can paste into any specific program to edit. Click the Save button at the top right to save it.
4] If you use the Xbox Game Bar
Taking screenshots with the Game Bar is another option, even if it might not be your first choice. It’s common for gamers to take screenshots and record videos through this method. You can take a screenshot by pressing Win + Alt + Prt Scr. In addition, you can capture an active window by selecting the camera icon in the Game Bar when you press Win + G.
5] When You Use a Third-Party Screenshot Tool
If you want to take screenshots with an application that’s not developed by Microsoft, you’ll have to check the settings of that application to determine where it stores screenshots. If you are still having trouble finding your files, you might try looking in either the Documents or Pictures folders in File Explorer.
6] What to do if you can’t find your screenshots
Can’t find your screenshots? Here’s a tip that may help.
To begin with, take a new screenshot. Next, go to File Explorer and search for recently modified files. Follow these steps to do so:
- Press the Windows + E keys to open the File Explorer window.
- Then, type datemodified:today into the search bar and press Enter.
Note: If you suspect it might be on one drive or folder, narrow down your search by browsing to that drive or folder first.
- In the search results list, you will soon see files created recently.
- If you find the screenshot file you just captured, right-click on it and select Open File Location from the context menu.
- The location of the saved screenshot will be open in File Explorer, and you may also find other screenshots there.
Read Next: How to prevent Apps from taking screenshots in Windows 10


