The graphics card is the most important component of a PC for gaming, as it is responsible for displaying images on the screen. It’s crucial to know what kind of graphics card you have installed on your computer so that you can adjust the settings on your computer for the best performance. Otherwise, games will lag or not play at all.
This article will show you four different methods on how to check your Graphics Card in Windows 11. So, let’s learn about them.

How to Check your Graphics Card in Windows 11
The graphics card has a major impact on the quality of your gaming or photo-editing experience. It’s important to keep up with the latest updates and drivers, as well as to change from time to time if you’re experiencing performance issues.
Here are some methods on how to check your graphics card in Windows 11 –
- Using Windows Settings
- Using the DirectX Diagnostic Tool
- Through the system information tool
- From the Device Manager
1] Using Windows Settings
You can use the Settings app to find out what graphics card is currently installed on your device. To make this happen, follow these steps –
- Press the Windows+I keys to open the Windows Settings.
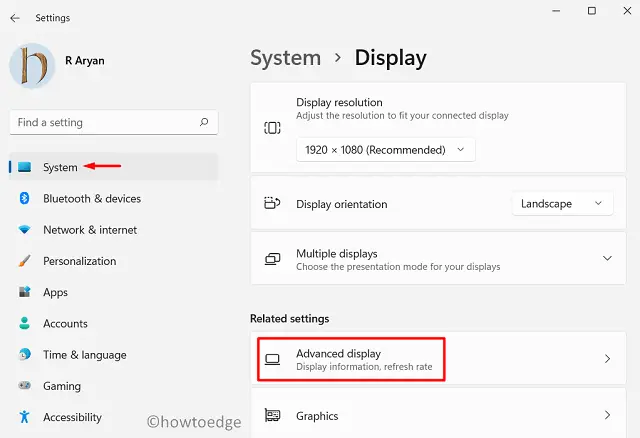
- In the left section of the Settings window, click on the System tab.
- Next, click the Display option from the list on the right.
- Under the Related settings option, click on the Advanced display option.

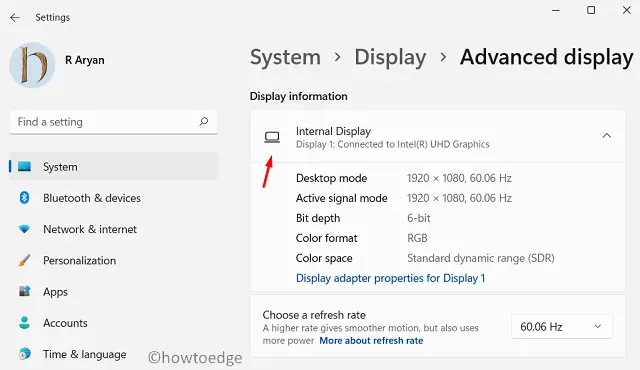
- Select Internal Display from the Display information.

Here’s where the model number and manufacturer of your graphics card are located. You can get additional information on your graphics card by clicking the “Display adapter properties for Display 1” option.
Note: In the Settings app, if you have more than one installed on your Windows computer, you can only see information about one graphics card.
2] Using the DirectX Diagnostic Tool
DirectX is a Windows program that enhances multimedia experiences, including 3D gaming, graphics, and networking. This program lets you access the graphics cards installed on your computer quickly. To do so, follow these steps:
- Open the Run tool using the “Windows + R” keys.
- Type “
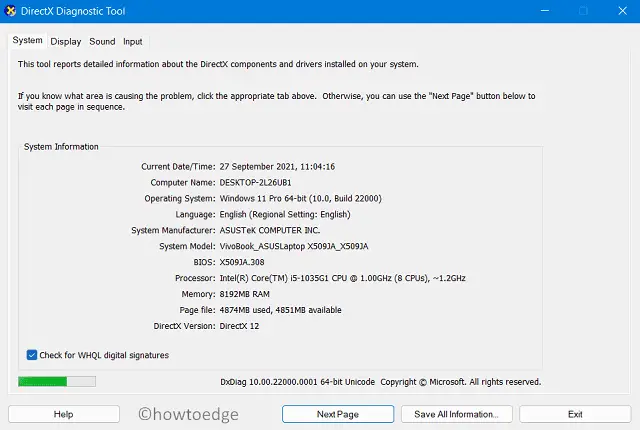
dxdiag” into the search box and press Enter to launch the DirectX Diagnostic Tool - If a confirmation message appears, click on the Yes button to continue.
- To view information about your primary graphics card, click on the Display tab.

3] Through the System Information Tool
Using the system information tool is another way to check the information about your graphics card. Here are the steps you can use to do so –
- Right-click on Start and select the Run option.
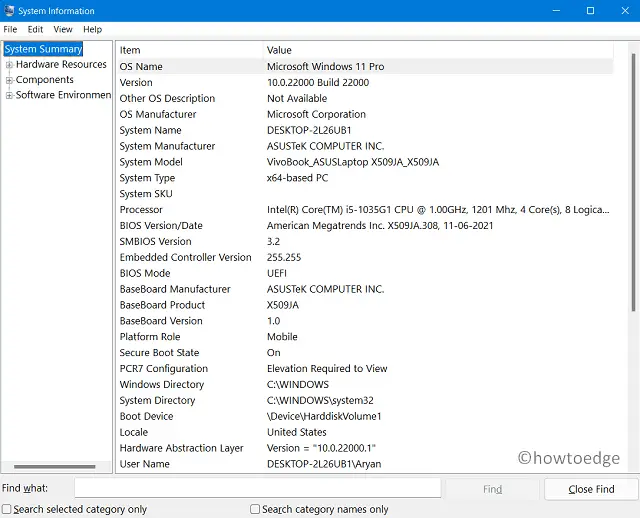
- Now you need to type msinfo32 into the Run dialog box to open the System Information window.
- Expand the Components section to the left of the screen.
- From the expanded options, choose Display.
- Now all the graphic cards on your computer will be displayed to the right.

4] From the Device Manager
Device Manager maintains information regarding input and output devices as well as their hardware properties. To check the graphics card using the Device Manager, use the following steps:
- Open the Settings menu using the Win+I keys.
- You should then click the System tab in the left window sidebar.
- In the left part of the window, click on the About tile.
- Scroll to the Related Settings section and click on the Device Manager option located there. You will now see a separate console window called Device Manager.
- Now click on the arrow icon next to the Display adapters. It will expand the section and show the list of installed graphics cards.
- In order to see all the details for the chosen graphics card, double-click it to open a new window with the relevant information.
Read Next:


