Often we end up adding more devices than we use on our Windows PC. With each new device added to your computer, the system starts running a bit slow and may even sometimes crash. So, it is essential to check which devices really need to be on your device and which ones don’t. This article presents two simple ways by which you can either disable or re-enable audio devices on Windows 11.
The audio device could be an output device just like Speaker or an input device like Microphone. It is to be noted that you are simply stopping the usage of an audio device. You may enable them back whenever the need arises.
Disable Audio Devices on Windows 11
If you no longer want a specific audio device to remain connected to your PC, remove it by following the below steps –
- Right-click on the Windows icon and select Settings.
- Click System on the left navigation.
- Jump to the right pane and click to expand the Sound section.
- If this is an input device, search for it under the Input section. Else, under the Output section.
- Click on Speakers (output device) or Microphone (input device).
- When the chosen section expands, click Don’t allow.

That’s it, the chosen audio device is now turned off. Do restart your PC so that the recent changes come into effect for all apps (previously installed ones).
Re-enable Audio Devices on Windows 11
If you ever wish to reactivate the disabled audio devices on your Windows 11 PC, follow these steps –
- Press Win + I to launch Settings.
- Go to System and then Sound on the adjacent right pane.
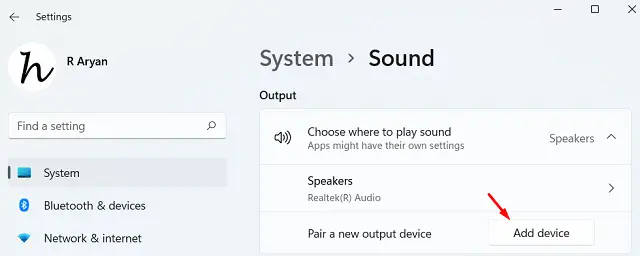
- If it is an output device, go to the Output section.
- Click Add device available next to “Pair a new output device“.
Note: In case you want to add a new input device, click Add device under the Input section.
- On the subsequent window, select the kind of device you want to add. The available options here are – Bluetooth, Wireless display or dock, and Everything else.
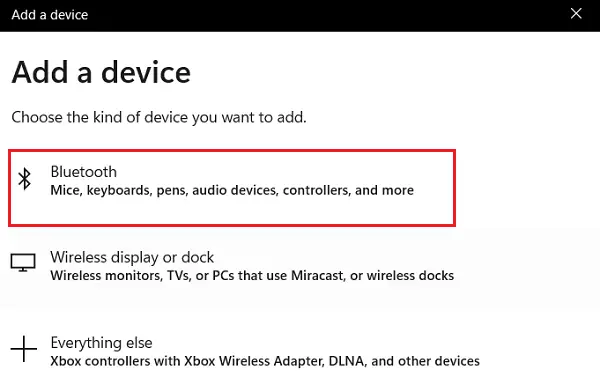
- If the input/output device works on Bluetooth or Wireless display, make sure your device is turned On and discoverable.
- Select the device once the scanning completes and follow the on-screen instructions.
That’s it, you have successfully added a new audio device to your computer. Moving ahead restart your computer. Sign back in and you will be able to use your recently added audio device as you meant to.
Read Next: