Several users have complained of being not able to create system backups because of an error 0x80780113 on their Windows PCs. If you are such a user and are wondering what to do next, we suggest reading the reasons why it occurs and the seven ways applying which you may overcome this issue.
System backup is basically an image file consisting of all currently running apps or services on your computer. You may use it whenever your device gets corrupted somehow. When this problem occurs, you may get an error message as well stating – “not enough space to create the volume shadow copy; Error 0x80780113“. Without any further ado, let’s discuss what you may do to fix this issue on your Windows 11/10 PC.
What causes System Backup to fail on Error 0x80780113?
Most of the time, System Backup fails simply because System Protection is disabled on your computer. So, enable this feature first and check if you can now generate a new restore point on Windows 11 or 10 PC. If this is still occurring, it might be because of one or more of the following reasons –
- Presence of bad sectors on the hard driver
- Corrupted USN Journal or System Volume
- Because of obsolete or outdated disk drivers
- Lack of storage spaces in the System Reserved or Recovery partitions
How to Fix Backup Failed Error 0x80780113 on Windows 11
If you are experiencing this error code while generating a restore point or system backup, attempt the below fixes –
- Run the CHKDSK command
- Ensure that System Protection is enabled
- Update Disk Drivers
- Create a new System Volume
- Extend System Reserved Partition or Recovery Partition
- Try Disk Cleanup Tool
- Delete the current USN Journal
1] Run the CHKDSK command
This error primarily occurs when there are some bad sectors on your hard disk drive. So, before you apply any workaround check if this is occurring because of your corrupted hard drive. To check whether your HDD is okay or not, use the CHKDSK tool. Here’s how to initiate a hard disk scan using this tool –
- Launch Command Prompt as administrator.
- On the elevated console, copy/paste the below code, and hit Enter –
chkdsk C: /f /r /x

- As the root drive is already in use, the HDD scan will not start. Instead, this will ask – “Whether you would like to start this scan the next time your PC restarts?”.
- Type “Y”, and reboot your computer.
- The next time your device restarts, you will get a report stating the bad sectors on your hard drive.
If there is none, you may try the next solution. Else, purchase a new SSD and replace it with the existing one.
2] Ensure that System Protection is enabled
Errors like 0x80780113 may also occur when System Protection is disabled for all disks on your computer. As long as this feature stays disabled, you won’t be able to generate any system backup. So, enable System Protection using the steps outlined below, and then only you may proceed with Restore points generation. Here’s how to do this –
- Make a right-click on the Windows icon (Win + X), and select Run.
- Type “
sysdm.cpl“, and hit OK. - When the System Properties window opens up, go to the System Protection tab.
- Under the Protection Settings section, select the C: drive, and hit the Configure button.

- Check the radio button left of “Turn on System Protection” and hit Apply then OK.
Note: You may also adjust the Max Usage slider as per your own need to the backup size.
Now that you have enabled System Protection, check if you can generate system backup.
Read Also: Create a System Restore Point using Command Prompt or PowerShell
3] Update Disk Drivers
The Backup Failed Error 0x80780113 may also occur due to the presence of corrupted disk drivers. So, try updating all the drivers of this nature and check if this resolves the issue that you are currently dealing with. Here’s how to manually update all disk drivers on your Windows 11/10 PC –
- Press Win + S, and start typing “Device Manager”.
- Click on the top result to start Device Manager.
- On the subsequent window, locate Disk drives and hit the right-arrow beside it.
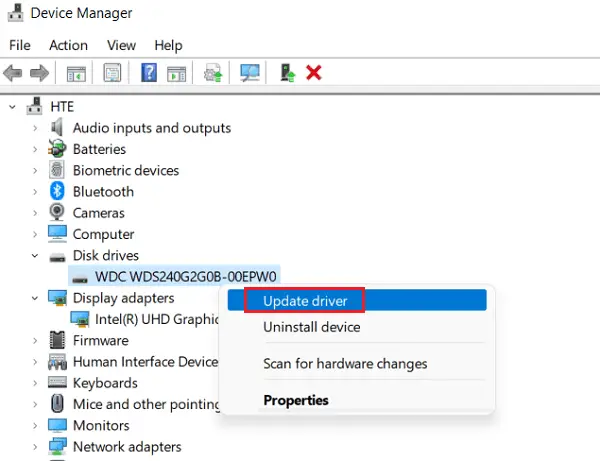
- Right-click on the available driver inside it and hit Update driver.
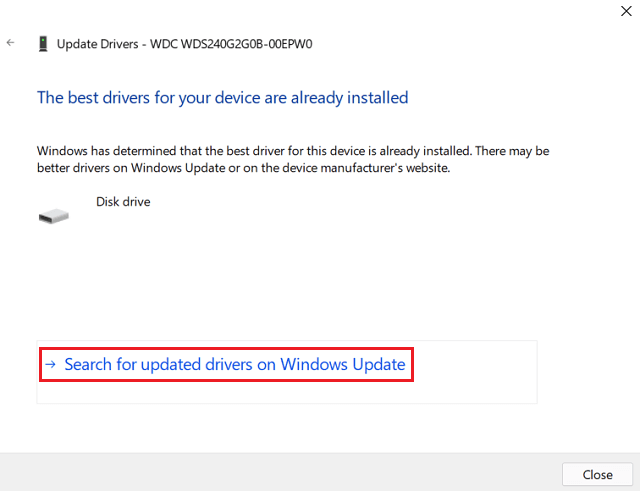
- Select “Search automatically for drivers”. This will suggest searching for any update drivers on Windows update. Well, click the button – “Search for updates drivers on Windows update”.
- On the Settings window, hit Check for updates and look for the “optional updates” link.
- If you do find such a link, click on it, mark all the checkboxes and hit “Download and Install“.
- The system will download and install the latest version of the chosen drivers on your computer.
Restart your PC now so that changes made become effective from the next logon.
4] Create a new System Volume
Several users succeed to get rid of the Backup Failed Error 0x80780113, by creating a new system volume. The only issue with this solution is that the new system volume must be created on an MBR disk. GPT and MBR disks can be used together on PCs that support GPT. So, in either case, creating a new system volume should work and resolve the issue that you are struggling with.
- Press Win + S and type CMD in the search box.
- Right-click on Command Prompt (top result) and select Run as administrator.
- The UAC window will come into the display next, hit Yes to allow its access.
- On the elevated console, type the following and press Enter –
bcdboot.exe /s C:\Windows /s H:
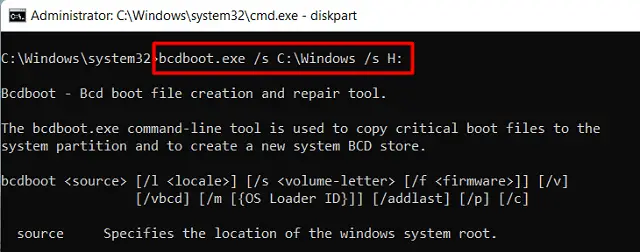
Note: Here C: is the root drive and H: is the new partition that you want to create. You may choose any other letter for your new partition as long as that letter has not been in use.
- The new partition has already been created, launch Diskpart, and activate the new volume.
- You may open Diskpart by running the below code –
diskpart
- Now that you are inside the Diskpart, run these codes one after another.
Select Volume H
active
- Running both these codes will activate your new system volume.
Restart your PC and check if you can now take a system backup without getting into the error code 0x80780113.
5] Extend System Reserved Partition or Recovery Partition
Lack of sufficient storage spaces inside the recovery partition or system reserved partition may also result in this error code. Normally, one can create a new partition or extend its size using Disk Management. However, it is not possible to do the same for System Reserved partitions.
In order to fix this issue then, you must take the help of a third-party tool like Mini Tool Partition Wizard.
6] Try Disk Cleanup Tool
If you don’t want to purchase MiniTool or install a third-party tool on your computer, you may try deleting the unnecessarily stored spaces on your PC. To free-up spaces on your Windows device, use Disk Cleanup Tool.
- Press Win + R to launch the Run dialog.
- Under the text area, type
cleanmgrand hit Enter. - Select the root drive (C:) and hit the OK button.
- The Cleanup tool starts detecting the storage spaces that it may free up.
- Click Cleanup system files on the upcoming screen.

- Pick the C: drive again followed by OK and wait for the scan to complete.
- Mark all the checkboxes, and hit OK to remove all the junk files, old Windows installation(s), update files, etc.
- Lastly, Restart your PC so that the leftover and residual files delete as well.
Sign back into your computer and check if you are now able to create a system image backup without getting an error code.
7] Delete the current USN Journal
Update Sequence Number (USN) Journal is a great feature on Windows that keeps a record of all recent file changes in the order of their occurrence. When this is sized up, it may start causing issues including error code 0x80780113. If that’s the case, you should clear your current USN Journal and check if doing so resolve the above issue. Here’s what you need to do –
- Press Win + X, and choose the option – Disk Management.
- Right-click on the System Reserved partition and select the option – “Change Drive Letter and Paths…”.
- Click on the Change button and hit the button – “Assign the following drive letter:”. Assign a drive letter to this partition, hit OK, and close Disk Management. For example – “H:”, you are going to use the drive letter sometime later.
- Now, press Win + R to launch the Run dialog.
- Type CMD, and press Ctrl + Shift + Enter keys altogether.
- Performing so will launch Command Prompt having admin rights.
- When the UAC window prompts, hit Yes.
- Now, execute the below commands to delete whatever is there inside the USN journal –
fsutil usn queryjournal H:
fsutil usn deletejournal /N /D H:- Here, H: denotes the same drive letter that you have used before.
Once this process is over, reboot your PC and check if the error 0x80780113 resolves.
I hope the solutions above help you to overcome this backup failed error 0x80780113 on your Windows 11 or 10 PC. If you do have any queries or suggestions related to this post, let’s know in the comment section.


