Today, in this article, we discuss one of the finest utility programs by Microsoft – Disk Cleanup Tool. The shortage of space on the hard disk often results in different update-related issues or troubles. Besides, there comes a time when we want to delete a few folders like – windows.old but we simply can’t. The system generates an error message that reads – “You don’t have admin rights”. However, in reality, the issue is far more complex in nature.
In all such scenarios, the Disk Cleanup tool works quite handy and helps us to get rid of such folders in a matter of a few seconds. Additionally, this also frees up huge space on HDD that otherwise is piled up with unnecessary cache, update files, error reports, thumbnails, and whatnot. Let’s explore how to use this utility program on Windows 10 devices –
Disk Cleanup Tool – Delete Windows.old, Windows Update, or Unnecessary Files
Here’s how to use Disk Cleanup Tool to delete the Windows.old folder, error reports, optimization files, and others –
- Press Win and S keys together to launch the search bar. In the text area, type “
cleanmgr“without quotes and click on the top result.

- Select the root drive (C:) on the pop-up menu and tap OK. The system will then start calculating spaces that it can free up.
- Mark all the check-boxes under “Files to delete:” except Download.
- Next, click “Cleanup system files“, select the main drive (C:) again, and tap OK.

- This will start looking for temporary files, Windows folders from previous installation(s), and Windows Update Cleanup. Wait for a while as this takes a few seconds to complete.

- Now, mark the new drives that appear in this advanced scan. Again, make sure not to tick the Download folder.
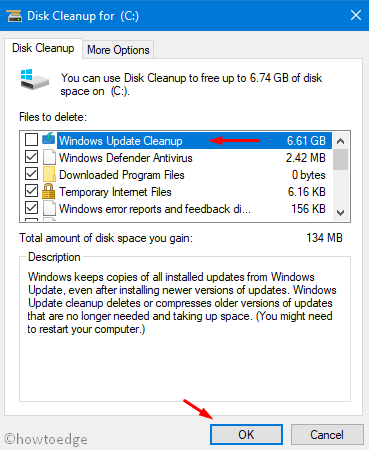
- Lastly, click OK to remove all of the marked files and folders. This takes a few minutes to complete.
- Once over, restart the computer so as to delete any leftover files during the PC reboot.
How to delete recent restore points using Disk Cleanup
You may use this tool to free up extra spaces on the computer by deleting the recently created restore point. Kindly go with this option only if you are sure that the latest system backup contains malware or other viruses.
Note: This tool doesn’t help to get rid of old restore points on the computer. Here’s how to delete old System Restore Points in Windows 10.
- Re-launch the Disk Cleanup window and head over to the “More options” tab.
- Under the “System Restore and Shadow Copies” section, click over the “Clean up” button.
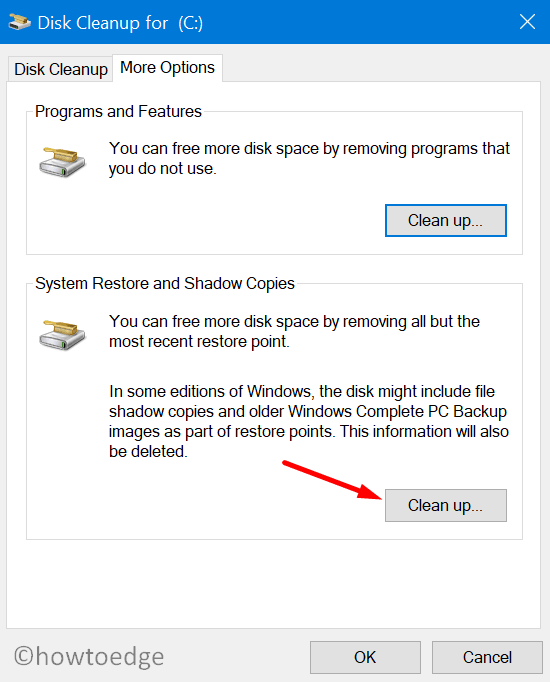
- A pop-up window appears immediately afterward asking whether you want to delete the most recent restore point or not. Press the Delete button to proceed further.

I hope this article serves its purpose. If you have any queries or suggestions, let us know in the below comment section.
On what principles, does Disk Cleanup Tool work?
Disk Cleanup tool is a very old tool in Windows that let users free up spaces on their hard drives. As a result of this, the system performance improves significantly. When you run this tool, it checks for temporary files, cache files, and any other program files which are not relevant to your current device functioning. Using this tool, one may easily get rid of these files from his/her Windows device.