Did you receive any error messages due to missing StartUpCheckLibrary.dll file on Windows 10 PC? If yes, then follow our 5-ways to fix this issue on the computer. Usually, the Dynamic Link Library (DLL) is a set of programs that performs different system operations and functions. If somehow any of these files become corrupt, you won’t be able to run essential programs thus generating error messages.
The quarantined file titled “StartUpCheckLibrary.dll” inside Windows Security, corrupt system files, or a recent upgrade may cause this bug. To solve this, you must remove Quarantine threats (if lie any), run SFC/DISM scan, and remove the lately installed cumulative update. Let’s explore the solutions in detail –
How to Fix missing StartUpCheckLibrary.dll in Windows 10
To fix the missing StartUpCheckLibrary.dll file on Windows 10, follow the below workarounds –
1] Ensure Windows Security is quarantined the StartUpCheckLibrary
Microsoft Security keeps the records of the current threats of Windows 10. Some of the DLL files also exist under this section which becomes the possible cause of such an issue. So you should remove the list using the following steps –
- Click the shield icon available on the notification area to start the Microsoft Defender app.
- On the succeeding wizard, expand Virus & threat protection.
- Now, click Protection history under the current threats section.
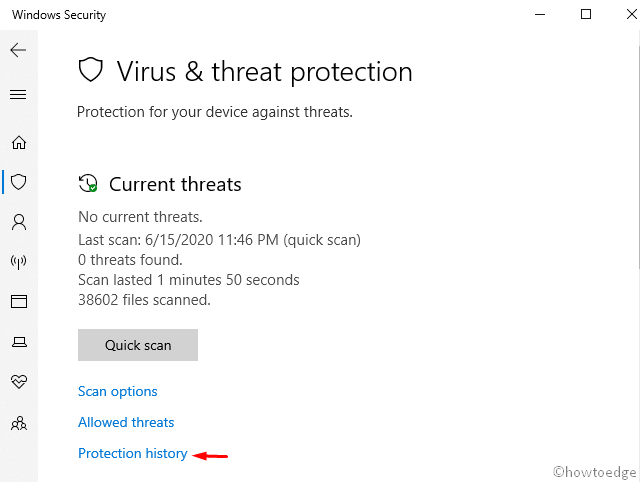
- Here, look for the available “Quarantine threats” containing the DLL files.
- If yes, remove this file and see whether it resolves the missing StartUpCheckLibrary.dll issue or not.
If not, follow our next set of solutions –
2] Perform SFC Scan
The System File Checker is an in-built Windows utility program that can identify and repair the missing DLL files. Here’s how to run this tool –
- Press Win + Q to start the Search UI and type cmd in the text bar.
- Make a right-click on the top result and hit Run as Administrator.
- When the UAC window appears, tap Yes to authorize access.
- On the command prompt, type the below code and hit Enter to start scanning PC –
sfc/scannow
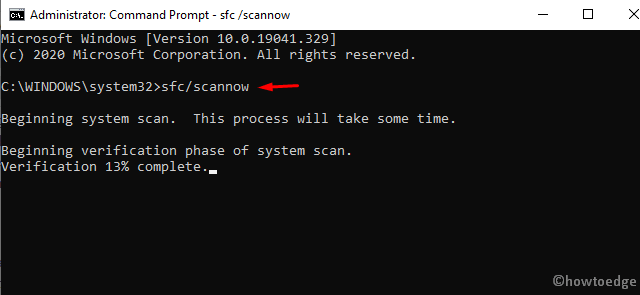
- This may take a few minutes to correct the missing DLL files, so wait accordingly.
- After the scanning/repairing finishes, do Restart your PC to make the changes effective.
3] Run DISM
Usually, sfc/scannow locates and repairs the corrupt system files. However, what if there is corruption inside the Windows image. Well, in such scenarios, you better run DISM codes to fix the StartUpCheckLibrary.dll missing issue. DISM functions similar to that of SFC, just open Windows console as an Admin and run the below codes –
- Right-click anywhere on the taskbar and select Task Manager.
- Next, go to the File menu and hit Run new task.
- Type cmd in the text box and tick “Create this task with administrative privileges” checkbox.
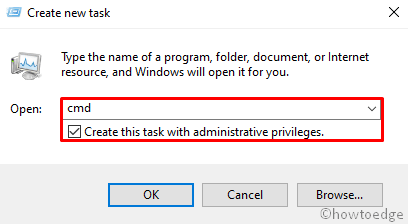
- On the elevated prompt, run the following codes sequentially –
dism.exe /online /cleanup-image /scanhealth
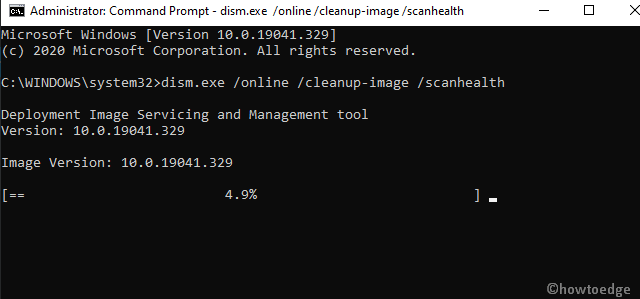
dism.exe /online /cleanup-image /restorehealth
dism.exe /online /cleanup-image /startcomponentcleanup
- Wait for a while, as this takes a few minutes to complete the scanning and repairing process.
- Once over, Restart your PC to implement the above changes.
4] Manually Download a DLL File
If the StartUpCheckLibrary.dll is still missing on your device, you may manually download its fresh edition. There are several sites that offer free DLL files, make sure to download it from a reputed website.
In case you don’t want to go this way, just log into some other PCs, copy this file, and paste it on your computer.
5] Rollback the latest Windows 10 Update
In case, none of the above fixes repair the StartUpCheckLibrary.dll missing issue, try rolling your PC back to an earlier state. To do so, you need to remove the recent updates following the below guideline –
- Jointly press WinKey & I hotkey to launch the Settings app.
- Expand Update & Security and go to the Windows Update.
- Head over to the right side and click View update history.
- Navigate to the Uninstall updates section then pick the recently installed patch.
- Afterward, click the Uninstall option available at the top bar.
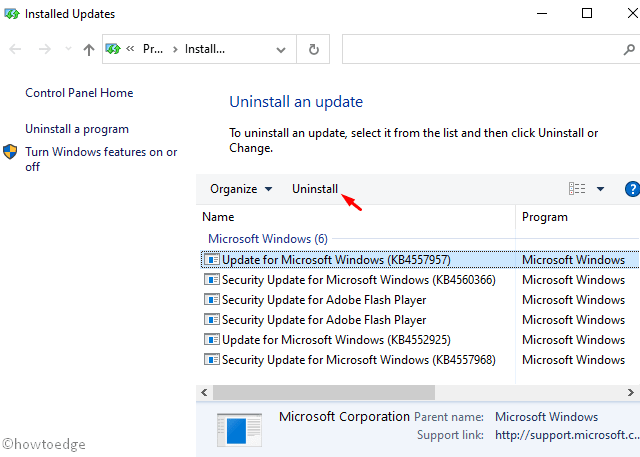
- Once you remove the latest cumulative update, Reboot your PC so as to implement the changes.
- Now, log back into the Windows, visit the official website, and manually download the standalone package.
- After the downloading finishes, go to the download folder and click twice on the setup to upgrade your PC.
That’s it, if you have any queries or suggestions related to this article, ping us in the comment section.

