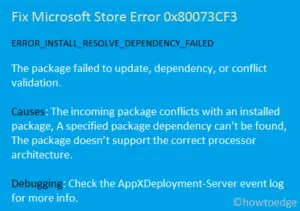
Did you encounter an error 0x80073CFA while trying to uninstall existing apps from Microsoft Store? Well, this error normally occurs due to some incorrect settings or connectivity issues. Or, this appears when there is some corruption inside Microsoft Store. Anyways, since you are already receiving this issue and are wondering how to fix it, read this guide till the end.
In this post, we will look into what exactly went wrong causing this error code and six probable solutions to this bug. Upon encountering this error code, you may receive the following error messages –
|
Or,
|
Fix – Unable to uninstall Apps, Error 0x80073cfa
If you are unable to uninstall a particular app on Microsoft Store, attempt the below fixes and see if any resolve this issue –
- Troubleshoot Windows Store Apps
- Reset Microsoft Store
- Uninstall the faulty app by booting into the Clean Boot
- Uninstall the conflicting apps using PowerShell
- Reinstall Microsoft Store using PowerShell (Admin)
- Perform a Full Scan on your PC
- Run SFC/DISM Scans
- Repair Windows using Installation Media
1] Troubleshoot Windows Store Apps
The simplest way to resolve any Store-related error is by running the in-built troubleshooter. This tool will look out for possible reasons triggering an error 0x80073cfa and resolve them. Follow the below guideline on how to troubleshoot Windows Store Apps.
The troubleshooting procedure slightly varies on Windows 11 as compared to Windows 10. Worry not, as we have included the right steps for each case –
Windows 11:
- Press Win + I and navigate to the below path –
System > Troubleshoot > Other troubleshooters
- When this expands, locate Windows Store Apps by scrolling down to the bottom.
- Click the Run button available on it.

- When the troubleshooter window launches, click Next and follow the on-screen instructions.
Windows 10:
- Launch Settings by pressing Win + I.
- Select Update & Security > Troubleshoot, and head over to the right pane.
- Click “Additional troubleshooters” on it and when this expands, scroll down to the bottom.
- Locate Windows Store Apps, click once on it, and hit Run the troubleshooter.

- When the troubleshooting window launches, click Next and follow the on-screen instructions.
2] Reset Microsoft Store
If you are still getting an error 0x80073cfa while uninstalling an app on Microsoft Store, consider resetting it. In case you didn’t want to lose any data, you better repair it first. Follow these steps to reset Microsoft Store on Windows 11 –
- Press Win + X, and select “Apps and Features”.
- On the next screen, scroll down and find Microsoft Store.
- Click the three dots available on its right end and hit Advanced options.
- Scroll down again to the Reset section and hit Repair.
- After the Store app is repaired successfully, you will see a tick icon next to it.

- Launch Microsoft Store again and check if you can uninstall apps without getting into an error 0x80073cfa.
In case the error appears again, re-visit the Reset section, however, this time hit the Reset button. Do note that all your saved data will be lost following this way.
One may reset Microsoft Store by running one line command on an elevated CMD as well. S/he must open Command Prompt as administrator and run this code –
WSReset.exe
3] Uninstall the faulty app by booting into the Clean Boot
An application may fail to uninstall due to some third-party interferences. However, when you boot into the Clean Boot state, all such interactions fade away. So, an easy way to avoid error 0x80073cfa is by booting into that state and then trying to uninstall that faulty program. Do this and you might be able to get rid of this nagging error.
4] Uninstall the conflicting apps using PowerShell
Since you are already getting an error 0x80073CFA while attempting to uninstall some apps on your PC, you may use PowerShell and get the application removed. Each and every application on Windows bears some package full name associated with them. All you need is to find this name and use that to uninstall that application on your device.
Here’s how to find the PackageFullName of an application and uninstall it using that info –
- Right-click on the Windows icon (Win + X), and choose Windows Terminal (Admin).
- The terminal will default land into Windows PowerShell unless you have changed it to Command Prompt. In case you did change it to CMD, use the drop-down menu and select it.
- Run this command first to view all appx packages on your device –
Get-AppxPackage | Select Name, PackageFullName
- PowerShell will display a list of installed apps on your computer along with their PackageFullName. Copy the “PackageFullName” of the conflicting app next. Execute this command next –
Get-AppxPackage PackageFullName | Remove-AppxPackage
Make sure to replace the PackageFullName with the one that you have copied before. Do this and your chosen app will be deleted instantly.
5] Reinstall Microsoft Store using PowerShell (Admin)
Microsoft Store may prevent users from uninstalling apps on it when the Store app itself has somehow corrupted. There is no way to say if that has happened or not. However, you may try uninstalling and reinstalling the Store app and check yourself if the problem resolves this way.
As there is no direct way to uninstall Microsoft Store, open PowerShell (Admin) instead and run these two codes on it –
Get-AppXPackage | Foreach {Add-AppxPackage -DisableDevelopmentMode -Register "$($_.InstallLocation)\AppXManifest.xml"}
6] Perform a Full Scan on your PC
The error 0x80073CFA could also have been the work of malware or viruses existing on your device. Initiate a full scan on your computer using Windows Defender to find and quarantine trojan horse or any other virus that it detects.
In case you are using some third-party antivirus, use that to check for viruses and all on your PC. Though they are equally good, if you are using a free version of 3rd-party antivirus, we strongly recommend using Windows Defender instead.
7] Run SFC/DISM Scans
Though Windows Defender will find and fix any viruses on your PC, this will not do anything to repair system files that have been corrupted because of malware. You have to manually find and repair the corrupt system files and folders.
For this, you must run either System File Checker or DISM tools. Here’s how to run both of these tools on an elevated console on Windows 11/10 –
- Press Win + X, and choose Windows Terminal (Admin).
- When the UAC window prompts, hit Yes to authorize opening the terminal as administrator.
- Press Ctrl + Shift + 2 to launch Command Prompt on the next tab.
- Now, copy/paste the below code and press Enter –
sfc /scannow

- Wait for the next 10-15 minutes while the system is finding and repairing missing or corrupt system files.
- Once this is over, run the DISM command as provided below –
DISM /Online /Cleanup-Image /RestoreHealth
- Wait again for 10-15 minutes while this tool is repairing any issue within the System Image. The time taken may increase depending on the number of files available on your device.
- When this completes as well, reboot your PC.
Sign back into your device and check if the problem resolves now. If not, consider reverting back your operating system to an earlier state when your device was functioning well. This fix is applicable only when you have generated a system restore point sometime back on your computer.
8] Repair Windows using Installation Media
If none of the above solutions resolve the uninstall error 0x80073CFA on your PC, the operating system must have been compromised to an extent where no internal tools can repair it. However, you can certainly repair it using Windows Installation Media.
By far, this has been the most effective method to resolve any issue within the Windows ecosystem, provided you are using a fresh installation media. You may create a bootable Windows installation media using Rufus, Media Creation Tool, and others.
Assuming you have already generated or created a fresh installation media, do the following to repair your Windows Operating system –
- Insert the Windows Installation Media in one of your device’s ports.
- Restart your PC next and when it is loading, press the motherboard’s supported function key. This could be Esc, f6, f11, or Del.
- Wait for the Windows to load up and when it does, click Repair your computer.
- Now, wait while Windows is repairing all device drivers and system files/folders on your computer.
I hope the error 0x80073CFA resolves after applying the solutions discussed so far. If not, you can always go for a clean installing Windows 11 on your device. Mind that, this will erase all your data and generate a fresh copy of Windows.
How do I uninstall an application on Windows 11?
When you are facing trouble uninstalling an application, do the following –
- Press Win + I to launch Settings.
- Go to Apps > Apps & Features.
- Head over to the right pane and scroll down to the application that you no longer want running on your PC.
- Alternatively, you may also search for this application name in the Search bar and press Enter.
- When found, click the three dots available to its right end, and hit Uninstall.
- A confirmation window should appear next.
- Click Uninstall again to completely remove that app from your device.
That’s it, the chosen program will be uninstalled successfully from your computer. Do restart your Windows PC so that any leftover or residual files delete as well.


