The volume slider is a key part of any computer system, letting you control your sound. But it’s annoying when the volume slider doesn’t work in Windows 11. If the Volume Slider is Not Working on your computer, and you don’t know how to fix this issue, this post is specially written for users like you.
In this guide, we will learn what possibly could cause the Volume Slider Not Working issue on Windows 11/10, and eight solutions that should resolve it on your computer.
Fix Volume Slider Not Working in Windows 11
If the Volume Slider is not working on Windows 11, attempt these fixes one by one and check if this issue resolves after applying them.
1. Make Sure Your Sound Settings Are Correct
First of all, you need to make sure that your computer is set up to hear the right sound. The Volume Slider not working issue often occurs when your device is trying to listen to the wrong place.
Check your audio settings, and if you do find them incorrect, adjust the same. This helps your device’s speakers focus on the right thing. Here’s what you need to do exactly on your Windows PC.
- Right-click on the volume icon in the taskbar and pick Sound settings.

- The system will redirect you to System > Sound.
- Under the Output section, click on Speakers.
- Now check if the speaker is set to the correct device.
If you don’t find the right setting there, click on Pair a new output device. Next, follow the on-screen instructions to add your device to Windows Settings.

Assuming you did add your device successfully, check if you are listening to the correct sound on your computer.
2. Restart Windows Audio Service
If the volume slider is still not working, there might be some issues with your Audio Service. Restart all Audio Services on your Windows PC and check if this resolves the Volume Slider issue. Here’s how to act on this task –
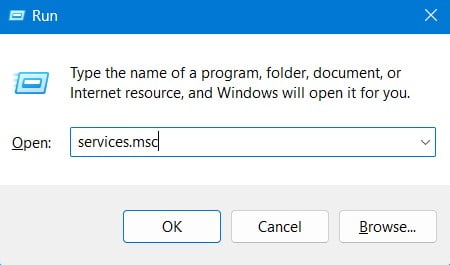
- Press Windows + R to launch the Run dialog.
- Type
services.mscon it and press the Enter key.
- Scroll down to Windows Audio, right-click on it, and select the Restart option.

- Close the Services window and restart your PC.
Sign back into your device again and check if the volume slider starts working normally on your computer.
3. Update All Audio Drivers
The presence of corrupt or outdated audio drivers might also result in Volume Slider not working issues on Windows. In order to fix this, you must check for outdated or corrupt audio drivers and update them accordingly.
When you update the audio drivers, the computer gets the correct instructions on what to do with the Volume Slider. Follow the below steps on how to update all your device drivers –
- Press Windows + I to launch Settings.
- Go to Windows Update, and click on Advanced options.

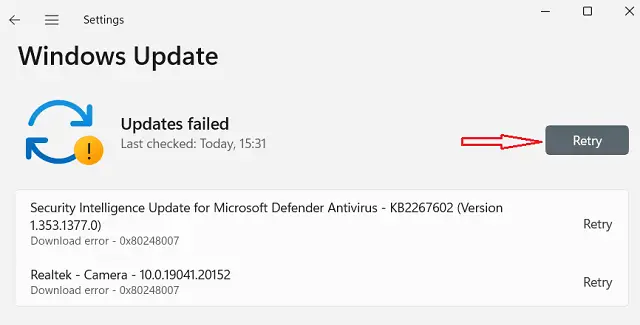
- Scroll down to Additional options, and check if there are any updates available inside Optional updates.
- If you do see any pending updates there, click on Optional updates.
- Tick all the checkboxes against the available updates, and hit Download & Install.
Close Settings, and restart your Windows PC. Sign back into your device again and check if the Volume Slider starts working normally.
4. Roll Back Audio Drivers
If you have recently updated the audio drivers on your PC, and this issue started appearing thereafter, you must have installed some faulty update. In such cases, what you can do is roll back all the recent driver updates. Follow these easy steps on how to proceed ahead with this task –
- Press Windows + X, and choose Device Manager.
- Click “>” left of Audio inputs and outputs, and locate the driver that you have recently upgraded.
- Right-click on that particular driver, and choose Properties.
- When this opens up, go to the Driver tab, and click Roll Back Driver.
Wait for the driver to come back to its previous installed version. After this is over, close Device Manager, and restart your Windows PC.
Sign back into your device again and check if the Volume Slider starts working normally now.
5. Troubleshoot Audio
Troubleshooter is an in-built tool on Windows that you may utilize to troubleshoot Windows components, including Windows Update, Audio, Store Apps, and others.
Since you are facing issues adjusting the sound on your PC, troubleshoot the Audio and check if the Volume Slider issue resolves afterward. Here’s how to go for this task –
- Right-click on the Windows icon and select Settings.
- Navigate to System > Troubleshoot > Other troubleshooters next.
- Locate Audio under Most frequent, and click the Run button available on its right end.
- When the troubleshooter launches, click Next and follow the on-screen instructions.
After the troubleshooting completes, check if you can adjust the volume slider normally now.
6. Check for Windows Updates
Sometimes, Windows 11 can have little mistakes in its codes, like bugs. These bugs might be causing the Volume Slider Not Working issue. If that’s the case, you should check for any pending updates and upgrade to the available ones.
Here’s how to perform this task in Windows 11 –
- Press Win + I to launch Windows Settings.
- Select Windows Update from the left navigation and head over to the right pane.
- Locate and click on Check for updates.
- Wait for the system to connect to Microsoft Servers online and download/install the pending updates on your PC.
After this is over, you may restart your computer and check if the Volume Slider Not Working issue resolves from the subsequent login.
7. Restart Windows Explorer
Internal glitches within File Explorer might also result in Audio not working issues in Windows 11. You may resolve this issue simply by restarting Windows Explorer.
Follow the below steps on how to restart File Explorer –
- Press Ctrl + Shift + Alt to launch Task Manager.
- When Task Manager opens, find Windows Explorer in the list of processes.
- Right-click on it and choose to Restart it.

The File Explorer will restart and as a result of this, the taskbar will also fade for some time. Wait for this to come back again and check if you can adjust the volume slider normally now.
8. Perform a System Restore
If none of the above solutions work to resolve the Volume Slider Not Working issue, and you do have an earlier restore point on your PC, you may revert back your device to its previous working state.
Note: This is a time-consuming solution, so proceed with this solution only when you have enough time to work on it.
Wrapping…
In conclusion, if you’re facing issues with your volume slider in Windows 11, don’t get upset. Read and apply the fixes discussed in this post and you will able to resolve this issue in no time.
Read Next: