As we all know, iPhone focuses primarily on your privacy and keeps all your information safe and secure. However, there are still ways using which you can safeguard your iPhone and hide personal content on it. In this post, we will discuss nine ways that help you keep your iPhone safe from prying eyes.

Why should one hide his personal information on iPhone?
Your iPhone is your personal property, and no one should ever have a hint of what exactly you are doing on your device. However, as we often come across people, there’ll always be one or two individuals who can’t help but peek at other people’s screens.
Apart from this, you may at times lend your iPhone to a colleague or family and he starts doing searches to know you well. There is certain information that gets leaked from your iPhone’s notification as well. So, it becomes essential to hide your personal information from people whom you don’t trust.
Hide Personal Content on your iPhone
If you care about your privacy, you must follow the below tips and tricks and keep your iPhone safe and secure from prying eyes –
1] Add a Passkey
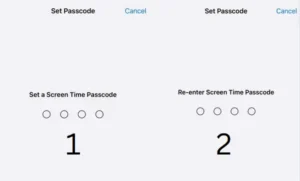
The first thing you must do on your iPhone is to add a passkey and create a face id. Your Face becomes the key to unlocking your iPhone every time you want to use it. Believe us, unlocking an iPhone using Face ID is blazingly fast.
Open your iPhone’s Settings, and click Face ID & Passcode. You may select what your Face ID can do like, unlocking your phone, opening iTunes & App Store, etc. Do change your passkey from time to time so that no one second guesses your correct passcode.

2] Hide your Personal Photos
It must have occurred to you that when you are finding a photo to forward, someone standing beside you starts looking at your photos. This could also happen when you are wanting to show them certain photos, however, you have to scroll through dozen photos before.
Well, if you do feel uncomfortable showing certain photos of yours, you may hide them from appearing anywhere on your iPhone. All these photos will go to a hidden folder and remains there unless you really want to view them yourself. With iOS 16, all hidden photos are locked. So, you need not worry about someone seeing your photo when s/he has access to your iPhone. Open any photo, click Edit and choose the option – Hide.

3] Hide Notifications appearing on the Lock Screen
The notifications reveal a lot about your liking, the apps you open too frequently, and other activities. Keep your notifications enabled only when you live alone or keep your iPhone always with you. This is essential as when one gets access to your iPhone, all s/he requires is to swipe down on the lock screen and see your recent notifications. Here’s how to hide notifications appearing on your iPhone’s Lock Screen –
- Launch Settings and select Notifications.

- Under Notification Style, look for the app from where you don’t want the notifications on the lock screen.
- On the app’s page, uncheck the box just below the “Lock Screen” option under Alerts.
- That’s it, all the notifications from the chosen app will not appear on the Lock Screen.
Alternatively, one may also disable Show Previews under Lock Screen Appearance. To do so, click on Show Previews, and select Never.

- Follow the above steps to disable notifications from other apps as well.
In case you want no apps displaying any notifications on the Lock screen, go to Settings > Notifications and click Show Previews. When this expands, select Never. This way, all your apps will stop displaying any notifications on the lock Screen.
4] Disable Siri Suggestions
Siri on iPhone constantly monitors your activities and brings up the same in the form of “Suggestions”. It could be like calling someone, messaging a specific person, etc. This even groups a list of things that you would like to browse at the same time. Having Siri monitoring your activities could be a bad thing especially when your iPhone is in someone’s else hands.
The best thing to avoid unnecessary complications is to turn off Siri Suggestions before handing over your iPhone to friends, or colleagues. Here’s how to turn it off –
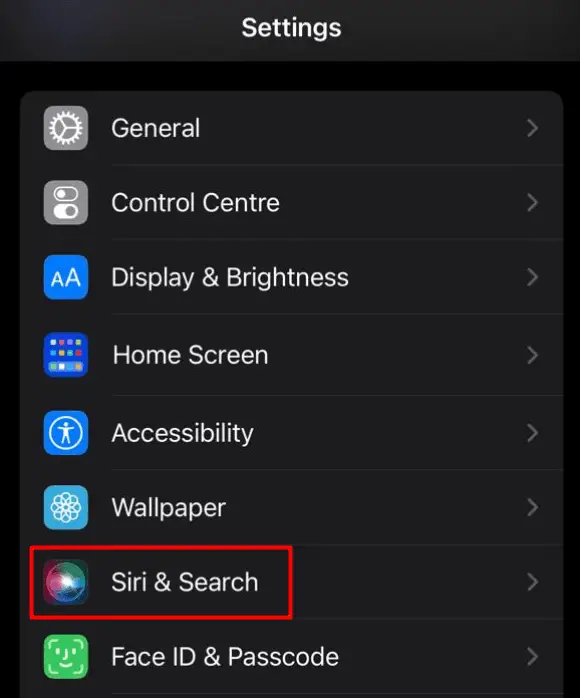
- Tap on the Settings icon and select Siri & Search.

- Scroll down to Before Searching, and disable all the toggle switches inside.
- Turn off all the toggle switches inside “Suggestions from Apple” as well.

Siri works like a charm on iPhone. When you get out of its services, it might feel less convenient. You must focus on things that are acceptable coming up and whatnot. So, we suggest keeping only those suggestions out which make you less comfortable opening up among your friends.
Apple provides blocking Siri Suggestions from individual apps as well. So, go to Settings > Siri & Search, and look for the apps from where you don’t want any suggestions popping up. Select that app, and when it opens up, disable all the toggle switches available under Suggestions.

5] Hide App from the Home Screen
If there’s an app you use too frequently but don’t want this app to appear on the Home Screen, you should hide this app. To do so, just long press on the App’s icon and select Remove App. On the succeeding pop-up menu, click “Remove from Home Screen”. You may find the Hidden app by swiping right to the last screen i.e. your App Library.
6] Make Sensitive Apps hidden
Unlike Google Play Store, all apps that you have purchased through App Store will remain glued to your Apple ID. Though you may delete a particular app, it would still appear when someone visits your purchased section. Well, worry not as you can always hide that specific app and keep it hidden. Anyone who knows this trick still has to know your passkey to see your past app purchases on your iPhone.
Here’s how to hide any app from App Store –
- Click on App Store’s icon to launch it.
- Go to Apps and click on your profile picture.
- Select Purchased and look for the app that you want to hide from here.
- In case you have already uninstalled this app, you may click on the tab – Not on this iPhone.
- Swipe the app from right to left and tap Hide.
That’s it, the chosen app will now hide from the App Store purchased list.
How to Find the hidden purchases on iPhone?
If you ever want to reinstall the hidden app, go to Settings and click on your Apple ID. Go to Media & Purchases > View Account next. You need to unlock your iPhone using either face id or passkey. When it opens up, scroll down and click Hidden Purchases.
All apps that you have made hidden at some point will reveal on this page. Tap the Unhide button on the App that you no longer want to keep hidden. If you had uninstalled this app before hiding it, go to App Store, and reinstall this app on your iPhone.
7] Lock Notes
There is no way to lock a folder inside iPhone unless you use a third-party tool like Folder Lock. However, you may put your sensitive data inside a note and lock it. In this way, one can easily keep his files and photos secure. Locking “Notes” is also useful when you keep some important information inside it.
Read Also: How to Stop Notes Syncing to iCloud on iPhone
8] Remove Recent Calls from the dialer
If you do call someone very frequently and don’t want others to have a look at it, make a habit of regularly removing the recent calls from the iPhone’s dialer. All you need is to launch your Phone app, swipe the recent call from right to left, and tap Delete.
In a similar fashion, you may delete private messages as well. Open your Messages app, locate the message that you no longer want someone to read, swipe it from right to left, and hit Delete.
9] Use Private browsing on Safari
Our online searches do reveal a lot about our personality, frequent searches, and many other things. Whether you use Safari, Chrome, or any other web browser, all your recent activities get locked inside the Browsing History. Anyone having access to your iPhone may search for it and find all the details.
Sometimes, they don’t even require visiting your history section. All they require is to open the Search bar and search for anything randomly. iPhone, or for that matter, any smartphones these days have the ability to predict your next text. In order to keep your online activities secure and personal, make sure to use Private Browsing on Safari or Incognito mode on Chrome, Firefox, etc.
I hope you are now able to hide your personal content on your iPhone and keep it safe from prying eyes.
Read Next:


