Recently, Microsoft grays out the option to skip having an internet connection while installing newer versions of Windows 11. If you are trying to skip this step, the “Let’s connect you to a network” page will come again and again. This might seem a bit frustrating as you can’t go ahead with the installation. Well, you can easily do so by running a single code on CMD. In this post, we will let you know the right way to install Windows 11 without an internet connection.
If you don’t run the code as guided above, an error message will appear that reads the following –
"Oops, you’ve lost internet connection"
Let’s learn how to overcome this issue on Windows 11 PC.
Why does Windows 11’s Setup Require an Internet Connection?
Microsoft is upgrading its operating system every now and then. Earlier, when users attempt to install a new OS, they could easily bypass connecting to an active internet connection. However, with OS Build 22557 and higher, the option to skip having internet connectivity is now grayed out. They did so to download/install any pending updates right during its installation.
Install Windows 11 Without Internet Connectivity
To install Windows 11 without connecting your device to a network, follow these easy steps –
Imp: A clean installation of Windows will remove everything from your device. So, make sure to create a full backup of all your important files and folders.
- Plug the USB flash drive containing Windows 11 installation into any port and restart your PC.
- While the operating system is loading, press the function key (Esc, Del, F6) to launch Boot Menu.
- Alternatively, you may also enter BIOS by pressing the relevant function key. Once you are inside, go to the Boot tab and change the first boot device to a Removable disk. Restart your PC again and this time Windows will load the installation media.
- Select your preferred language (English United States) and hit Next.
- Click “Install now” to proceed ahead.
- Select I don’t have the product key next. If you were on an activated version of Windows 11 previously, the new OS will re-activate automatically as soon as the installation completes.
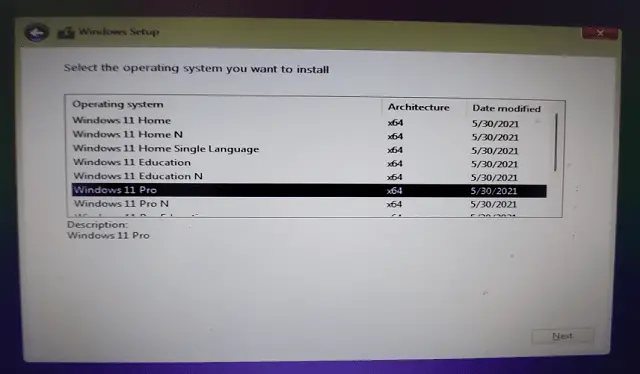
- Choose the Windows 11 edition of which you have the license key.
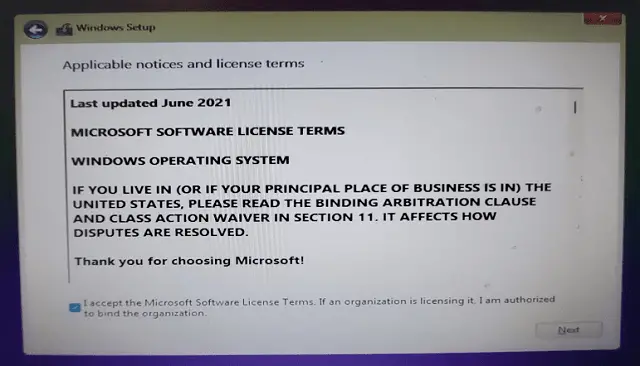
- On the Application notices and license terms window, tick the checkbox and hit Next again.
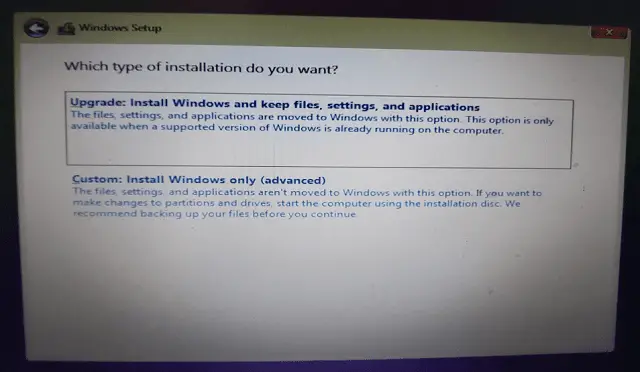
- Pick the second option i.e. Custom: Install Windows only (advanced).
- Now select each drive separately and click the format button. After you have formatted a disc drive, make sure to delete it as well. To do so, select any drive, and hit the Delete button.
Note: If there is more than one drive, you need not require deleting all disc drives. Just format and delete the root drive and select it again to go ahead with the installation.
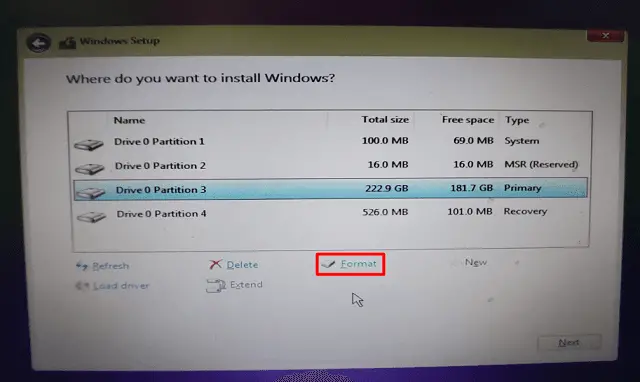
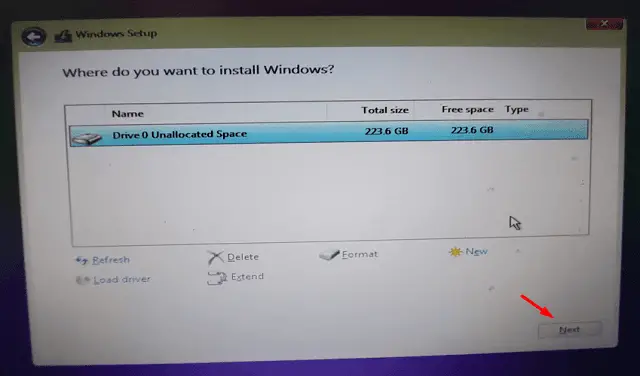
- Select the drive where you would like to install the new operating system, and hit Next.
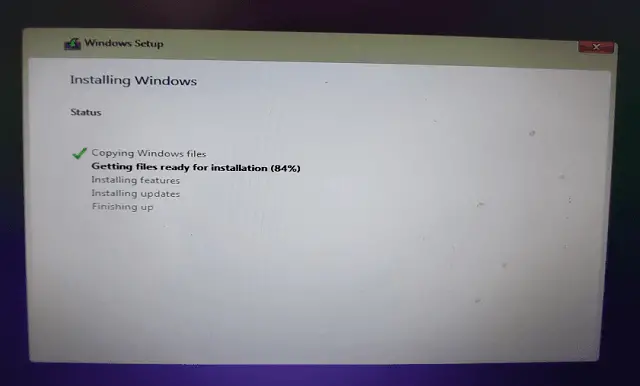
- Let the system extracts the relevant files and folders from the Bootable media. As soon as all five steps display a green tick, remove and USB drive.
Windows 11 Out of Box Experience
The preliminary steps are now done. You will get the OOBE screen next, so follow these steps carefully –
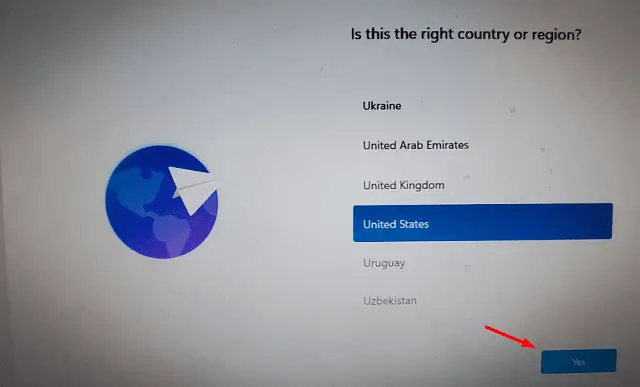
- First of all, select your region and hit Yes.
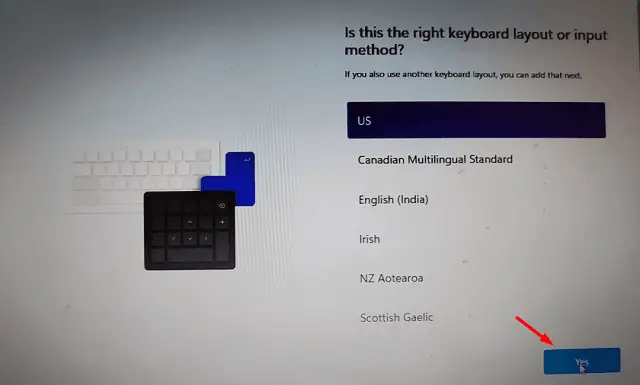
- Subsequently, pick up your keyboard layout setting and hit Yes again.
- Windows will suggest adding a new keyboard layout. If you don’t want that, simply click Skip.
- Click “I don’t have internet”, and you will circle back to the same page. Press Shift + F10 to launch Command Prompt and run this code –
OOBE\BYPASSNRO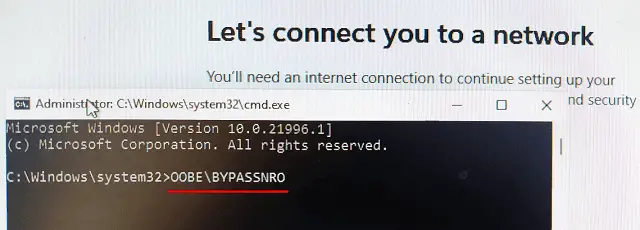
- Once the execution completes, the installation will automatically restart and display the out-of-box experience (OOBE) page.
- Select again your region and keyboard layout as guided above.

- On the “Let’s connect you to a network” screen, click I don’t have internet follows by “Continue with limited setup“.
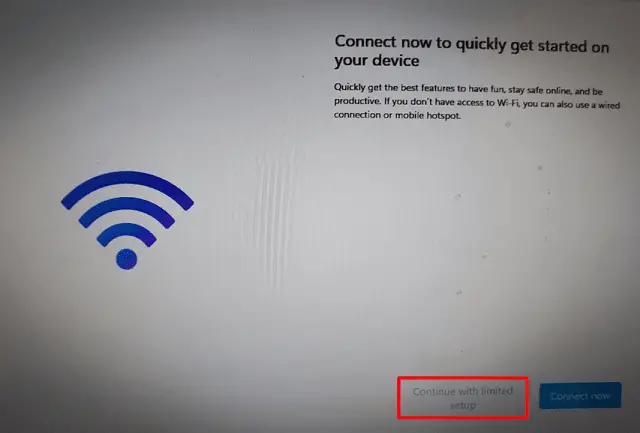
- Accept all terms and conditions so that the new Windows installation begins.
- As you are not connected to a network, you must create a local account.
- Provide a name to the local account, and hit Next.
- Fill in and confirm your password followed by Next again.
- The system will prompt setting three security questions on the upcoming screens. Well, do the same.
- Wait while Windows 11 is installing. In the end, select your privacy settings and hit Next available on the bottom-right corner.
- Keep on pressing Next time and again and at last hit Accept.
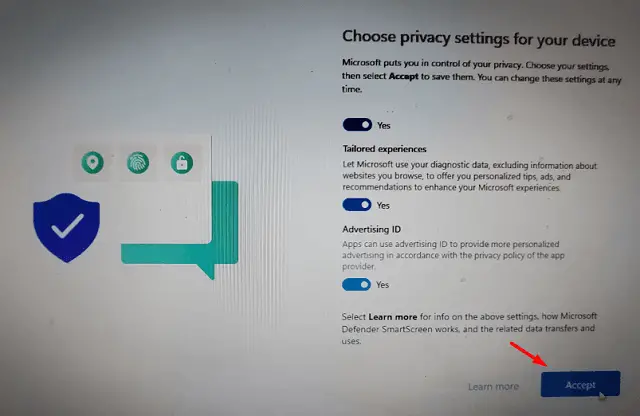
- That’s it, you have successfully installed Windows 11 without an Internet connection.
- Restart your PC and boot into your newly created local account.
I hope you were able to follow each one of the steps guided above and have activated Windows 11 without the internet. Let’s know if you face any difficulty following this tutorial.


