There are dozens of tools available at the Google Play Store that can record and save Android Phones Screen for free. Moreover, there often lies some native app that does this task quite smoothly. However, what if you would like to record your display screen on Windows 11 and that too for free?
Well, there are two in-built tools in Windows that can perform such tasks without charging you any cost of it. The two tools are Xbox Game Bar and Snipping Tool. Go for the first one if you want to record your gameplay while playing some games.
On the contrary, if you want to capture the Desktop Screen, you should opt for the Snipping Tool. One may also use this tool to customize the area that s/he wants you to capture. In short, this tool lets you manually decide the area which you would like to record and efficiently does its tasks.
Record Windows 11 Display Screen for Free
If you are looking for some simple and easy tools that can record your display screen on Windows 11 for free, you may utilize these two tools –
1. Using Xbox Game Bar
The easiest way of recording Windows 11 Display Screen is by using the Xbox Game Bar. Press Windows + G and you will see the Xbox Game Bar controller. By default, this opens the Capture, Audio, Performances, and a few other widgets.
However, there are certain restrictions to using it on Windows 11. For example, you can’t use this tool to record the screens of Windows Desktop or File Explorer. For any other system or external app, this tool works quite well.
Go to the Capture Widget and click on the “Recording Screen” button. Wait for a few seconds, and you will notice a new widget opening up and start recording your screen.
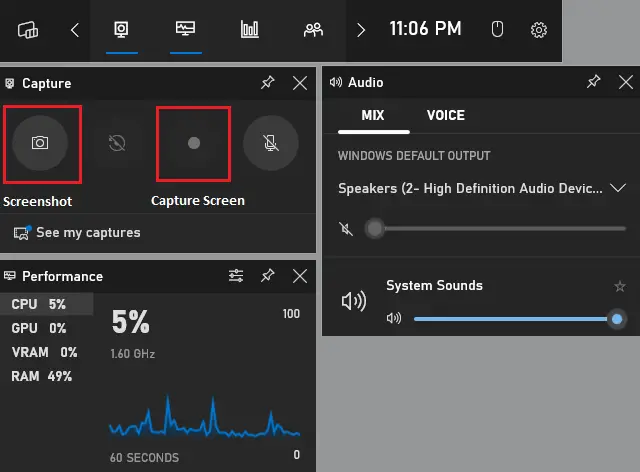
Note: You may also capture what’s actually going on in the background except that of Desktop and Explorer. To do so, all you require is to press the Camera icon. All saved recordings or snap layouts will be saved at the following –
C:\Users\username\Videos\Captures
2. Using New Snipping Tool
Microsoft has hugely advanced its Sniping tool to incorporate doing some complex things. Recording Windows Screen is one of those which Snip Tool does best. Here’s how to go for this method –
- Open Windows Settings (Win + S), and start typing Snipping.
- Click on the top result and this will launch the Sniping Tool.
- Go to the top bar and click on the Video icon next.
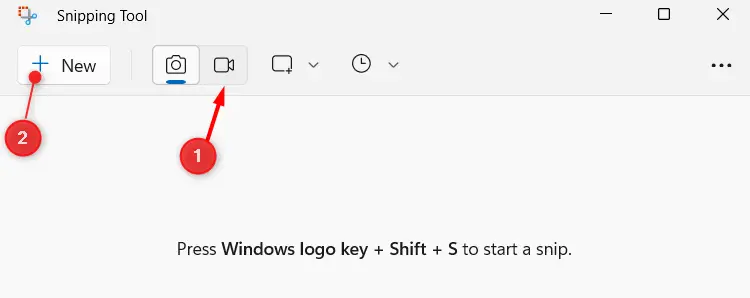
- You may now select the Screen recording feature. Click on the + New button and select the area (which you would like to record).
- Assuming you did select some area, now click on the Start button.
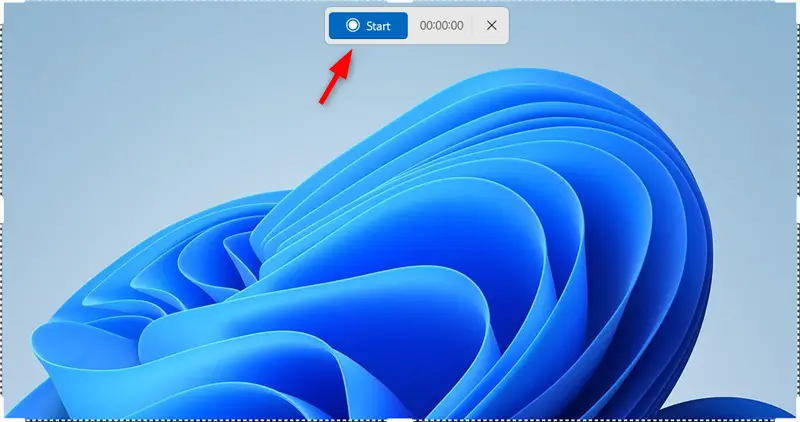
Your Windows 11 Display Screen is now being recorded. After you are done recording the screen, click on the Red button and the recording stops.
To save the recently recorded screen, you may use the Ctrl + S hotkey. That’s it, you have successfully recorded the Windows 11 display screen.
Note: The only drawback of using the Snipping Tool is that it saves files in MP4 format only. You may use some video converter tool to change its extension to any other video extension.
Read Next: How to Record Game Screen in Windows 10 without Third-Party Software