Did you encounter an error code 0xc0000001 while clean installing or updating Windows 10 on your computer? Well, this is a blue screen type error and usually occurs due to different reasons. In this post, we will cover all the reasons that may trigger this issue along with eight probable workarounds.

To overcome this issue, you require a Windows 10 Installation Media, so create it first. Now, follow the below-mentioned troubleshooting guides one after another –
- Rebuild obsolete BCD codes
- Use System Restore point
- Repair corrupt Windows 10 files
- Scan the HDD efficiency using the CHKDSK command
- Resolve file corruption using SFC/DISM
Here, we depict some easy methods to bypass this problem.
What causes error code 0xc0000001?
In general, this bug arises primarily when you are updating the Windows 10 OS. By default, missing system files, recent applications, and faults in hardware are the sole reasons behind this trouble. Usually, failing to install Windows may cause this BSOD Error code 0xc0000001 or more.
[Solved] BSOD Error code 0xc0000001 in Windows
To solve this kernel error on your computer, go through the below suggestions, and see which solution exactly fixes this issue –
Note: While attempting the below solutions, make sure to perform the steps carefully as any wrongdoing may create some other issue.
Create Windows 10 Installation Media
Since this is a BSOD-type error, you will need Windows installation media to repair the underlying cause. If you don’t have a Media Creation Tool, you may create one by following these steps –
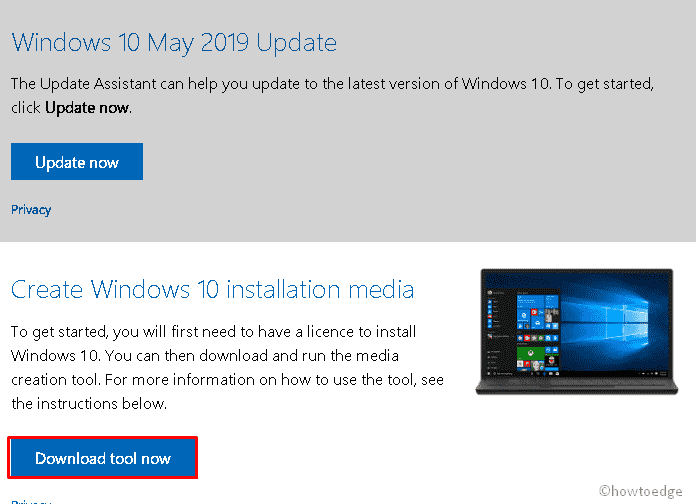
Step-1: First of all, visit Microsoft’s official site, scroll down to Create Windows 10 installation media, and hit the button – Download tool now.
Step-2: Accept the license terms and conditions that appear next.
Step-3: Now choose the option Create installation media (USB flash drive, DVD, or ISO file) for another PC then hit Next to go ahead.
Step-4: We suggest opting for the ISO file as this will allow clean installation of Windows when none of the fixes work to resolve the error code 0xc0000001.
Note: Make sure the USB flash drive has at least 8 GB of free space.
Step-5: Now that you have the required setup file, follow the below solutions one by one. Make sure to remove the secondary devices so that any corrupt peripherals don’t affect the troubleshooting process.
1. Uninstall the faulty program in Safe Mode
Sometimes, the recently installed apps restrict the installation of new updates on your system. As a result, error code 0xc0000001 appears. To avert this problem, uninstall the recently installed applications from your PC –
Entering into Safe Mode
As stated above, this is a blue screen error, so you can’t get past the login screen. There’s no point in following any solutions if you can’t log into your device. Well, Safe Mode is a great tool on Windows that allows accessing and getting past the login screen. Here’s what you need to do –
- Press and hold down the Power button for approximately 5 seconds to launch the Preparing Automatic Repair window.
- In case, you don’t receive this page, repeat this process 3 times.
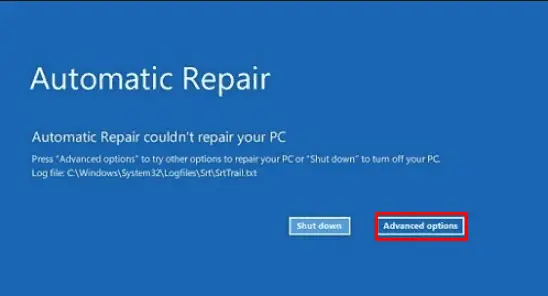
- After a few seconds, the Automatic Repair window will pop up, here select the Advanced options button.
- Henceforth, click on the Troubleshoot then Advanced Options again.
- Now, hit Startup settings then Restart to complete further processes.
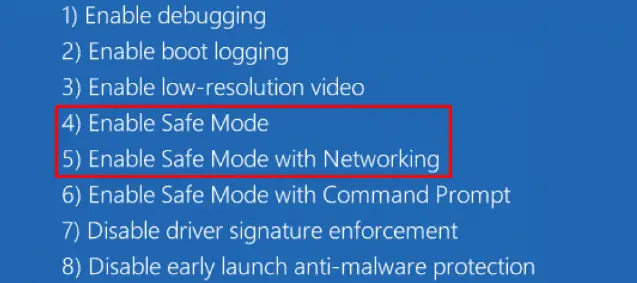
- Here, Choose either F4 to enable safe mode or F5 for Safe mode with networking.
Uninstalling the faulty app
- After you boot into your device, Press the Win and I hotkey to launch Settings.
- Select Apps followed by Apps & Features.
- Here, scroll down and select the app that you had installed recently.
- Click Uninstall and then Uninstall again to confirm its deletion.
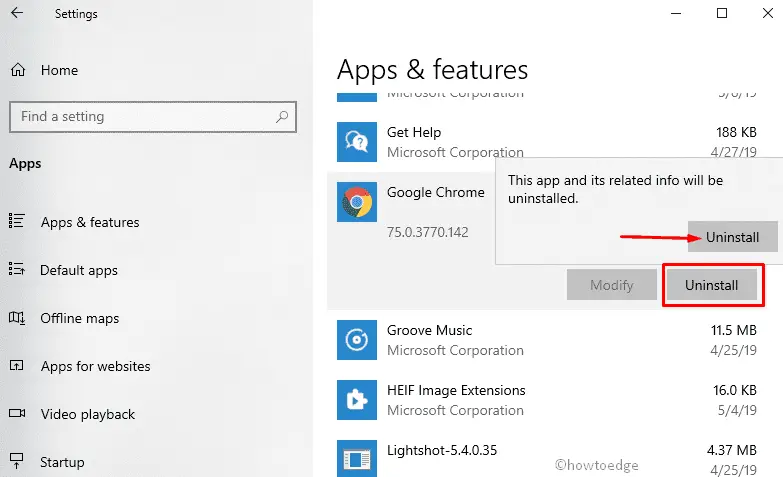
Once finished, Restart your PC normally and check whether the error code 0xc0000001 is resolved or not. If not, try the below set of solutions next –
2. Run the SFC scan
System File Checker is one of the most effective tools to fix different error codes in Windows PCs. It is thereby recommended to try this tool and see if it does solve the underlying causes i.e. corrupted files and folders –
- Attach the Windows Installation Media and Reboot your PC.
- Press the Motherboard’s supported function key to launch the boot Repair.
- Once the Choose an Options page appears, navigate to the following options one by one –
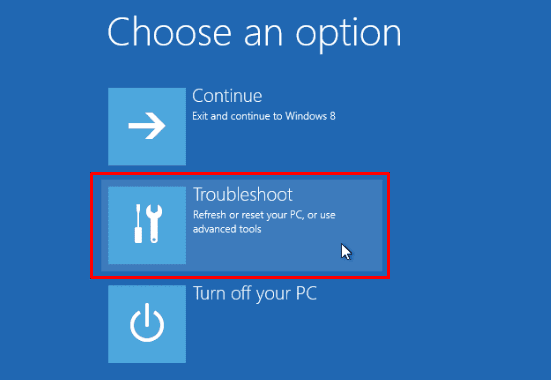
Troubleshoot > Advanced options > Command Prompt
- On the elevated console, type
sfc/scannowand press Enter –
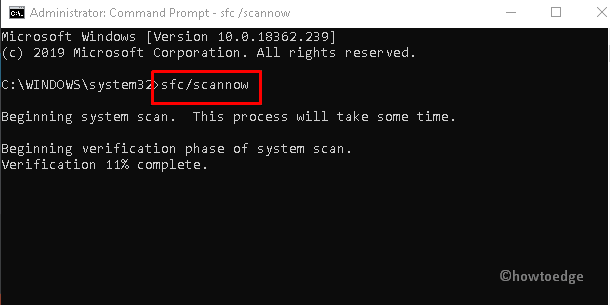
This is a time-consuming process, hence wait patiently.
- Once over, complete installing Windows 10 and restart your computer normally.
If you are still getting a blue screen, follow these solutions next –
3. Check the hard drive
The presence of bad sectors on the HDD may also trigger an error code 0xc0000001 and thus restrict the installation of Windows 10. Check the current performance of your hard disk and see if is all okay. Here’s how to inspect hard disk in Windows –
- At first, open Command Prompt using the boot Startup Repair (as discussed above).
- In the prompt area, type the following and press the Enter key –
chkdsk C: /f /r /x

- If there appears any confirmation message, type Y followed by the Enter key.
- This will scan the overall disk’s health performance on the root drive and repair the same if it suspects any corrupt drive.
- After you complete the above task, Restart your system and see if the problem continues to persist.
4. Run DISM
Similar to the SFC scan, DISM (Deployment Image Servicing and Management) is also a default characteristic of Windows 10. You can use this service to scan and check the health of your hard disk. Here are the instructions to follow –
- Insert the Windows Installation Media onto your PC’s port then Restart your Machine.
- Press one of the function keys as per your System Model and architect to enter the boot mode.
- Thereupon, navigate to the following path-
Troubleshoot->Advanced options-> Command Prompt
- When the console prompt, copy/paste the below path and press Enter –
DISM.exe /Online /Cleanup-Image /RestoreHealth /Source:C:RepairSourceWindows /LimitAccess
- Here C: RepairSourceWindows is the path of the connected DVD or USB. Make sure to change it if it differs in your case.
- Reboot your system after the scan completes and check if the issue is resolved.
5. Repair BCD code
Boot Configuration Data is a vital part of the Windows OS. However, it may get corrupted sometimes resulting in bugs like BSOD error code 0xc0000001. If that’s the case, Repairing the BDC files may help to address this trouble –
- Plug the USB drive to the port then Reboot your system.
- Press the function key as per your hardware configuration to launch the boot menu.
- On
Choose an optionsScreen, select Troubleshoot thereafter Advanced Options.

- Further, choose Command Prompt among the different categories available there.
- Near the blinking surface, run the following command lines one by one. Make sure to press the Enter key at the end of each command.
Bootrec /fixmbr
Bootrec /fixboot
Bootrec /rebuildbcd
exit
- Once the above task is completed, Restart your system to save the changes made so far.
6. Perform Automatic Repair
If you fail to install the Windows operating system subject to BSOD error code 0xc0000001, Automatic repair may work as a troubleshooting guide. This utility tool will scan the potential bugs and try to fix the same. Here are the steps to follow –
- First of all, attach the Media Creation Tool to the respective port and Restart your PC.
- While the Windows is loading, press any key to enter boot mode.
- Set the time and language on the next screen.
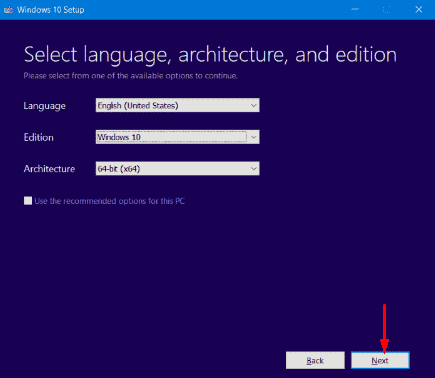
- Subsequently, move to the lower-left corner of the screen and select Repair your computer.
- Henceforth, tap Troubleshoot under the Choose an option window.
- Go ahead and choose Advanced options.
- Click Startup repair on the subsequent page.
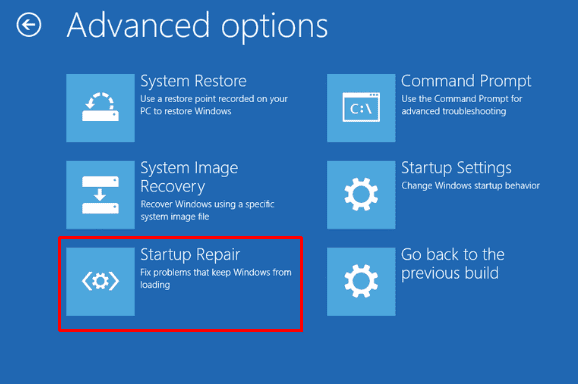
Keep patience till the utility command restores your PC.
7. Convert NTFS drive to GPT
Changing Drive attributes from MBR to UEFI may fix this BSOD Error 0xc0000001 on your PC. Here are the steps to follow-
- Insert the Windows installation media like DVD, CD, or USB flash drive to the respective port then Restart your system.
- When the Windows is loading, press the function keys such as – f2, f4, f9, f12, Del, or Esc as per your System configuration.
- Select Troubleshoot on the next screen followed by Advanced options.
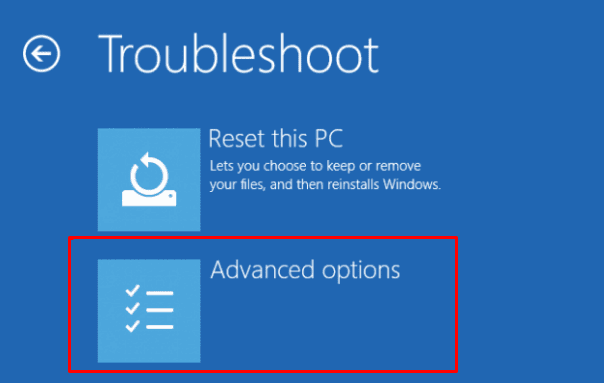
- Subsequently, select the Command Prompt from the available options.
- Now, type
diskpartnear the blinking cursor followed byEnterKey. - Next, type list disk then Enter to get the available list of drives on your PC.

- Choose the Disk number (either 0 or 1) depending on the number of partitions on your HDD.
- Again, type GPT then press Enter Key. This will change the drive attribute from NTFS to GPT.
- At last, type exit then hit Enter to come out of the Console.
You can now proceed ahead to complete the installation of the Windows 10 setup file.
8. Restore the System with Windows Recovery Environment
In case, the above Error code 0xc0000001 persists even after applying the above fixes, try restoring your PC using System Restore point. Here’s how to proceed-
- Attach the Windows installation tool and Restart your System multiple times to get the Preparing Automatic Repair Screen.
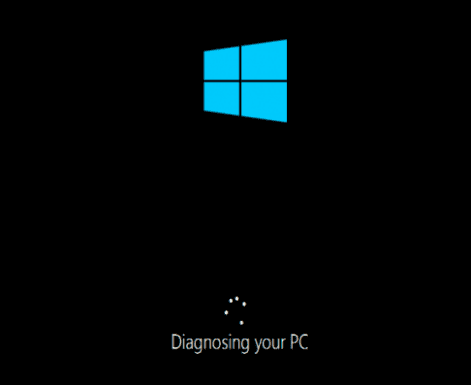
- After a few seconds, select Troubleshoot from the Windows Recovery Environments.
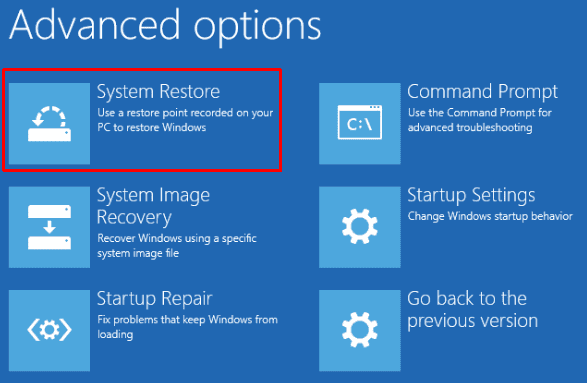
- Now, choose Advanced Options followed by the System Restore from the list of categories. See the Snapshot below-
- On the new dialog asking recovery key, enter the valid passkey.
- At last, use your administrator account name & Password then follow the on-screen instructions to complete the remaining task.
I hope this post helps to solve the BSOD Error code 0xc0000001 on Windows 10 PC.
