On Windows 10, ‘sharing a folder’ in the network is a remarkable approach to share files with other users. This is a pretty easy job to share files instead of having to email files back and forth or using a USB flash drive. Although, the day may arrive when you require to stop sharing a folder for the various causes. In this blog post, you will know easy techniques to stop sharing a network folder on Windows 10.
Setting up a folder to share is a simple process and stopping it is comparatively easier. We have introduced here two approaches to stop sharing a network folder by using Computer Management and Command Prompt.
RECOMMENDED: Fix: Network Discovery not Working on Windows 10
Methods to stop sharing a network folder in Windows 10
Use these methods to stop sharing a network folder in Windows 10-
1} Using Computer Management
Here is an easy approach to stop sharing a network folder in Windows 10.
Step-1: Press Window + S to launch the Taskbar search.
Step-2: Search for Computer Management and select the result from the top of the list.
Step-3: On the left side of the next page, expand the Shared Folders branch.
Step-4: Now, move along the right and select Shares item.
Step-5: Make a right-click on the folder which you don’t want to share. Select Stop Sharing option.
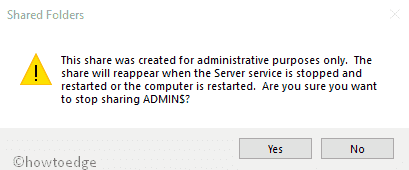
Step-6: A warning message will flash on your screen, hit the Yes button.

Once you perform the above steps, the folder will not accessible through any network. In addition, you can stop sharing a folder within the location of the folder. This tutorial uses the Computer Management experience because it allows you to see and stop all the shares from one location.
2} Using Command Prompt
If you are not comfy with the above procedure, using the Command Prompt option can come in handy if you’re having problems trying to disable a share using File Explorer or Computer Management.
-
At first, press Window + R hotkey to open the Run dialog box.
- In the empty field, type cmd and press Ctrl + Shift + Enter to open the Elevated Command Prompt.
- When UAC prompts, simply click on the Yes button.
- On the subsequent page, type the following command to see all the shared folders on your computer – net share
- Press the Enter key.
- To stop sharing a particular folder, type the following command – net share ShareOne2 /delete

- Again, press the Enter key.
- Subsequently, make sure to change ShareOne2 for the name of the folder that you’re sharing.
When you complete the above procedure, the folder that you particularized in the command will no longer be available for network users.


