Apple has finally released the stable and public version of iOS 17 to all its users. This new version has brought several new features, and one of the most talked about features is the use of Contact Posters.
Contact Poster is quite a unique thing introduced in iOS 17 and with this, you can decide how you appear on your friend’s screen during calls. This is really a big change as opposed to using the old, plain interface displaying the initials of your name on the receiver end.
With Contact Poster, you may now be more creative and decide how to express yourself while reaching out to a friend or family during calls. In this post, we will discuss what a contact poster is and how to create and enable it on an iPhone with iOS 17. Do note that this can be enabled only when your friend has also upgraded to iOS 17.
How to Enable Sensitive Content Warning on iPhone iOS 17
What are Contact Posters in iOS 17?
Apple had last introduced tools to personalize the Lock and Home Screen with its iOS 16. The tech giant has continued improving the personalization features even on its new version i.e. iOS 17.
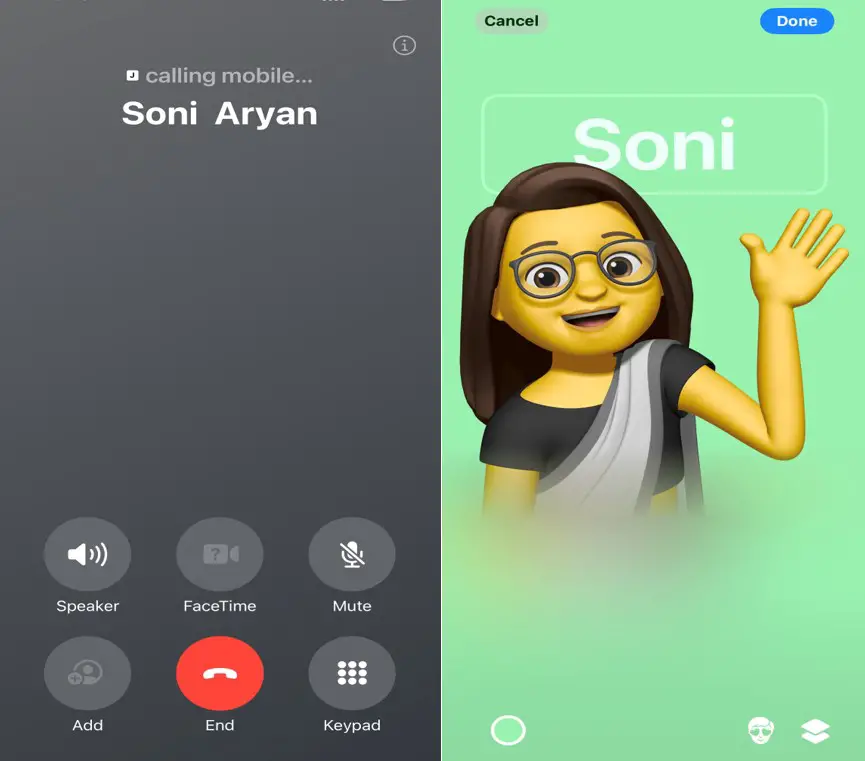
This time, Apple has brought some new tools using which you can create and personalize your contact poster. The newly created poster will appear on your receiver’s screen.
Similar to how you were customizing the Lock/Home Screen previously, you may now choose either Photo or Memoji to create a unique contact poster. Moreover, you can also personalize the poster with your own choice of typography.
Create Your Contact Poster on iPhone with iOS 17
If you do like the concept of Contact Poster and want to create your own personal one, follow these steps on your iPhone.
- After you have upgraded your iPhone to iOS 17, go to App Library and search for Contacts.
- Tap on this Contacts app once, and click on your profile.
- On the top right end, you will find the option to Edit. Well, tap on it.
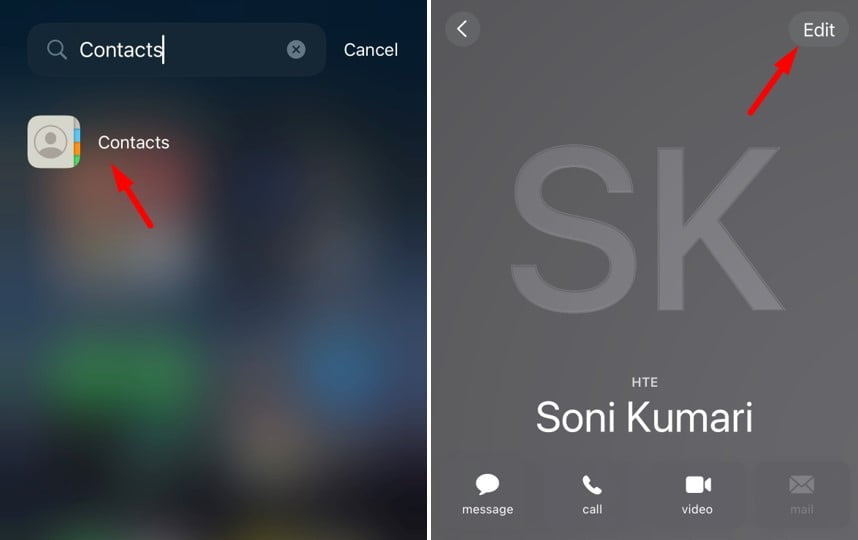
- Your card will now open up. Tap on the Edit button again, available just below your profile picture.
- You may either start customizing the first screen or slide further and tap on Create New.
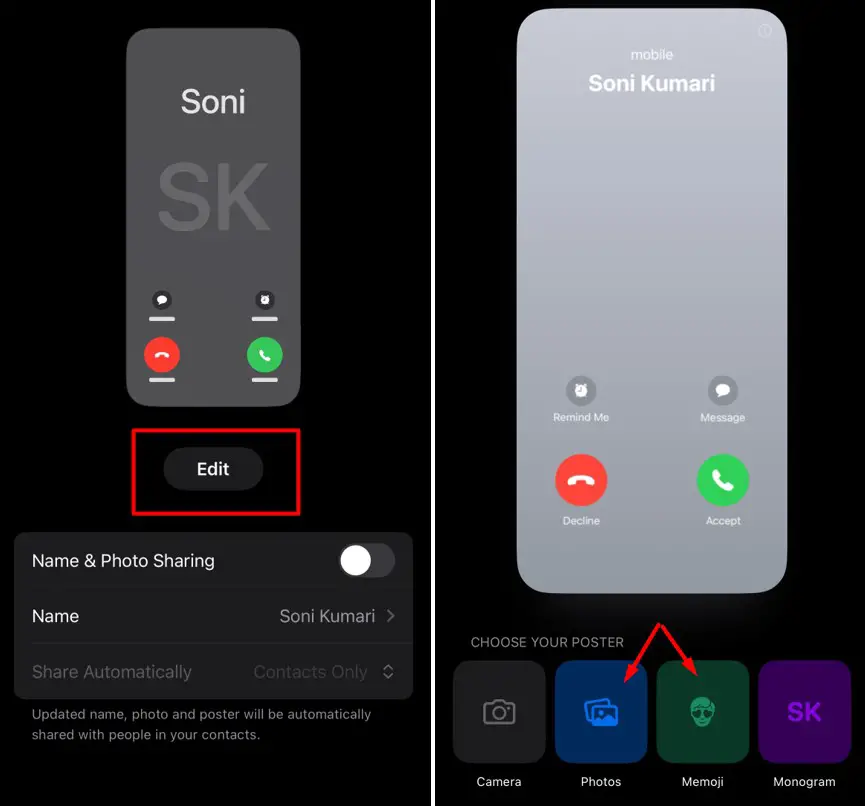
- There are four different options to choose your poster. Choose the one that suits you the most.
- We have chosen the Memoji one and have explained how to customize it properly in the below section.
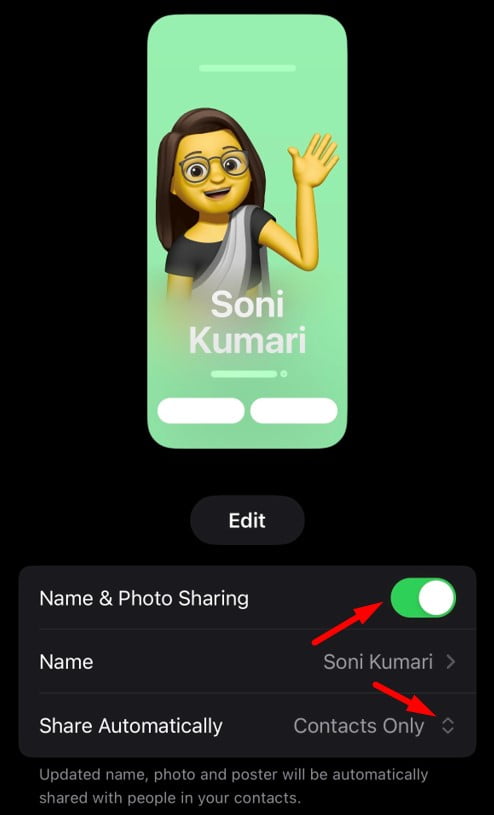
- After you have made the necessary changes to your contact poster, come back to Contact Photo & Poster, and enable the toggle switch next to Name & Phot Sharing.
Note: If you have chosen to select a photo, make sure to alter the shadings and see how they look. Just like opting for a lock screen in iOS 16, you have options to choose from Natural, Gradient backdrop, Seamless Background, Seamless Background Mono, Overprint, Studio, Black and White, Color Backdrop, Duotone, and Color Wash.
- If you want to change your name, edit the same, and write down the one you want others to know you from.
- In the end, you have two options to choose under Share Automatically. Go for the “Always Ask” option if you don’t have everyone in your contacts seeing your contact poster. Otherwise, select Contacts Only.
That’s it, you have successfully updated your “Contact Photo & Poster.”
How to create a new contact poster and modify it in iOS 17
In case you want to create a new contact poster and modify the same to use it on iOS 17, use the below steps –
- Open App Library and click on the Contacts app. Tap on Contact Photo & Poster, and then hit Edit.
- Click Customize, and then select Poster. The chosen display picture will appear on your display screen.
- Click on the Memoji icon, and tap over the “+” icon. Select a face design you would like to use for your receiver screen.
- You have numerous things to choose from here on the current screen. This includes changing Skin, Hairstyle, Brows, Eyes, Head, Nose, Mouth, Ears, Facial Hair, Eyewear, Headgear, and Clothing.
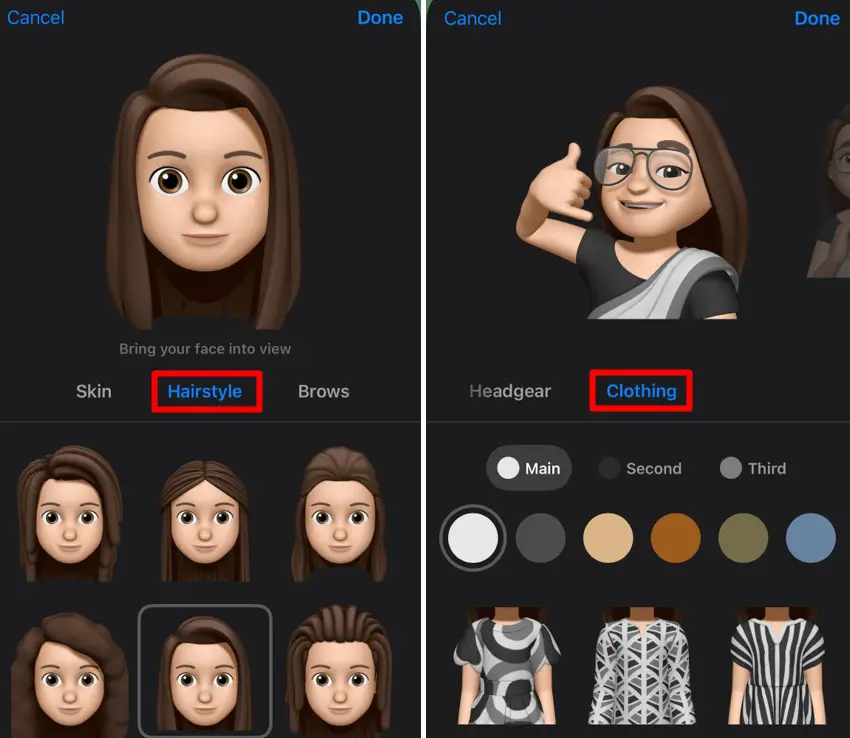
- After you are done selecting things that you would like to set, tap on the Done button.
- On the last screen, you have the option to choose your facial expression which is quite an interesting thing. To set your own facial expression, all you require is to move your head at an angle and hit the Snap button.
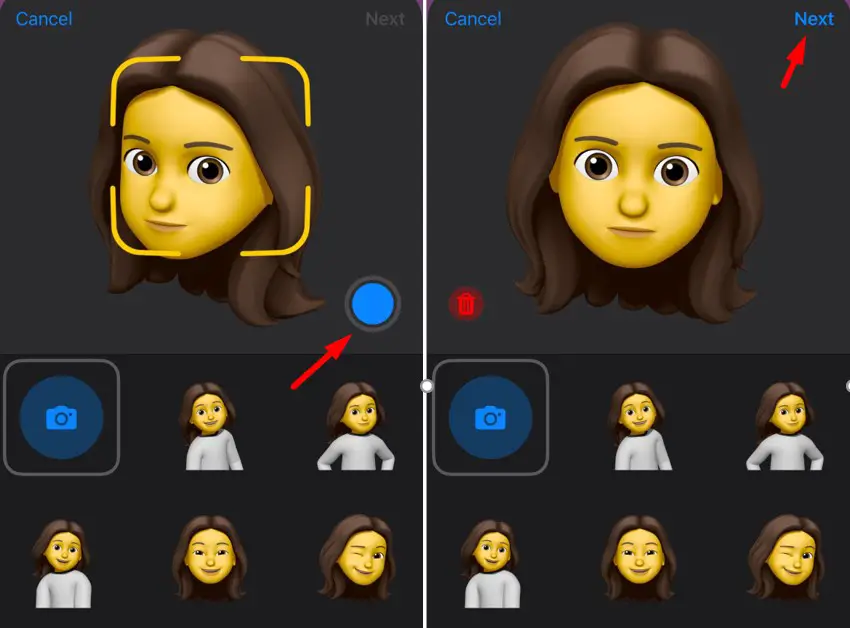
- iOS 17 also lets you add or remove the Depth Effect from the contact poster. Choose the one that suits your needs. In the bottommost left corner, you have the option to change the background color as well.
Note: In case you would like to change your name and how it appears, click on the typography, and choose your font and color. Whenever you change the default image on the poster, iOS 17 will ask if you want to update it. You can either choose to update or skip this for now.
- After you are done, tap on the Next button again. A preview of the recently made poster will appear on the display screen. Click Continue to proceed ahead, or the Back button to customize it again.
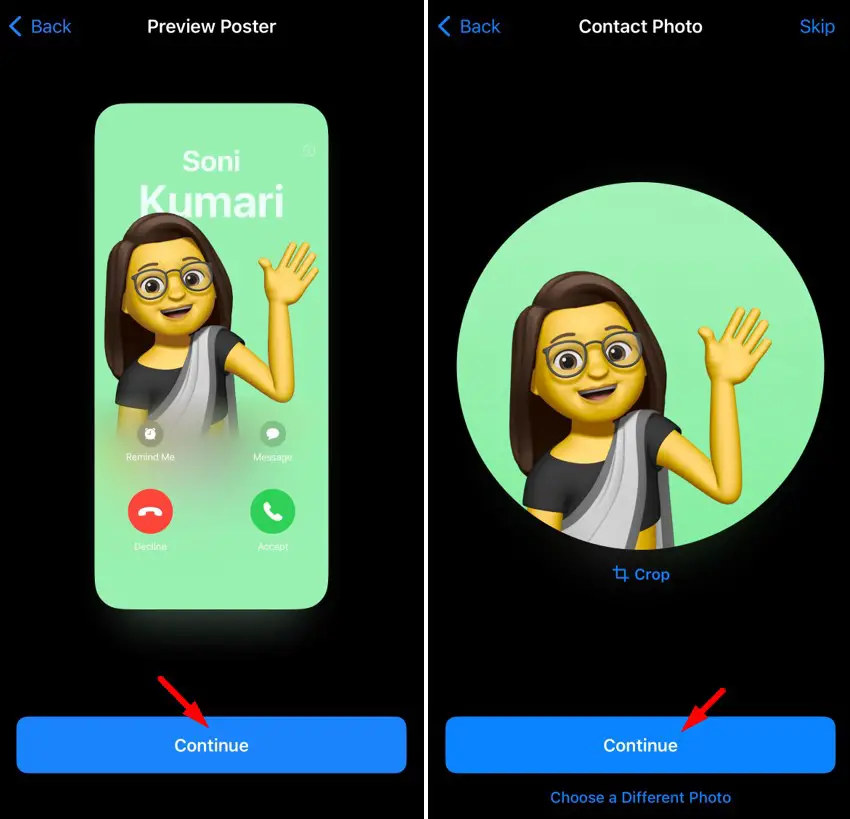
That’s it, you have successfully set up a personal contact poster and this will appear on your receiver’s end during calls. From now onward, whenever you call your friends, they will see your personalized contact poster on their devices provided they have also upgraded their iPhones to iOS 17.
