When it comes to attending online classes, office meetings, and other video-conferencing meets, Microsoft Teams excels everywhere. That’s the reason why Microsoft has provided an option to access this app directly from the system tray. However, what if one uses some other apps like Zoom, Google Meet, etc. to do the things mentioned above. In such cases, s/he will find it unnecessarily occupying storage spaces and want to uninstall Microsoft Teams as soon as possible.
If you are one such user and are exploring ways how to configure this app in Windows 11, read this guide till the end. Rather than doing a plane uninstallation, you may do the following as well –
- Quit Microsoft Teams
- Stop Teams app from starting automatically
- Disable Teams app during Windows startup
- Remove Microsoft Teams
Why does Microsoft Teams open when Windows restarts?
By default, all apps that Microsoft finds essential feature a setting that enables them every time you restart your PC. This may suit programs that you frequently use. However, if you don’t use an application that much, keeping it disabled from startup will save system resources from being consumed.
Related: How to Blur Background on Microsoft Teams
How to Remove or Uninstall Microsoft Teams in Windows 11
If you don’t use Microsoft teams app that much and want to get rid of it on Windows 11, you may do the following –
1] Come out of the Teams app in Windows 11
If the Teams app launches way more time than it should, you must either quit, remove, or uninstall this program from your PC. Assuming you are not willing to uninstall this software, here’s how you can quit this app.
- On the taskbar, you may easily locate the Microsoft Teams icon.
- When found, right-click over it, and select the button – Quit.
- In case you don’t find the Teams icon anywhere on the system tray, click the up-arrow on the taskbar.
- When this expands, you will definitely find the concerned app icon.
- Right-click over it and hit the option – Quit.

Note: Quitting Microsoft Teams will prevent this app from starting temporarily in Windows 11. As soon as you restart your device, this app will launch again. To stop this app permanently, you may follow either of the following solutions –
2] Stop Microsoft Teams app from starting automatically
In case you don’t want to uninstall or remove this program, you may restrict it from unnecessarily popping up on the display screen. Here’s how to perform this task –
- First of all, start this application by tapping over its icon.
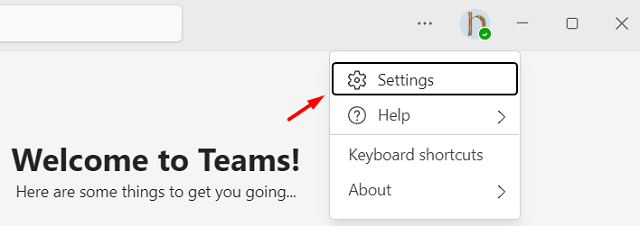
- When it launches, click the three dots on the right-top screen, and hit Settings.
- Under General > System, you will find a checkbox – “Auto-start Teams“.
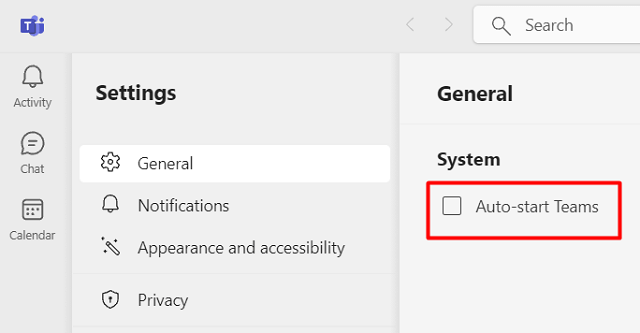
- Uncheck this box and close the Teams app.
Doing this will stop Microsoft Teams from appearing out of nowhere in Windows 11.
3] Disable Microsoft Teams during Windows 11 startup
The procedure to disable Microsoft Teams during startup is similar to that of any other programs in Windows 11 i.e. by disabling a program under Task Manager. If you don’t know how to perform this task, follow the guideline below –
- Press Ctrl + Shift + Esc to launch Task Manager.
- Go to the Startup tab and locate Microsoft Teams.
- By default, this is enabled on the Startup screen.
- So, right-click over it and choose the option – “Disable“.
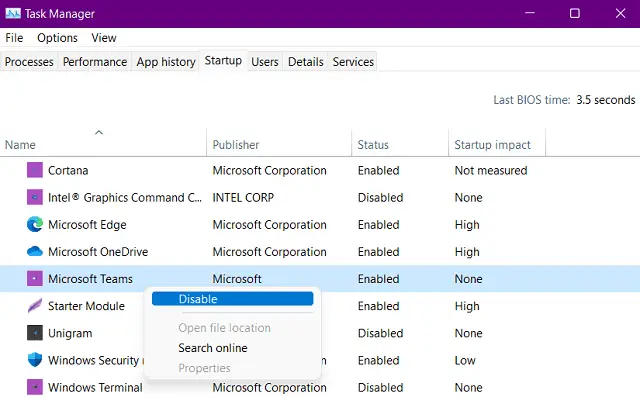
- Restart your PC and check if this starts up again on your computer.
4] Uninstall Microsoft Teams
If you think Microsoft Teams is unnecessarily consuming system resources on your device and you no longer require this app, use the steps below to remove it from your computer –
- Press Win + X and select Apps & Features.
- Scroll down to Microsoft Teams app, click the three dots, and hit Uninstall.
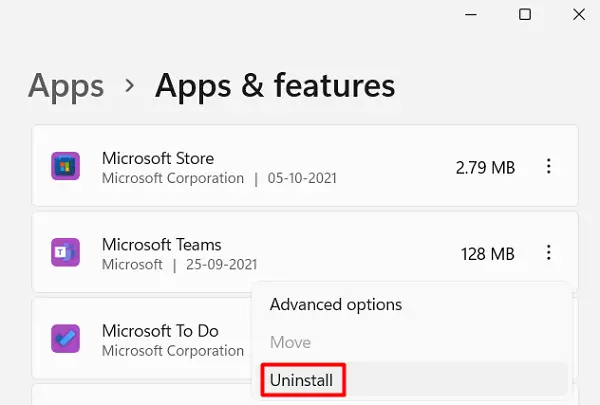
- Doing this will uninstall the Teams app from your Windows 11 PC.
- Make sure to restart your PC next so that any leftover or residual files delete as well.
How to uninstall Microsoft Teams via Windows PowerShell
Though Microsoft allows uninstalling this app right from the Settings app, you may also get rid of this program via Windows PowerShell (Admin). To do so, follow these steps –
- First of all, press Win + X, and select Windows Terminal (Admin).
- The terminal will default start the PowerShell.
- Copy/paste the code below, and press Enter –
Get-AppxPackage MicrosoftTeams* | Remove-AppxPackage
- PowerShell will run this cmdlet and remove Microsoft Teams from your device.
- You may reboot your PC next so that any leftover or residual files delete as well.
I hope this guide presents a clear idea on how to uninstall, remove, or quit the Microsoft Teams app in Windows 11.
How to reinstall Microsoft Teams on your computer
If you ever thought of reinstalling Microsoft Teams back on your device, you may do so by following these easy steps –
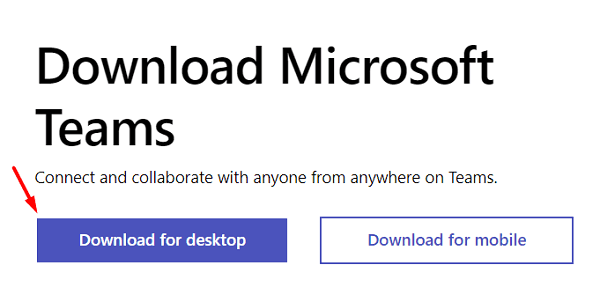
- First of all, visit the site – Download Microsoft Teams.
- Click Download for desktop.
- Choose the version that you want to install on your computer.
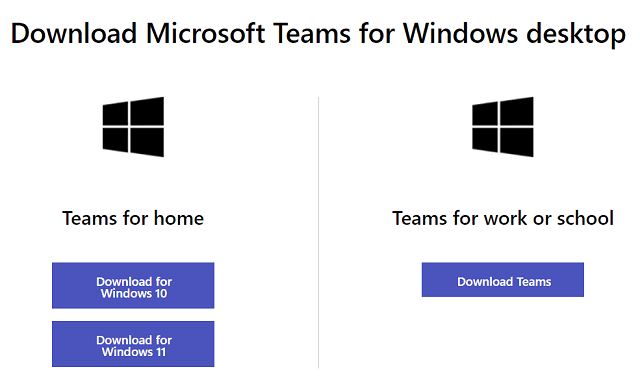
- When prompted to save the setup file, browse to the location where you would like to save the setup file.
- Once the download completes, navigate to the folder where you had saved the setup file, and double-click on that.
- The UAC window should appear next, hit Yes.
- Microsoft Teams will soon start installing on your computer.
Read Next: How to Reduce Background Noise in Microsoft Teams


