Microsoft brings a new feature on its latest dev version i.e. Windows 11 22H2 that goes by the name Desktop Stickers. Using this new feature, you may add stickers of different types to your desktop screen, and they resemble as if they are a part of the desktop wallpaper itself.
By default, you will find these desktop stickers disabled on your computer. To enable such stickers on your computer, you need to make a few changes inside the registry. However, do note that your operating system must be running on Dev or Beta Channel for desktop Stickers to work effectively.

Are there any prerequisites to enable Desktop Stickers?
Yes, Desktop Stickers are available only on Windows 11 22h2, and that too if you are running a dev or beta build. More to this, it is still under experiment and we can’t confirm if this becomes a permanent feature in future releases. So, you better enjoy this new feature for whatever long time it continues.
How to Enable Stickers on Windows 11
By default, desktop stickers are disabled on Windows 11 PC. Hence, you need to first enable them by making a minor change to the registry. However, as making changes to the registry is not without trouble, make sure to create a full registry backup first.
Here’s how to enable Desktop Stickers on your Windows 11 PC –
- Press Win + R to launch the Run dialog.
- Type “
regedit” on it and press Enter. - The UAC window will appear next, hit Yes to authorize opening Registry.
- When the registry opens, navigate to the below path –
HKEY_LOCAL_MACHINE\SOFTWARE\Microsoft\PolicyManager\current\device
- Alternatively, you may copy this path and paste it into the address bar. Press Enter to reach out to the Device key inside the registry.
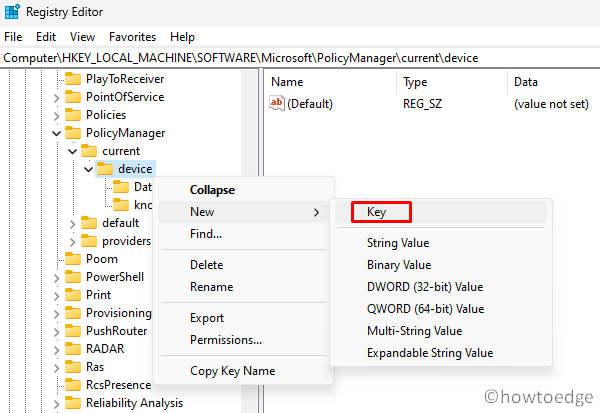
- Right-click on this Device key (visible on the left navigation) and select New > Key. Rename this newly created key as “Stickers“.
- Select the Stickers key and put a right-click on its right pane.
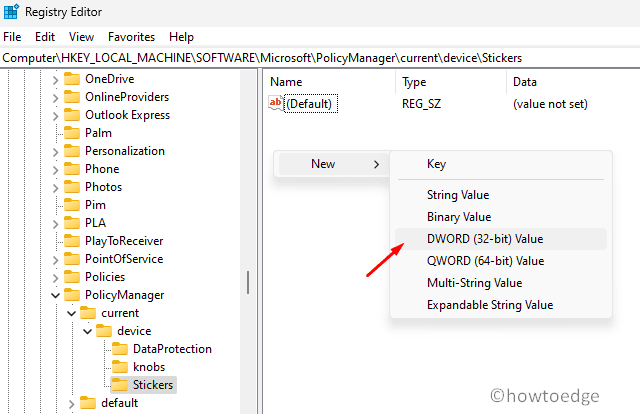
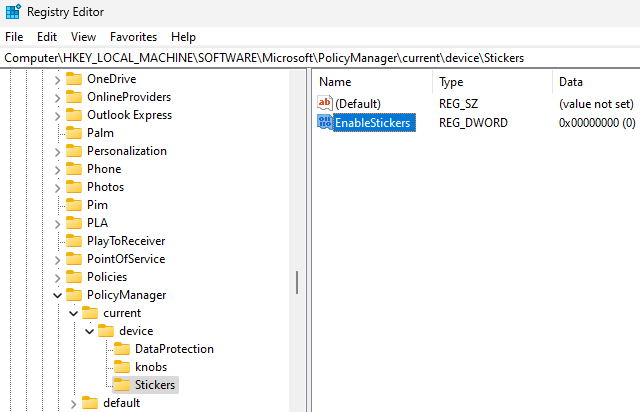
- Select New and then DWORD (32-bit) Value on the shortcut menu. Rename this key as “EnableStickers“.
- Double-click on the EnableStickers entry and change its Value Data field to “1“. Leave the base radio button as it is i.e. Hexadecimal.
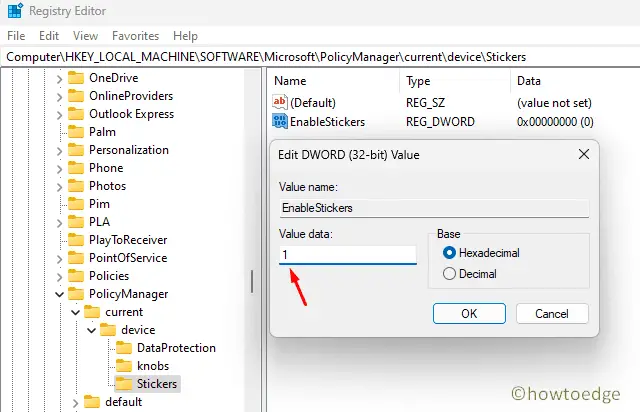
- Click OK to confirm the latest changes and restart your PC.
Note: If you ever want to disable Desktop Stickers on your PC, re-visit the above path and change the Value Data field of the “EnableStickers” key back to “0”.
How to Add and Use Stickers in Windows 11
After you have made the necessary changes inside the registry, the Desktop feature must appear under Settings > Personalization. Launch Windows Settings by pressing Win + I, and do the following –
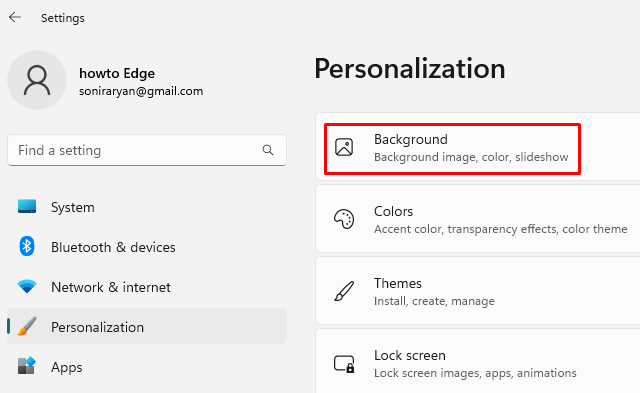
- Select Personalization available on the left navigation panel.
- Move to the right pane and click on the Background option.
- When this expands, you may see the “Choose stickers for your wallpaper” under “Personalize your background”.
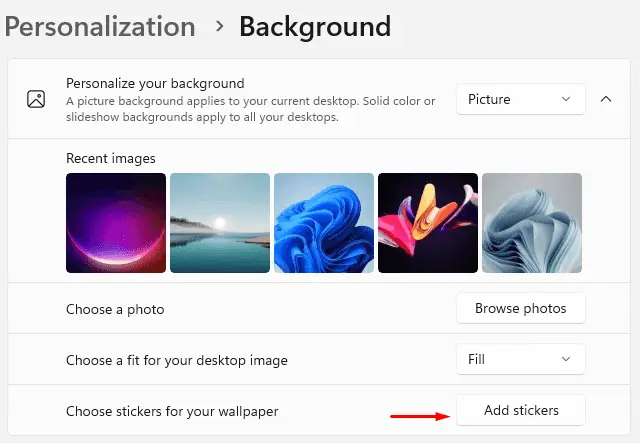
Note: For this option to work correctly, you must choose either “Picture” or “Windows Spotlight“. If you change this to Solid color or Slideshow, there won’t be any setting to add or use desktop stickers.
- Select the sticker that you would like to add to your device and hit “Add stickers“.
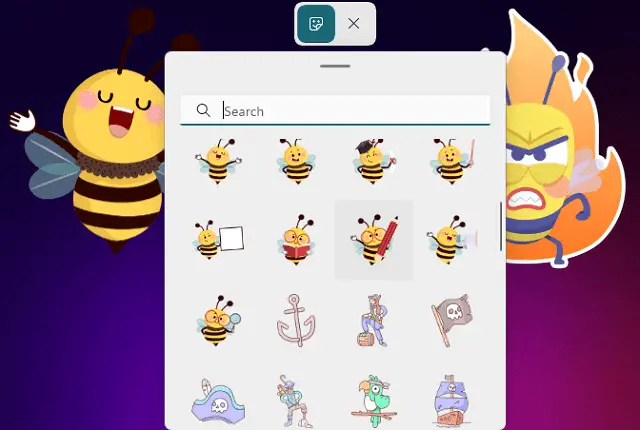
- Now that you have added a sticker to your Desktop, make sure to rightly adjust its size.
- Close the Stickers window and restart your PC.
When you are using stickers, the desktop and the taskbar icons will grey out for that time. If you are facing this issue very frequently, you may restart your PC and the problem resolves.
Read Next:


