With the release of new builds in Windows 10 Insider Preview, usage of reserved storage in Windows 10 is much appreciated by several users. Today, in this article, we will discuss how to enable or disable reserved storage in Windows 10. What exactly is this, how to enable and disable this feature on your system. Let’s go ahead and explore all the necessary details related to Reserved Storage in Windows 10 1903.
There will be an extra feature available to all users with the release of April 2019 Windows 10 1903. This is basically the presence of Reserved Storage. 7GB of the hard drive is retained only to be used for the update process, storing temporary & program files in addition to system cache. This implies that when you mount the latest update on your system, it will store the previous files in this Reserved Storage section. Doing so will resolve the basic issues like not enough storage which in turn could affect the smooth operation of your PC. Let’s get to know how to enable, disable the reserve storage in Windows 10 –
Enable, disable or check the Reserved storage in Windows 10
Here, we discuss three different sections to understand Reserved Storage in detail. They are –
- Check Reserved Storage in Windows 10
- Enable Reserved Storage in Windows 10
- Disable Reserved Storage in Windows 10
What is Reserved Storage in Windows 10?
Starting with the next version of Windows update i.e. April’19 1903, the issue of no disk space will eventually die. This is because there will be blocking of 7 GB disk storage which can be used only for System updates, applications cache, and temporary files. The prime goal behind this move is to ensure the smooth running of Windows OS.

Benefits of Reserved Storage in Windows 10
With an extra 7 GB reserved for windows update, system cache, temp files, and different applications, there is no need to worry even if you utilize all the available space of your System. Windows and their applications will work exactly as they were working before. In simpler terms, you can say that this will optimize your system even in worse scenarios.
Is Reserved Storage in Windows 10 really that much great
There is no doubt that the concept of Reserved Storage in Windows 10 is a great idea. However, this isn’t really that much great like the way it is hyped among Windows users. Firstly, this will not work effectively on low-end devices that have a storage capacity of near about 32 GB or 64 GB. These Windows Devices have already so much less storage. Keeping 7 GB stored for this new feature doesn’t sound good as this will only worsen the current condition of these PCs.
1] Check Reserved Storage usage in Windows 10
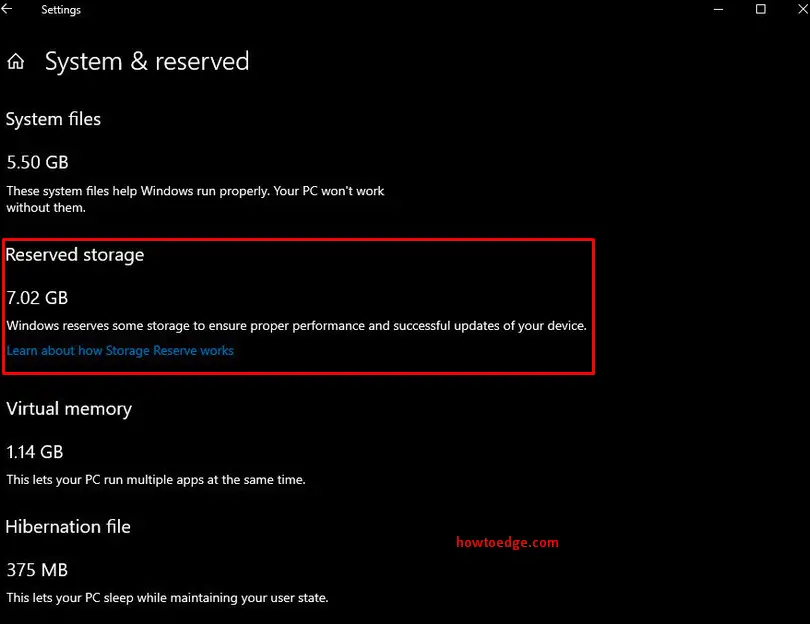
Microsoft has confirmed that, with the onset of Windows version 1903, there will be extra reserved storage of 7 GB which is to be used only for Windows update. This will resolve the no disk space problem and enhance the OS’s efficiency. If you are curious to see how much-reserved storage is available after the update, you should follow these steps-
- Press Win logo and I hotkey to let open the Settings app.
- Click on the System category thereafter Storage from the left column.
- On the same page, click on the Show more categories option.
- Now select System & reserved tool.
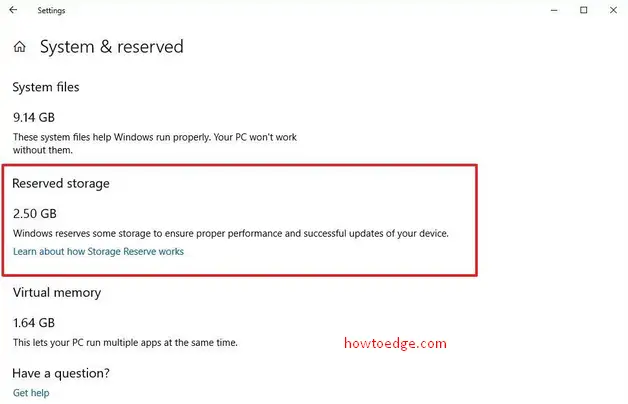
Here you can see the volume of Reserved Storage for the update. The extra space available here will make sure of the proper performance and successful update of your system.

Note: In case you cannot locate the available Reserved Storage, it might be due to the fact that you have already enabled this and not yet upgraded your PC to its latest version.
2] Enable ‘Reserved Storage’ on Windows 10
If you already checked how much Reserved Storage in Windows 10 is there for you and want to go for an update, you need to enable this option. This facility can be availed after installing an insider preview of the April 2019 update. It will solve the no disk problem on your PC. Here are the steps-
- Press Window key and R shortcut to launch Run dialog box.
- In the search box, type regedit and click OK.
- If the UAC prompt appears up, click Yes to access the Registry Editor.
- Now navigate to the following path:
HKEY_LOCAL_MACHINE\SOFTWARE\Microsoft\Windows\CurrentVersion\ReserveManager
- Here switch to the right pane and generate a new 32-Bit DWORD value and name it ShippedWithReserves.
Note: If you are using 64 bit Windows, double click on ShippedWithReserves and change its value from 0 to 1.
- Again click the OK button to save the changes made so far.
- Once this process is completed, Restart your PC and you can avail the extra space available on your hard disk for the update.
Note: When you upgrade the OS with the latest insider preview build, you can use this storage if enabled.
3] Disable Reserved Storage on Windows 10
In case you have enough space on your hard disk drive and don’t feel the need for the extra space, you can disable this facility as well. To perform this, you have to follow these simple steps-
- Go to Cortana and type Registry Editor. Now right-click on the best-matched result and select the Run as administrator option here.
- Click Yes option in order to sanction your consent.
- Now navigate to the following destination:
HKEY_LOCAL_MACHINE\SOFTWARE\Microsoft\Windows\CurrentVersion\ReserveManager
- Move to the right-hand side and open the ShippedWithReserves key.
- Thereafter change its value from 1 to 0 and click on OK.
- Lastly, Restart your system.
Note: If you enable this feature on Windows 10 PC, you need to wait for the next in-place upgrade to modify it.
I hope now you know the essential steps to either enable or disable Reserved Storage on Windows 10 device. If you have any queries related to this article, let us know in the comment section.


