Having TPM v2.0 and Enabled Secure Boot are the two most important conditions before you can upgrade your device to Windows 11, or its later versions. These two restrictions apply to Windows 11 2022 as well. If you are already on Windows 11, you need not worry. However, if you are still using Windows 10 and are planning to switch to Windows 11, version 22H2, make sure to enable TPM and Secure Boot inside BIOS.
In this post, we will discuss ways to check both TPM and Secure boot on a computer along with ways to enable both. Even in cases where you would like to install Windows 11 on a virtual workstation, you must ensure having both these features enabled.

Check and Enable TPM and Secure Boot in BIOS
Windows 11, version 22H2 superimposes the same restrictions which were necessary to install Windows 11, the original release. The restrictions were as follows –
- TPM v2.0 running on your device
- Secure Boot enabled on your PC
So, if you are planning to upgrade your device from Windows 10 to Windows 11 2022, you must check whether your device supports these two features or not.
Checking the current status of TPM on Windows 10 PC:
- Press Win + R to launch the Run dialog.
- Type “
tpm.msc” on it and hit OK. - The Trusted Platform Module Management window will appear next.
- See what’s written beneath the “Status” and “TPM Manufacturer Information” sections.
- The Status should read “The TPM is ready to use” and its version says 2.0, your device is all set to receive the next feature update of Windows 11 i.e. 22H2.

In case your device lacks the support of TPM Chip, you will not see any hardware information. Moreover, its status says “Compatible TPM cannot be found”. If that’s the case, you can’t proceed to install Windows 11 on your PC.
Checking if Secure Boot is available on your PC:
- Press Win + R and type “msinfo32“.
- Click OK and the System Information window will come out on the display screen.
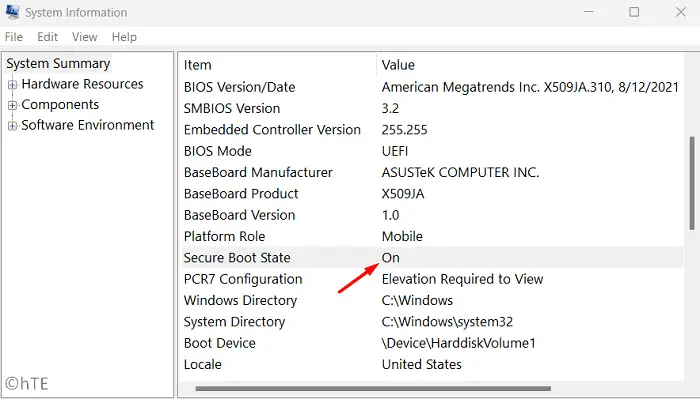
- Go to the System Summary on the left navigation and check what’s the value next to the Secure Boot State item. See the Snapshot below.

- If the value reads “ON”, the Secure Boot is already enabled on your computer. However, if it says “Off”, you must change the Secure Boot’s Value to ON.
Now that you have ensured checking both TPM 2.0 and Secure Boot, follow the below section on how to enable both of them. If both TPM and Secure Boot are enabled, you may skip the below section and head straight to Windows 11 22H2 installation on your computer.
Enable TPM 2.0 and Secure Boot for Windows 11
Assuming your device does support both these features i.e. TPM v2.0 and Secure boot, now check your BIOS version. If you were previously using the legacy BIOS, you need to convert your MBR drive to GPT first using Diskpart. After you change the format of your HDD/SSD, make sure to switch to the UEFI mode and enable Secure boot on your PC.
In case you fail to do the conversion from Legacy BIOS to UEFI, the bootable media won’t run. Let’s first check how to enable TPM 2.0 and Secure boot inside BIOS on Windows 11.
Enabling Secure Boot on Windows 10
- Press Win + I, and select Update & Security.
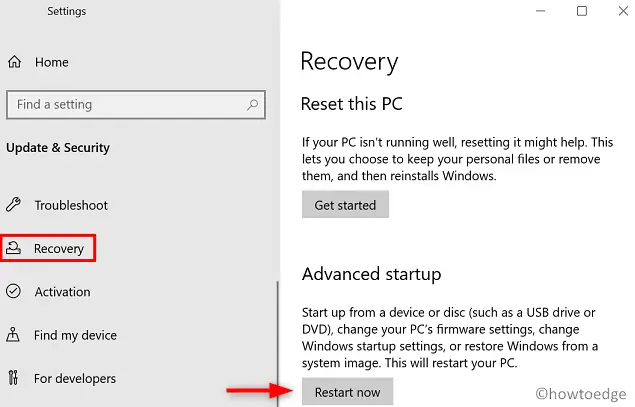
- On the next screen, select Recovery available on the left navigation.
- Head over to the right pane and click Restart now under Advanced startup.

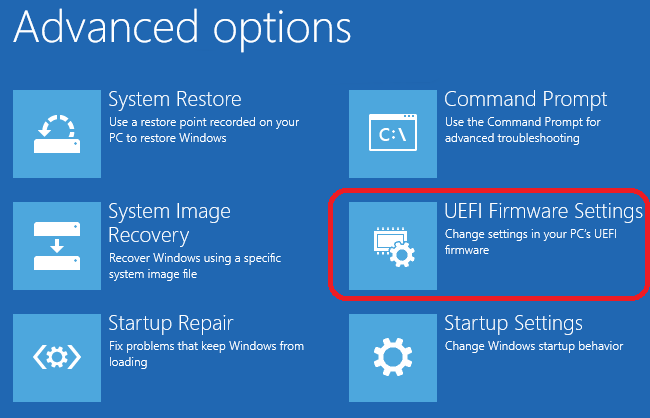
- Your PC will restart soon afterward. When Windows 10 reloads, navigate to the below path –
Troubleshoot > Advanced Options > UEFI Firmware Settings

- Click Restart and wait while your system is rebooting into the firmware settings.
- Most Manufactures place the Secure Boot option under the “Boot” tab. In case you didn’t find the relevant setting under Boot, check the Advanced or Security tabs.
- When you find the Secure Boot option, select Enabled using the Up/Down arrow keys.

Note: If your system isn’t older than 5-6 years, you should find this Secure Boot option. In case your device doesn’t support this booting option, you may go for a new PC to enjoy Windows 11 and its new features.
Enabling TPM v2.0 on Windows 10
Now that you have found Secure Boot and enabled it on your Windows 10, look out for TPM 2.0 inside the Advanced, Security, or Boot tabs inside BIOS. When found, select the TPM 2.0 option and turn it ON.
Tip: Finding TPM is really a challenging task as this varies for different processors. The complexity increases when you will not see the name TPM anywhere inside the BIOS. Well, you need to understand one basic thing and this will ease finding and enabling it on your computer.
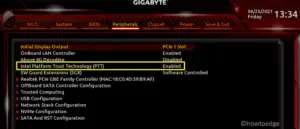
On Intel Processors, you may also find TPM as “Intel Platform Trust Technology (PTT)”. So, check for PTT while remaining inside the BIOS. On one of our computers, we find this PTT under Peripherals. See the Snapshot below.

In AMD processors, you may find the TPM module installed as fTPM or AMD fTPM. So, locate and enable this module. After you enable TPM, PTT, fTPM, or AMD fTPM, you must be able to perform an in-place upgrade to Windows 11.
As stated earlier, if you were previously using Windows 10 on Legacy BIOS, you need to change the HDD format from MBR to GPT as well. Download the new operating system ISO file and create a bootable image of it. While creating a bootable image, make sure to change the BIOS to UEFI.
We have written a detailed guide on how to download Windows 11 2022 ISO file and later install it on your Windows PC. Let’s know in the comment section if you find any difficulty following this post.
Should I bypass TPM 2.0 and Secure Boot on my Windows PC?
One may install Windows 11 on unsupported devices as well. However, as the support for Windows 10 isn’t going to last till 2024, you need not require upgrading the OS. TPM 2.0 and Secure Boot are basically the security features Microsoft encompasses to improve its operating system. According to them, these two are very useful to secure your devices from malware attacks, ransomware, or other threats.
Both TPM and Secure Boot differ in the ways they use to enhance security on your computer. Secure Boot is a module that ensures your device boots up using only those apps that your PC manufacturer trusts. On the other hand, TPM is a piece of hardware that offers a secure environment to store and protect the encryption keys. This is very useful when some third party gets access to your PC and tries decrypting the data available on the hard drive. In a nutshell, you shouldn’t install Windows 11 on unsupported devices.
Read Also:

