In this guide, we will look into two different ways that can help to format SSD partition on Windows 11/10 PC. If you are getting into issues formatting the solid state drive or are receiving an error message “SSD won’t format”, you may apply these two solutions.
By default, an SSD drive comes write-protected and thus you need to first remove this attribute on your purchased solid state drive. Removing the write-protection won’t work in cases where the SSD is still in the raw format. So, you need to change this attribute as well by running a few codes on the Diskpart.

How to Securely Format Hard Disk in Windows 10
Fix – SSD partition won’t format on Windows 11/10
If you are not able to format the SSD partition on your Windows PC, here are a few fixes that you must try –
1] Remove write protection of the SSD partition
An SSD comes write-protected which means that it will prohibit the addition of any new information unless you disable its attribute. Here’s how you may re-configure its settings with the help of the Diskpart tool –
- Jointly press Win + R to launch the Run dialog.
- Type
diskpartat the void followed by the Enter Key. - The User Account Control window will prompt next, hit Yes to authorize the access.
- Type “list disk” (without quotes) on the elevated console and press Enter again.
- A list of available partitions will appear on the Diskpart prompt.
- Identify your SSD drive and use its disk number as shown below.
select disk 0
- Press Enter to select the SSD drive.

Note: Make sure to replace the disk number i.e. “0” with your exact SSD drive number, in case that differs.
- After selecting your drive, run this code next –
attributes disk clear readonly
- Wait for a few seconds while the diskpart executes this code on your computer.
- After the command run is successful, you may close the Diskpart window.
- Restart your PC so that changes made become effective from the next logon.
Sign back in to your system again and check if you can now format your SSD partition. This should work now, however, if not, try the next workaround.
2] Format the Raw SSD using diskpart
If you are still not able to format the SSD partition, format its raw version via Diskpart. However, before you do so, make sure to launch the Disk Management and view the exact status of the SSD partition.
- Press Win + X, and choose the option – Disk Management.

See what to do when the Disk Management is not opening on your Windows PC.
If the SSD disk is enlisted as RAW on the next screen, you should perform the below steps to format your solid-state drive.
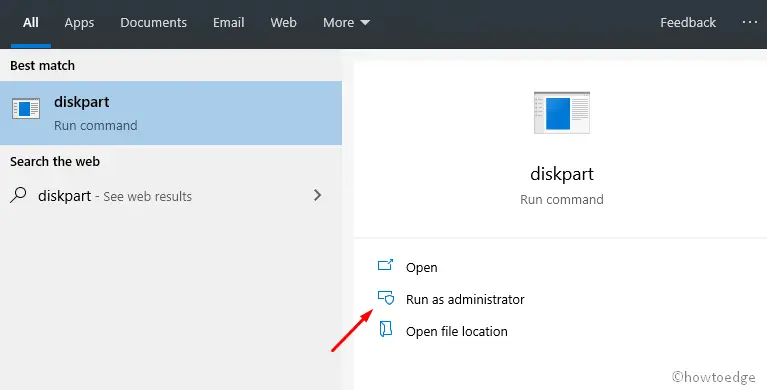
- Hit the Windows icon and start typing “
diskpart” using the keyboard. - Right-click on the top result and hit Run as administrator. Alternatively, you may also do the following as shown in the snapshot below.

- Run the below codes one by one on the elevated console. Make sure to press the Enter key at the end of each command line.
list disk
select disk n (where n is the SSD drive)
clean
create partition primary
format fs=ntfs quick
assign letter=x (where x is the letter assigned to your SSD)
Note: You may replace “format fs=ntfs quick” with “format fs=fat32 quick” to format the SSD partition using Fat32.
Let us know if this guide was helpful to format SSD partition on your Windows 11/10 PC.
How to Remove or Delete a Drive Partition on Windows 10
Why should one use SSD instead of HDD?
A solid-state drive is considered 5-10 times faster as compared to a normal hard disk. This is because the read and write capabilities on SSD doesn’t require any moving part to run. That’s the reason why apps and services run quite effectively on Windows PC.
If you are planning to purchase a new laptop, better go for the one that comes along with an SSD. In case you have already purchased a device with a regular hard drive, you may replace it or add an additional SSD partition to your computer.


