In this guide, we will discuss what Winget (Windows Package Manager) is and how can you install or start using it on your PC. Winget is a useful tool on Windows that you can use to install new applications, upgrade the existing ones, and remove/ uninstall buggy apps from your system. By default, this tool is disabled on your computer and you may turn it On simply by updating the App installer or downloading/installing the right setup file from Github.
If you are learning about Winget for the first time and want to see how this works, make sure to create a system restore point. This is because an incorrect command run might break your operating system and only a clean installation of Windows can fix that.

How to install and Start using Winget on Windows
If you are looking to install different third-party apps via CMD on Windows, you must download and install the Winget first. Here’s how can you install the Windows Package Manager on your PC –
Download and Install Winget
You may get the Windows Package Manager (Winget) installer from either of the following places –
- Microsoft Store – Open the Store app, type “Winget” on the search bar, and click to open App installer. By default, this app doesn’t include the Winget functionalities. In case you want to activate this feature on your PC, update the App installer and you will have the full-featured Winget.

- Directly from Github – If you wish to get it from Github, you may visit the
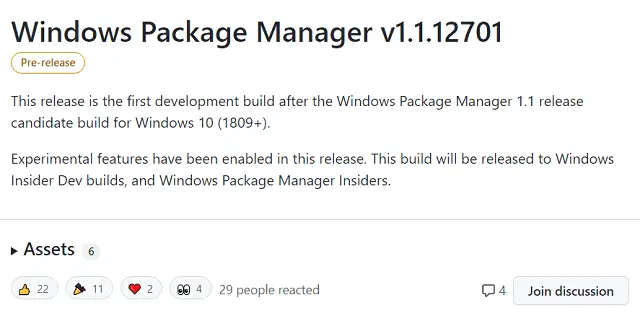
microsoft/winget-clipublic profile. The latest version of this application was released on 28th Sept 2021.

How to Use Winget on Windows operating system
Since this is a command-line application, you may use it on any latest version of Windows i.e. 11 or 10. However, before you can go for this app, do know that it requires full-featured Windows 11 running on your PC. Or, you may become a Windows 10 insider and start exploring its rich features. Here’s a list of things that you may do using Winget –
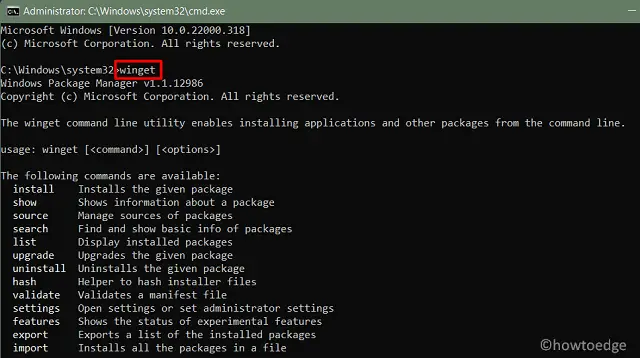
To learn what it can do, open CMD as administrator, and execute this command – winget. Press the Enter key and you will get a list of all Winget commands. Let’s learn a few important things that you can do using this Winget tool on Windows 11/10 –

1] Manually Search for Apps
Using the search feature on Winget, one can locate any app along with its description. Here’s how you may initiate an app search using the Winget command-line program –
winget search chrome

2] Get All information about the searched app
Now that you can search for a particular app using Winget, you may access its package information as well. Here’s how you can get all the data relevant to an application only –
- Press Windows + X to launch the
winget show google.chrome
3] Install or Update Apps using Winget
The best part of having Winget is you can easily install new apps or update the existing ones directly over the Windows console. Here’s how can you install new apps using Winget –
- Press Win + R to start the Run dialog.
- Type “CMD” and press Ctrl + Shift + Enter keys altogether to launch Command Prompt as administrator.
- When the UAC window prompts, hit Yes.
- On the elevated console, type the following, and press Enter –
winget install chrome
To update any app, run this code instead –
winget upgrade chrome
Note: To upgrade all the packages installed on your PC, you may execute this command –
winget upgrade --all
4] Uninstall Apps using Winget
Similar to that of installing programs on Windows 11/10 via Winget, you may use this tool to remove or uninstall apps as well. For this, copy/paste the below code on an elevated Command Prompt, and press Enter –
- To view all apps on your device –
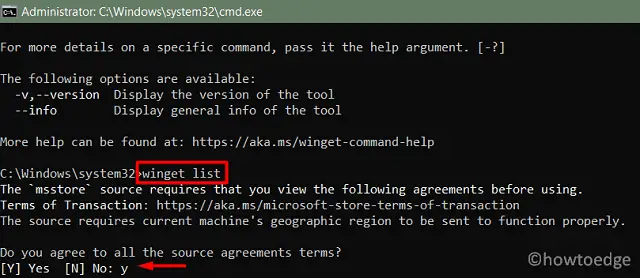
winget list

Note: Listing all the apps that Winget can edit or modify will require additional authority from your side. Type “Y” and hit Enter to confirm
- To uninstall Google Chrome on Windows 11/10 –
winget uninstall chrome
I hope you are now well versed on how to use different Winget codes using Command Prompt. Let’s know if you face any problems running any code on this App installer.


