Have you ever wondered how your Windows 11/10 PC actually works and what actually happens in the backend? If not, this post is going to cover an important topic related to the boot process in Windows. In this post, we will discuss what exactly Windows Boot Manager is, how it works, and how to enable or disable it on your computer.

How to Fix Dual Boot Option Not Showing In Windows
What is Windows Boot Manager?
BOOTMGR, short for Windows Boot Manager, is an inbuilt tool in Windows that contains all information related to the Volume boot record. It is because of this Bootmgr, users are able to boot into their installed operating systems. Though this is a part of Windows, it supports Linux and Ubuntu Operating systems as well.
All information related to the “booting of an operating system” are stored as Boot Configuration Data (BDC) here inside the Windows Boot Manager. You can think of Bootmgr similar to that of the registry database where you can find all essential files responsible for the smooth processes of Windows and its components.
By default, the BOOTMGR is a read-only file and it stays hidden on your computer. However, if you want to see its files, you may find this file inside the root directory of the partition (where an OS is installed). To view this file, you may open Disk Management and check the partition labeled as “System Partition“. Since this is a read-only file, there isn’t any drive letter associated with this volume.
In case you didn’t find such a volume, it must have been installed directly on your root drive i.e. over the C:\ drive. When you press the power button on your computer, BOOTMGR forces Winload.exe to start up which results in your operating system opening.
How to Delete the EFI System Partition in Windows 11/10
How to Enable or Disable Windows Boot Manager?
Now that you know what Windows Boot Manager is, let’s dive into ways to either enable or disable it on your Windows PC. One may perform this task using two different ways. The first one involves running a few codes over the CMD while the other one is through the System Properties window.
1] Using Command Prompt
- Press Windows + X and select Terminal (Admin).
- The UAC window will prompt next, hit Yes to authorize accessing the terminal.
- When the terminal launches, press Ctrl + Shift + 2 to open Command Prompt.
- Copy/paste the following code on it and press Enter –
Note: If you are on Windows 10, launch CMD as administrator first and run the following code on the console.
bcdedit /set {bootmgr} displaybootmenu yes

- If you want to specify the timing for which the boot menu is displayed, execute this command next –
bcdedit /set {bootmgr} timeout 30
- The number “30” in the above code stands for time in seconds after which the default OS will boot in.
- That’s it, you have successfully enabled displaying the boot menu on your computer.
Restart your PC so that the recent changes become effective from the next login.
Disabling Boot Menu displaying during Windows Startup
In case you ever want the Boot Menu not to be displayed during Windows Startup, re-open Command Prompt and execute this code over it –
bcdedit /set {bootmgr} displaybootmenu no
- Restart your PC and you will find no boot menu appearing during Windows Startup.
2] Enable or Disable the Boot Menu through System Properties
If you are not that comfortable with running codes over the terminal or console, you may use System Properties instead to either enable or disable the Boot Manager in Windows. Here’s what you need to do –
- Open the Run dialog by pressing Windows + R.
- Type “
sysdm.cpl” without quotes on it and hit the OK button. - Head over to the Advanced tab and hit the Settings button inside under Startup and Recovery.
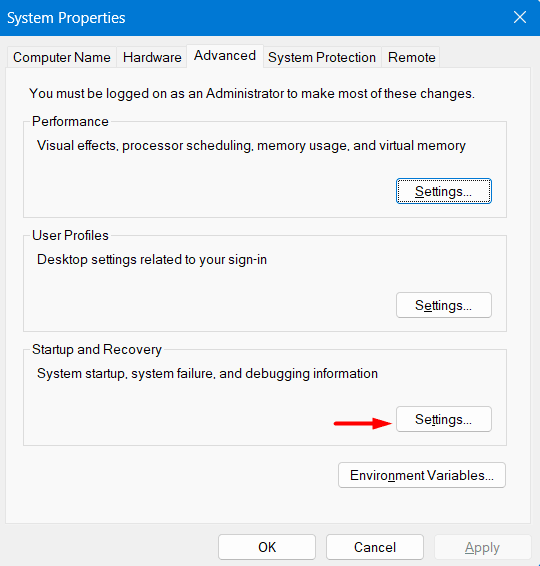
- On the next screen, use the up & down arrow keys to select the time for which you would like Boot Menu to keep displaying. Though you may change this time limit to 999 seconds, we suggest not using more than 30 seconds.
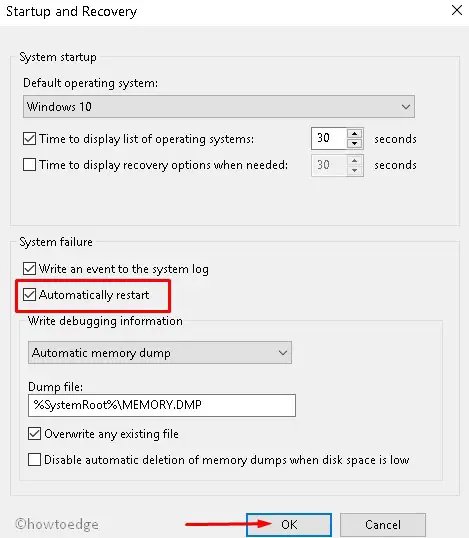
- Make sure to tick the box available left of “
Time to display list of operating systems“, “Automatically restart” under System failure, and hit OK.
That’s it, you have successfully enabled displaying the Boot Menu during your PC startup. If you ever want to turn off the boot menu displaying during Windows Startup, re-visit the Advanced tab under System properties, and undo the recent changes over it.
This includes unchecking both boxes i.e. “Time to display list of operating systems:“, and “Automatically restart“. I hope you were able to either enable or disable the Windows Boot Manager using this guide. Let’s know in the comment section if you face any difficulty following this blog post.


